Where a “standalone” spectrograph (i.e. without an Andor camera) has been purchased, the unit is supplied with an
appropriate camera ange to allow a camera to be attached to the spectrograph body. The camera must be attached to
the ange and the ange attached to the spectrograph body with the screws supplied.
In this instance, the focusing tube will not be pre-set before shipping, so the unit must be adjusted to achieve the best
possible results with the specic camera being used. This should be done (after installation has been completed) as
follows:
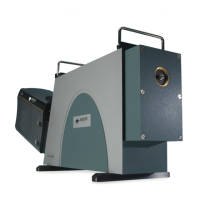
1. Mount the camera onto the Shamrock spectrograph and start data acquisition.
2. Mount a suitable light source at the entrance slit of the spectrograph (e.g. a Mercury, or Neon discharge lamp).
3. Power the Shamrock on and move the spectrograph to a known spectral line wavelength (e.g. Mercury 435.8 nm
or the Neon 585.2 nm line).
4. Loosen the focusing wheel clamp screw.
5. Acquire data using the camera and check the image of the light source, or alternatively, the line intensity and
shape. Slowly rotate the focusing wheel until the sharpest image is achieved. It is then necessary to rotate the
camera for best alignment, by loosening the screws in the ange as shown in the drawing above and rotate the
camera.
6. When complete re-tighten the clamping screw, please refer to “Offset Adjustment Control” on page 46 for
details of how to adjust the calibration of the system to the tted camera.
 Loading...