The grating turret contained within the Shamrock spectrographs can be easily replaced by end-users. The procedure for
replacing the Grating turret is outlined below:
WARNINGS:
• ENSURE THE SPECTROGRAPH IS SWITCHED OFF BEFORE REMOVING THE LID
• BE CAREFUL WHEN WORKING WITH THE SPECTROGRAPH WITH THE LID REMOVED AS OPTICAL AND ELECTRONIC PARTS MAY
EASILY BE DAMAGED.
• OBSERVE APPROPRIATE ESD PRECAUTIONS
• ONLY REMOVE THE LID FOR THE PURPOSE OF GRATING TURRET REPLACEMENT OR OTHER PROCEDURES AS INSTRUCTED BY
ANDOR, ENSURING THAT THE LID IS PUT BACK IN PLACE AFTERWARDS.
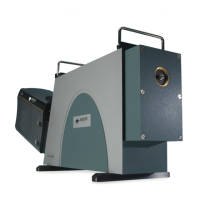
1. Remove the lid of spectrograph (750 model shown below). You will require an allen head screwdriver.
2. This will expose the grating turret.
3. At this point, put on protective gloves before continuing.
4. Loosen the screw at the top of the grating turret ,then carefully remove the turret using a twisting motion.
5. The grating should be stored in a safe place- for example in the packaging of the newly installed turret.
6. Lower the new grating turret gently into position so that the ball bearing clicks into the groove.
7. Ensure the turret is correctly in position then carefully tighten the top screw.
8. When you are satised that the grating turret is working correctly, replace the lid.
9. Navigate to the EEPROM settings (Hardware/Setup Spectrograph).
10. Click on the “System Conguration” and select the new turret.
When inserting the new
turret, rotate until the ball
bearing clicks into place
Use screw to fasten/
unfasten
When inserting the new
turret, rotate until the ball
bearing clicks into place
Use screw to fasten/
unfasten
 Loading...