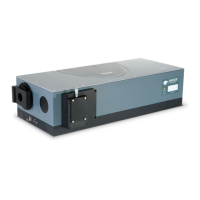
A Relative Efciency Correction [REC] is possible in Step and Glue mode of your Andor Shamrock. This enables the
quantitative measurement of peak intensity ratios, and to correct artefacts such as etaloning.
Setting up REC
1. First ensure you are in “Single Scan” mode of the camera.
2. Select the Step and Glue mode on the Shamrock Control Panel.
3. Click the Step and Glue Setup button, which will bring up the settings dialog as shown below.
4. Enter the start and end wavelengths,
5. For most cases select ‘Auto’ number of points- this makes the nal dataset have the same dispersion, in terms
of nm per pixel, as a single acquisition.
6. The “Valid width about centre” should be used if you wish to only use the central portion of your camera – this
is normally only changed from the full width if an ICCD is used which has a tube that is smaller diameter than
the width of the sensor.
7. The Filter Swap should be used if your spectral range is such that there could be 2nd orders of light present.
For example, if your range is 800nm to 1000nm then 2nd or 3rd order light from below 500nm could be present
and invalidate the REC – a suitable high-pass lter is necessary. For larger step and glue ranges, multiple high-
pass lters will be necessary and the “Setup Filters” dialog allows you to select the appropriate lter for the
appropriate step: enter the number of the appropriate lter beside the step (the start and end wavelengths of
each step are given). If you have labelled your lters this is accessible to guide your lter selection.
8. Enable REC and navigate to your source le for your broadband calibration lamp – if using an Ocean Optics
DH2000-BAL then .LMP is likely to be le type.
9. Click on OK and you are ready to start taking your REC data.
10. Press <ctrl><b> to take a background.
11. Press <ctrl><r> to take a reference using the calibration lamp.
12. Then take your signal – the nal Step and Glue REC will be presented in window #1. The data from the
individual steps is stored in the different frames of window #0.

 Loading...