60
03/2010 Rev. 0.1
03/2010 Rev. 0.1
61
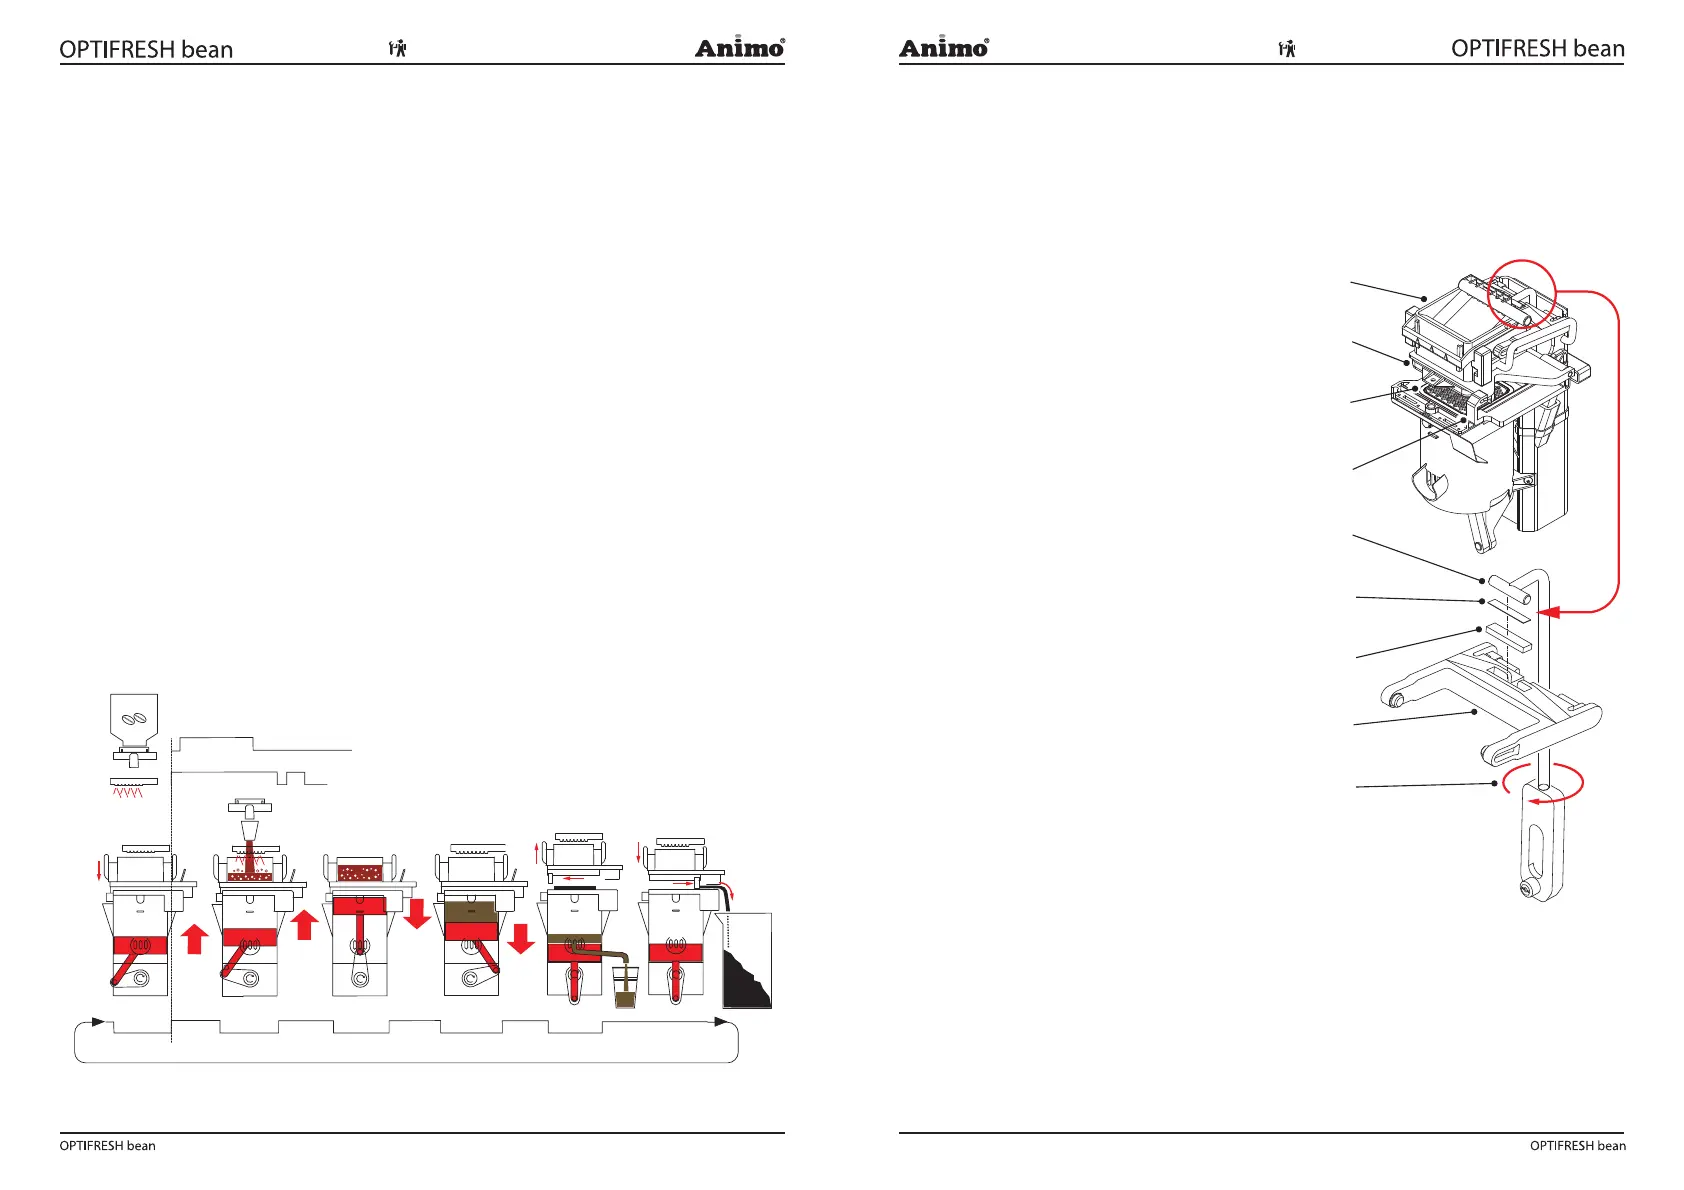
1.8 Brewer unit
Ground coffee and hot water are dispensed to the permanent lter and are drawn into the lter by
vacuum. After making a fresh brew drink selection the following process ( g. 3) starts:
Start
position
Brewer in resting position. Start
brewer 3
The piston moves down and sucks
the coffee extract through the
permanent lter.
Start
brewer 1
The piston leaves the resting posi-
tion. Ground coffee and hot water is
dispensed to the brewer unit.
Pause 3 Just before the coffee extract
leaves the brewer the piston either
pauses or stops again to make
sure the coffee residue is suf-
ciently dry.
Pause 1 The piston stops just above the
outlet. Coffee and hot water is still
dispensed.
Start
brewer 4
The piston moves down further so
that the outlet opening opens.
Start
brewer 2
The piston rises and forces air
upwards out of the cylinder, ensur-
ing that coffee and water are mixed
thoroughly. Water dispensing stops
during this cycle.
Pause 4 The coffee is now dispensed to the
cup, goblet or jug.
Pause 2 Piston stops at the highest setting to
enable the coffee to be extracted.
Return to
start
The piston returns to the start
position again. At the same time
the coffee residue is wiped away
by the lter wiper, before it drops
into the waste bin.
1.8.1 Adjustment
If a leak occurs between the brewer unit and the
permanent lter the tensile force of the brewer needs to
be increased.
The tensile force of the brewer should be set so that no
water is able to leak between the brewer unit ( g. 4-1)
and the permanent lter ( g. 4-3).
The tensile force also ensures that the wiper ( g.
4-4) completely pushes the coffee residue off of the
permanent lter.
See gure 4 for the most important brewer parts:
1. Brewer unit
2. Rubber seal (Art. No. 03375)
3. Permanent lter (Art. No. 03488)
4. Wiper (Art. No. 03380)
5. Tension member
6. Adjustment shim* (Art. No. 03384)
7. Rubber
8. H-frame
9. Tension member adjustment
1. First remove the brewer from the device (see section
8.7.2 in the user manual for instructions).
2. The tensile force can be set by adding adjustment
shims ( g. 4-6) between the tension member ( g.
4-5) and the H-frame ( g. 4-8).
3. Press the H-frame downwards and take the tension
member out of the recess. Place an adjustment
shim* in the recess and replace the tension member.
CAUTION: adding multiple shims at the same time
can cause excess tensile force and damage the
brewer!
4. In most cases this procedure is suf cient for
repairing leaks. If the brewer unit still leaks t
another adjustment shim.
5. If the brewer unit still leaks remove the two
adjustment shims and then turn in the tension
member once (clockwise). CAUTION: turning in the
tension member should only be done as a last
resort.
6. If the tensile force is correct but the brewer still leaks
do not increase the tensile force any more! For
further help see chapter 1.8.3 Troubleshooting.
1
2
3
4
6
8
7
9
5
Fig. 4
* a extra shim is located behind
the stainless steel panel on the
inside of the door.
Fig. 3
Pauze 1
Pauze 2
Pauze 3
Pauze 4
retrun to start
start
position
Start 1
Start 2
Start 3
Start 4
1,3 sec.
92,5ml
7,5ml