Waveguide Adapter Kit Instructions 7-4 Waveguide Adapter and Bracket Removal and Installation
VectorStar ME7838x/x4 Modules RM PN: 10410-00311 Rev. F 7-7
6. Adjust the third set screw (Item 4) so it just touches the Waveguide Adapter (Item 8) flange.
See step 8 of Section 7-2 for reference.
Do not torque the bottom set screw. Leave it just touching the waveguide adapter flange.
7. With the waveguide ports connected, evenly tighten all six thumb screws on each module.
Check again that the waveguide test ports can be connected and disconnected without binding.
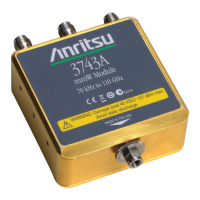
8. Verify that the V Termination (Item 10) is installed on the “SRC” connector of each 3744x mmW Module.
7-4 Waveguide Adapter and Bracket Removal and Installation
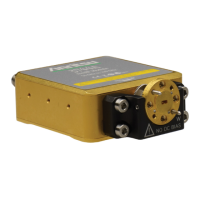
This procedure describes how to remove and install the Waveguide to Coax Adapter and the Adapter Mounting
Bracket as a single unit.
(See Figure 7-3 for item number reference)
Removal
1. Completely loosen the four captivated Socket Head Screws (Item 7) from the 3744x mmW Module with
the Hex Torque Driver (Item 2).
2. Disconnect the Waveguide Adapter (Item 8) from the 3744x mmW Module at the W connector with the
Torque Wrench (Item 15).
Installation
1. Connect the Waveguide Adapter (Item 8) to the 3744x mmW Module (Item 11) at the W connector. Leave
the W connection just loose enough to allow a small amount of play.
2. Screw the 4 Socket Head Screws (Item 7) into the module housing but leave the screws slightly loose.
3. Tighten the W connector with Torque Wrench, (Item 15) – 0.45 N·m (4 lbf· in).
4. Tighten the 4 Socket Head Screws (Item 7) with Hex Torque Driver - 0.56 N·m (5 lbf· in). Do not over
tighten.
5. For alignment of a 2 port system see Section 7-3 for instructions.