7. Brightness: Sets the brightness for the units display Screen
To scroll up and down, use the Rotary Control.
To enter each one of the sub-menus, press the Rotary Control.
To confirm a chosen setting, press and hold the Rotary Control.
8. Headphone outputs
Two independently assignable headphone outputs, selectable and controllable via the
main volume control knob.
The lights next to the outputs are illuminated to indicate which headphone output is
currently controlled.
9. Re-amp outputs
These outputs are direct outputs that should be used with guitar amplifiers for re-amping.
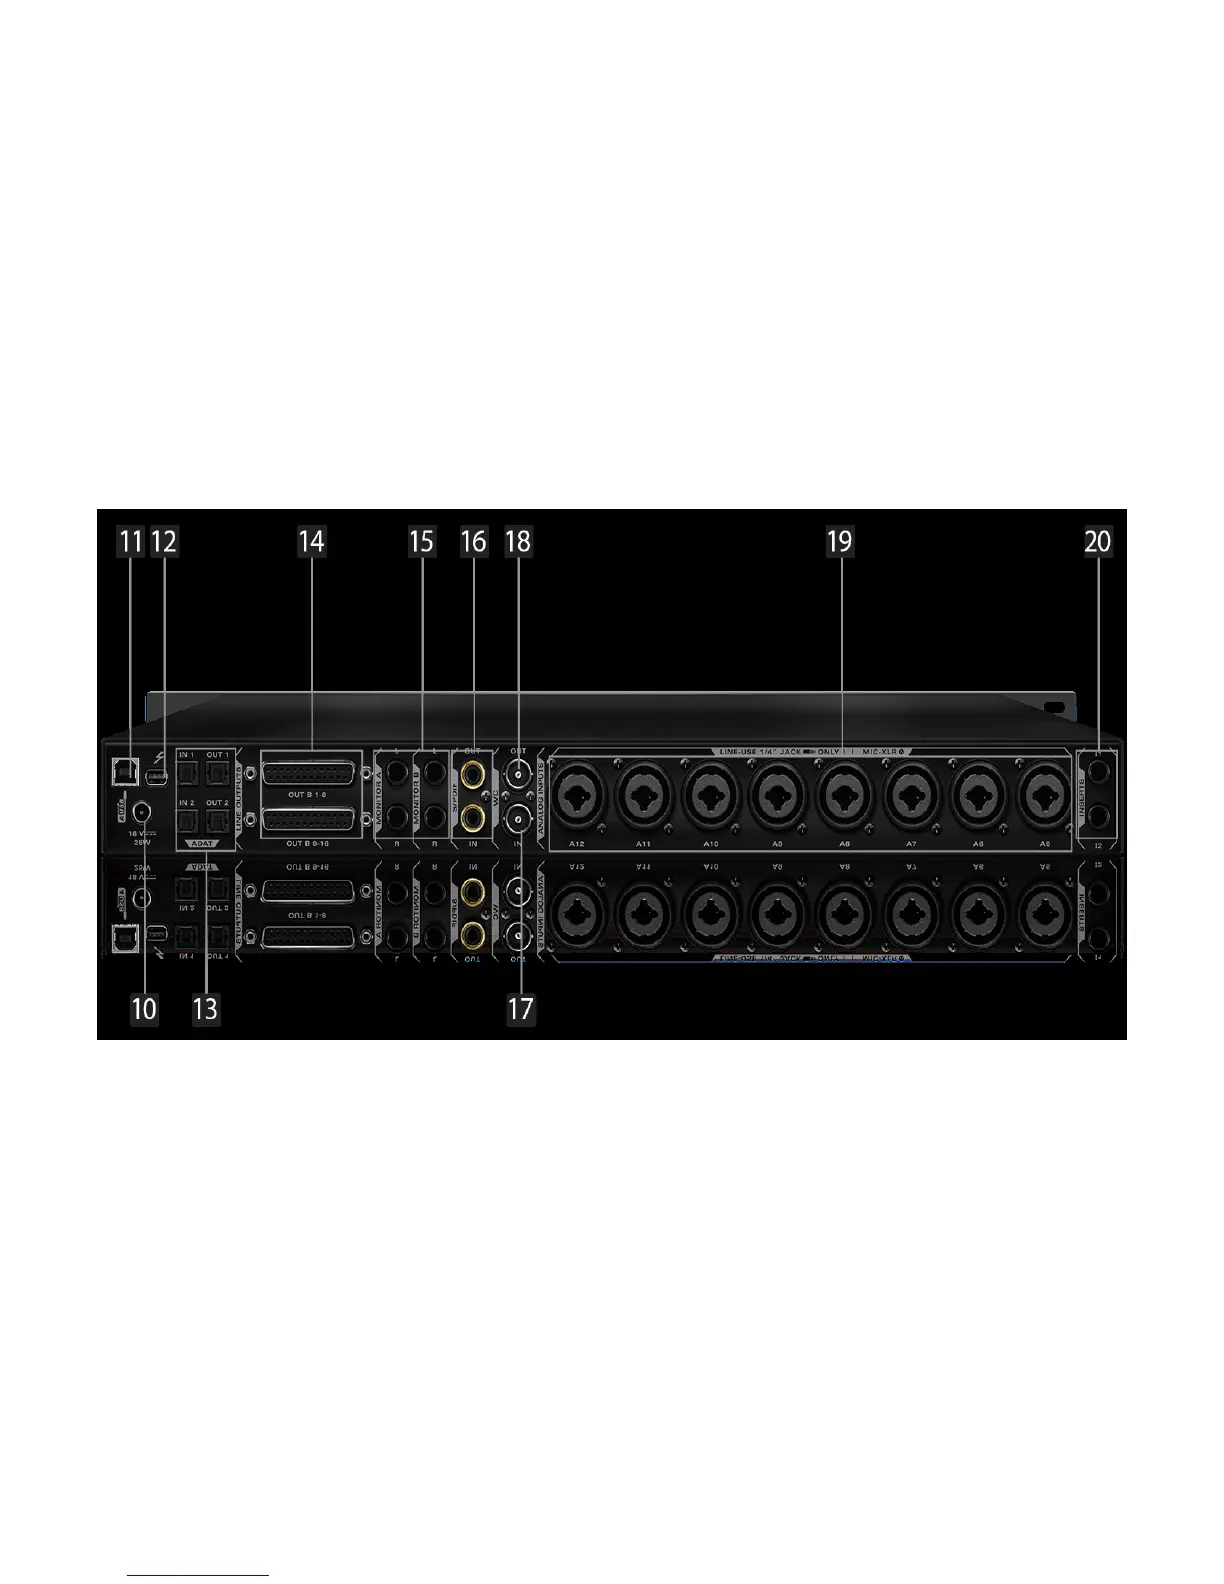
6. Rear Panel Explained
10. DC Power Connection
For use with Antelope’s DC power supply, only.
11. USB High-Speed
Orion Studio uses USB connector Type B and operates up to 192kHz sample rate with
Antelope ASIO on Windows & Mac OS X.
12. ThunderboltTM port
Enables you to connect your Orion Studio to a ThunderboltTM port on a Mac computer
using a ThunderboltTM cable (not included).
13. ADAT Connectors
2 Inputs & 2 Outputs (up to 8 channels per line).
14. D-SUB 25pin TASCAM Analog Outputs
A connector enables you to attach breakout cables, each with 8 lines.
15. Two Stereo Monitor Outputs (Monitor A and Monitor B)