DRAFT
June 23, 2003 9:39 am, MFC_QSG_text.fm
Preparing and Running the Micro Fluidic Cards (PCR)
Applied Biosystems Micro Fluidic Card Getting Started Guide 23
2. Import the contents of the SDS setup file into the current
document.
a. Place the Micro Fluidic Card Information CD in the
CD-ROM drive (typically, D: or E:)
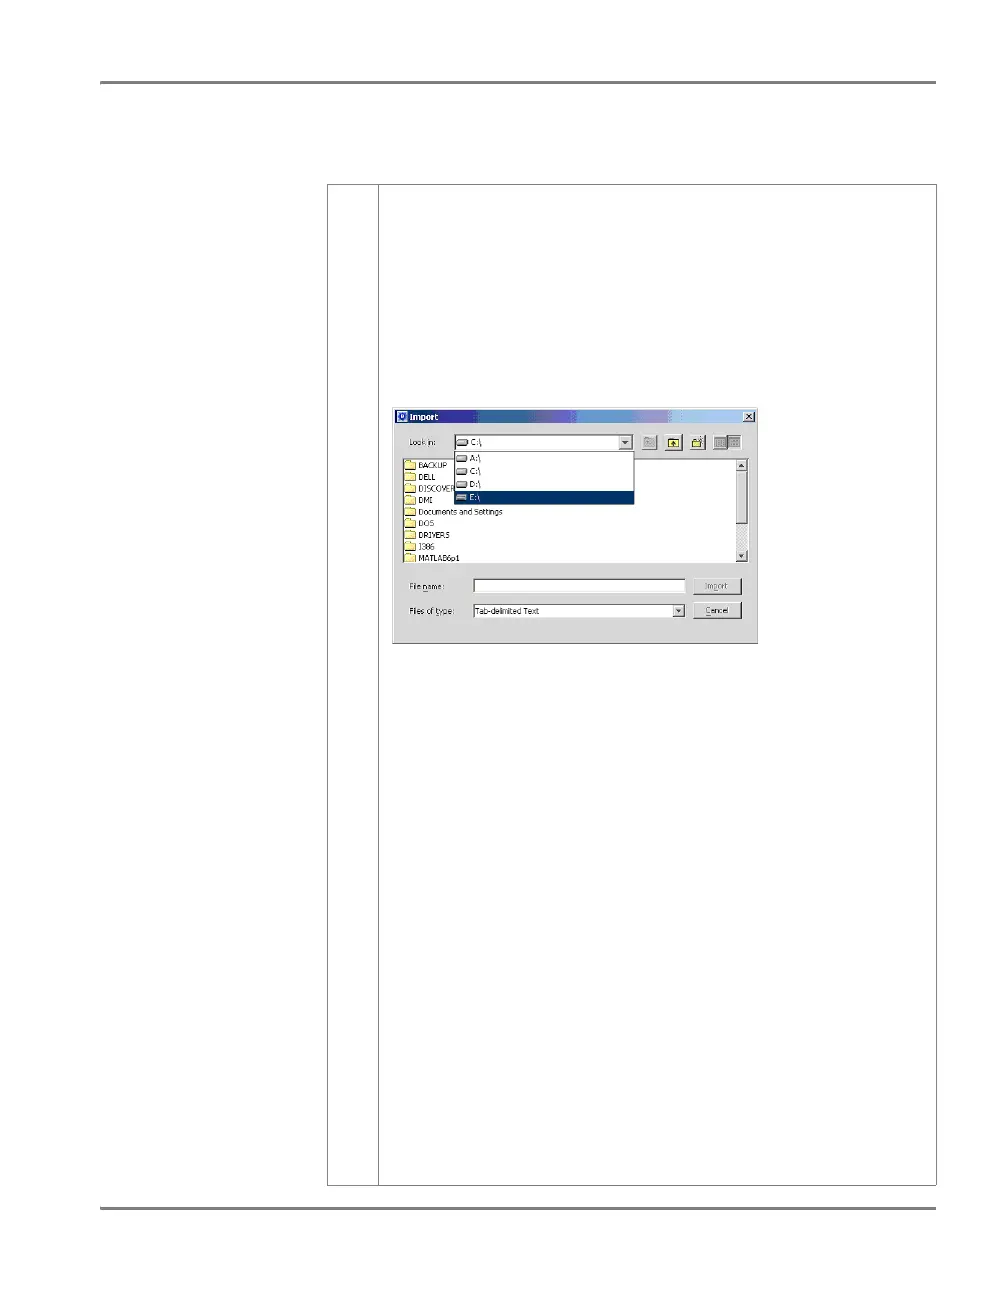
b. From the File menu, select Import.
The Import dialog box appears.
c. In the Look In field, select the CD-ROM drive.
d. Select the SDS setup file (
SDS_prodNum.txt, where
prodNum is the production number of your custom
Micro Fluidic Card).
Note: Each custom Micro Fluidic Card is assigned a unique
production number. This number appears as part of the file
names of assay information file (AIF), cardmap, and SDS
setup files.
IMPORTANT! Take care when modifying the contents of the
setup file. Modifying the setup file can corrupt the
information on the Micro Fluidic Card.
e. Click Import.
The SDS 2.1 software imports the data from the setup
file into the current SDS document. The detectors for
each assay are assigned to the appropriate wells as
indicated in the card map.
Note: The card map file is also provided on the Micro
Fluidic Card Information CD. Refer to Appendix A or
to the
readme.txt file on the CD for more
information about the card map file.
To create a Micro Fluidic Card template or document for relative
quantification using the SDS setup file: (continued)

 Loading...


