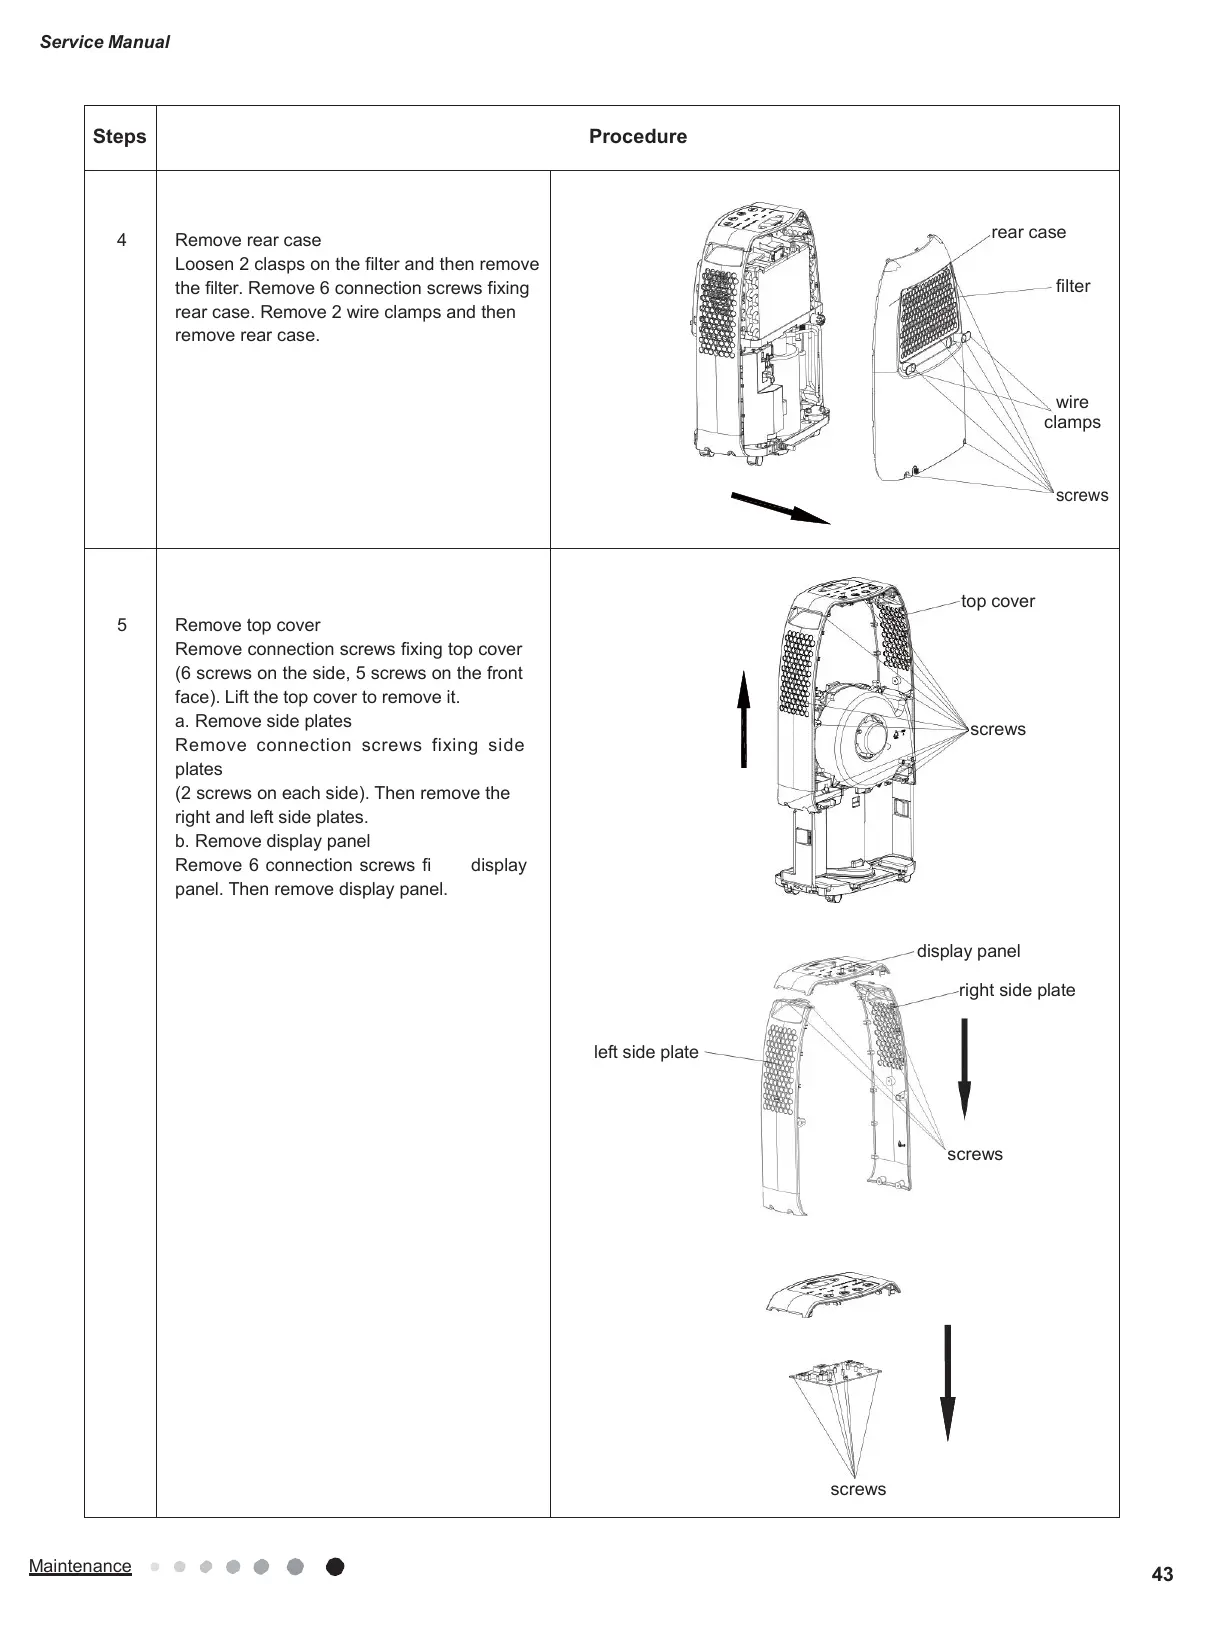
EasyManuals Logo

Argo ALICE 13 User Manual

Argo ALICE 13
60 pages
To Next Page IconTo Next Page
To Previous Page IconTo Previous Page
Page #47 background imageLoading...
Page #47 background image
Service Manual
Maintenance
43
Steps
Procedure
4
Remove rear case
Loosen 2 clasps on the filter and then remove
the filter. Remove 6 connection screws fixing
rear case. Remove 2 wire clamps and then
remove rear case.
rear case
filter
wire
clamps
screws
5
Remove top cover
Remove connection screws fixing top cover
(6 screws on the side, 5 screws on the front
face). Lift the top cover to remove it.
a.
Remove side plates
Remove connection screws fixing side
plates
(2 screws on each side). Then remove the
right and left side plates.
b.
Remove display panel
Remove 6 connection screws fi display
panel. Then remove display panel.
left side plate
screws
top cover
screws
display panel
right side plate
screws

Questions and Answers:

Question and Answer IconNeed help?

Do you have a question about the Argo ALICE 13 and is the answer not in the manual?

Argo ALICE 13 Specifications

General IconGeneral
Airflow115 m³/h
DisplayLED
Noise level43 dB
Product colorWhite
Built-in displayYes
Water tank capacity3 L
Suitable for room area up to15 m²
Suitable for room volume up to- m³
AC input voltage220 - 240 V
AC input frequency50 Hz
Power consumption (typical)220 W
Operating temperature (T-T)5 - 32 °C
Operating relative humidity (H-H)35 - 80 %
Weight and Dimensions IconWeight and Dimensions
Depth225 mm
Width353 mm
Height496 mm
Weight11500 g

Related product manuals