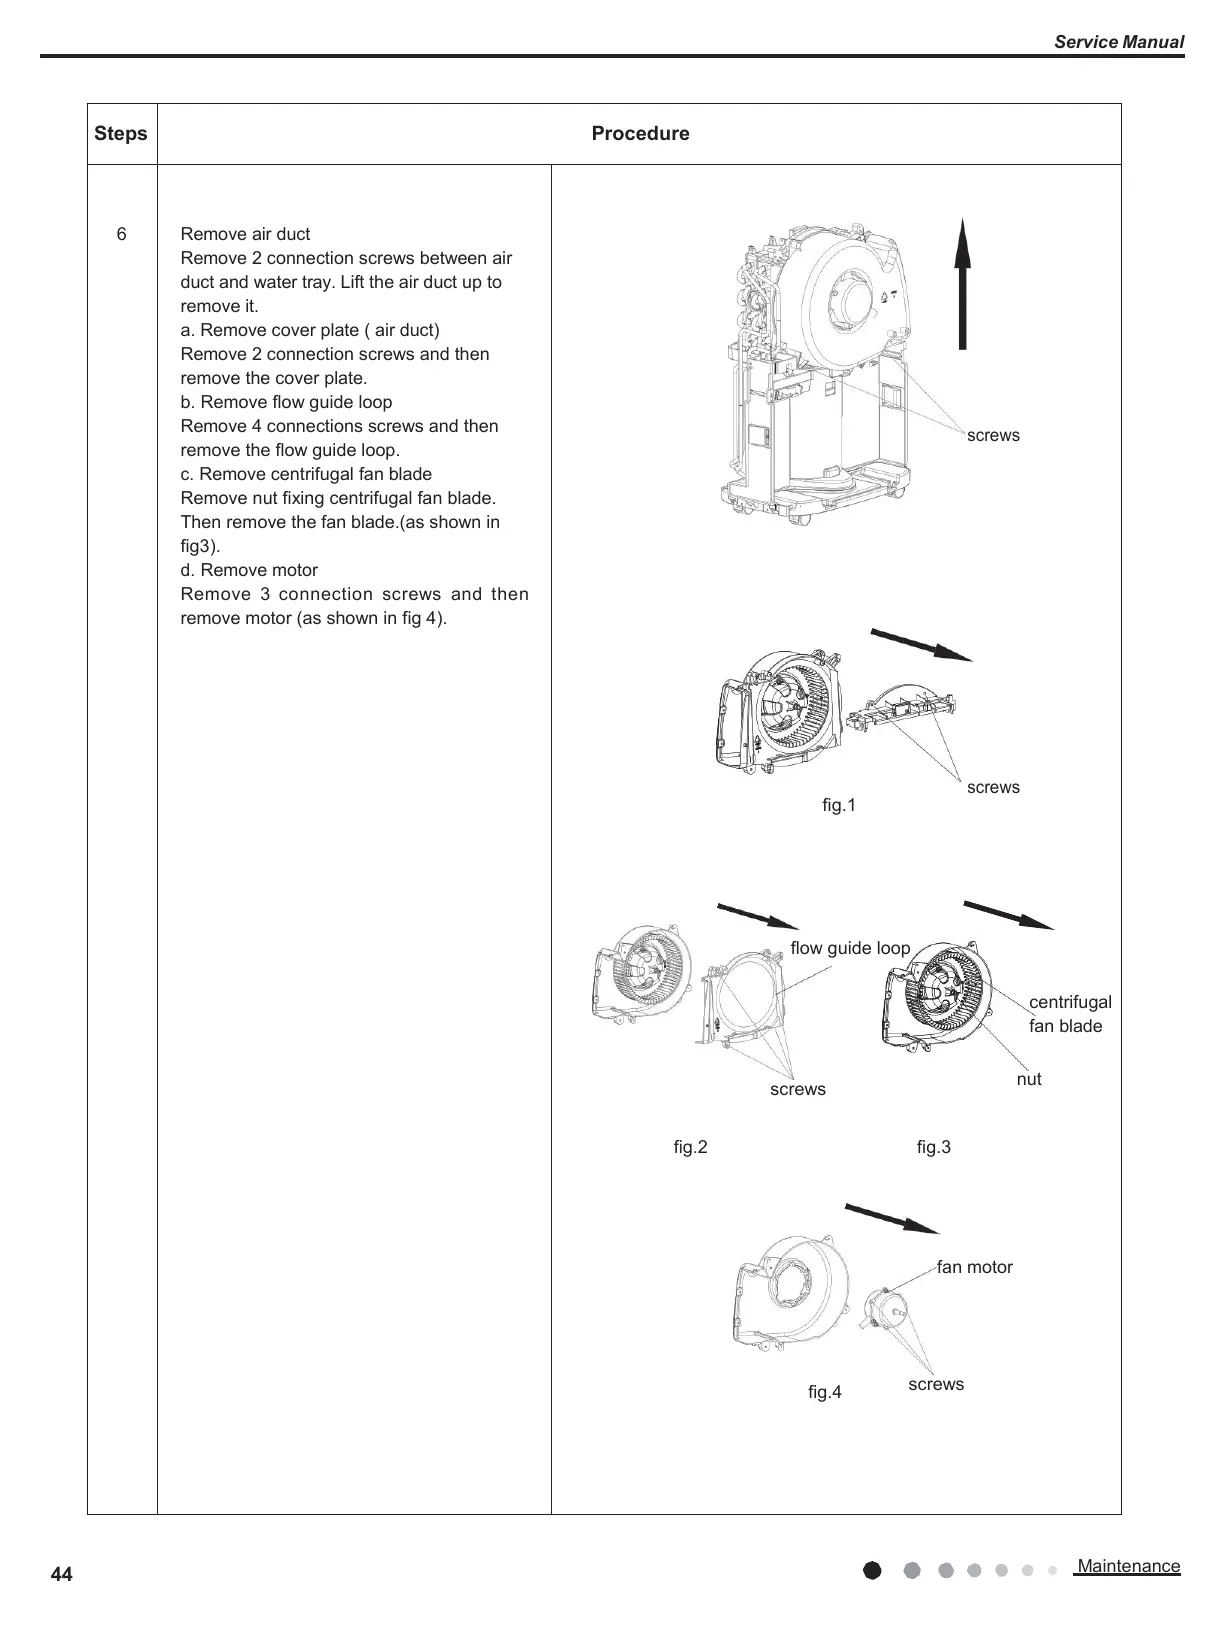
EasyManuals Logo

Argo ALICE 13 User Manual

Argo ALICE 13
60 pages
To Next Page IconTo Next Page
To Previous Page IconTo Previous Page
Page #48 background imageLoading...
Page #48 background image
Service Manual
Maintenance
44
Steps
Procedure
6
Remove air duct
Remove 2 connection screws between air
duct and water tray. Lift the air duct up to
remove it.
a. Remove cover plate ( air duct)
Remove 2 connection screws and then
remove the cover plate.
b. Remove flow guide loop
Remove 4 connections screws and then
remove the flow guide loop.
c.
Remove centrifugal fan blade
Remove nut fixing centrifugal fan blade.
Then remove the fan blade.(as shown in
fig3).
d.
Remove motor
Remove 3 connection screws and then
remove motor (as shown in fig 4).
screws
screws
fig.1
flow guide loop
centrifugal
fan blade
screws
nut
fig.2 fig.3
fan motor
fig.4
screws

Questions and Answers:

Question and Answer IconNeed help?

Do you have a question about the Argo ALICE 13 and is the answer not in the manual?

Argo ALICE 13 Specifications

General IconGeneral
Airflow115 m³/h
DisplayLED
Noise level43 dB
Product colorWhite
Built-in displayYes
Water tank capacity3 L
Suitable for room area up to15 m²
Suitable for room volume up to- m³
AC input voltage220 - 240 V
AC input frequency50 Hz
Power consumption (typical)220 W
Operating temperature (T-T)5 - 32 °C
Operating relative humidity (H-H)35 - 80 %
Weight and Dimensions IconWeight and Dimensions
Depth225 mm
Width353 mm
Height496 mm
Weight11500 g

Related product manuals