Avon Protection 32 DAS775571AA Version 9, December 2015
GR 13313 CR121804
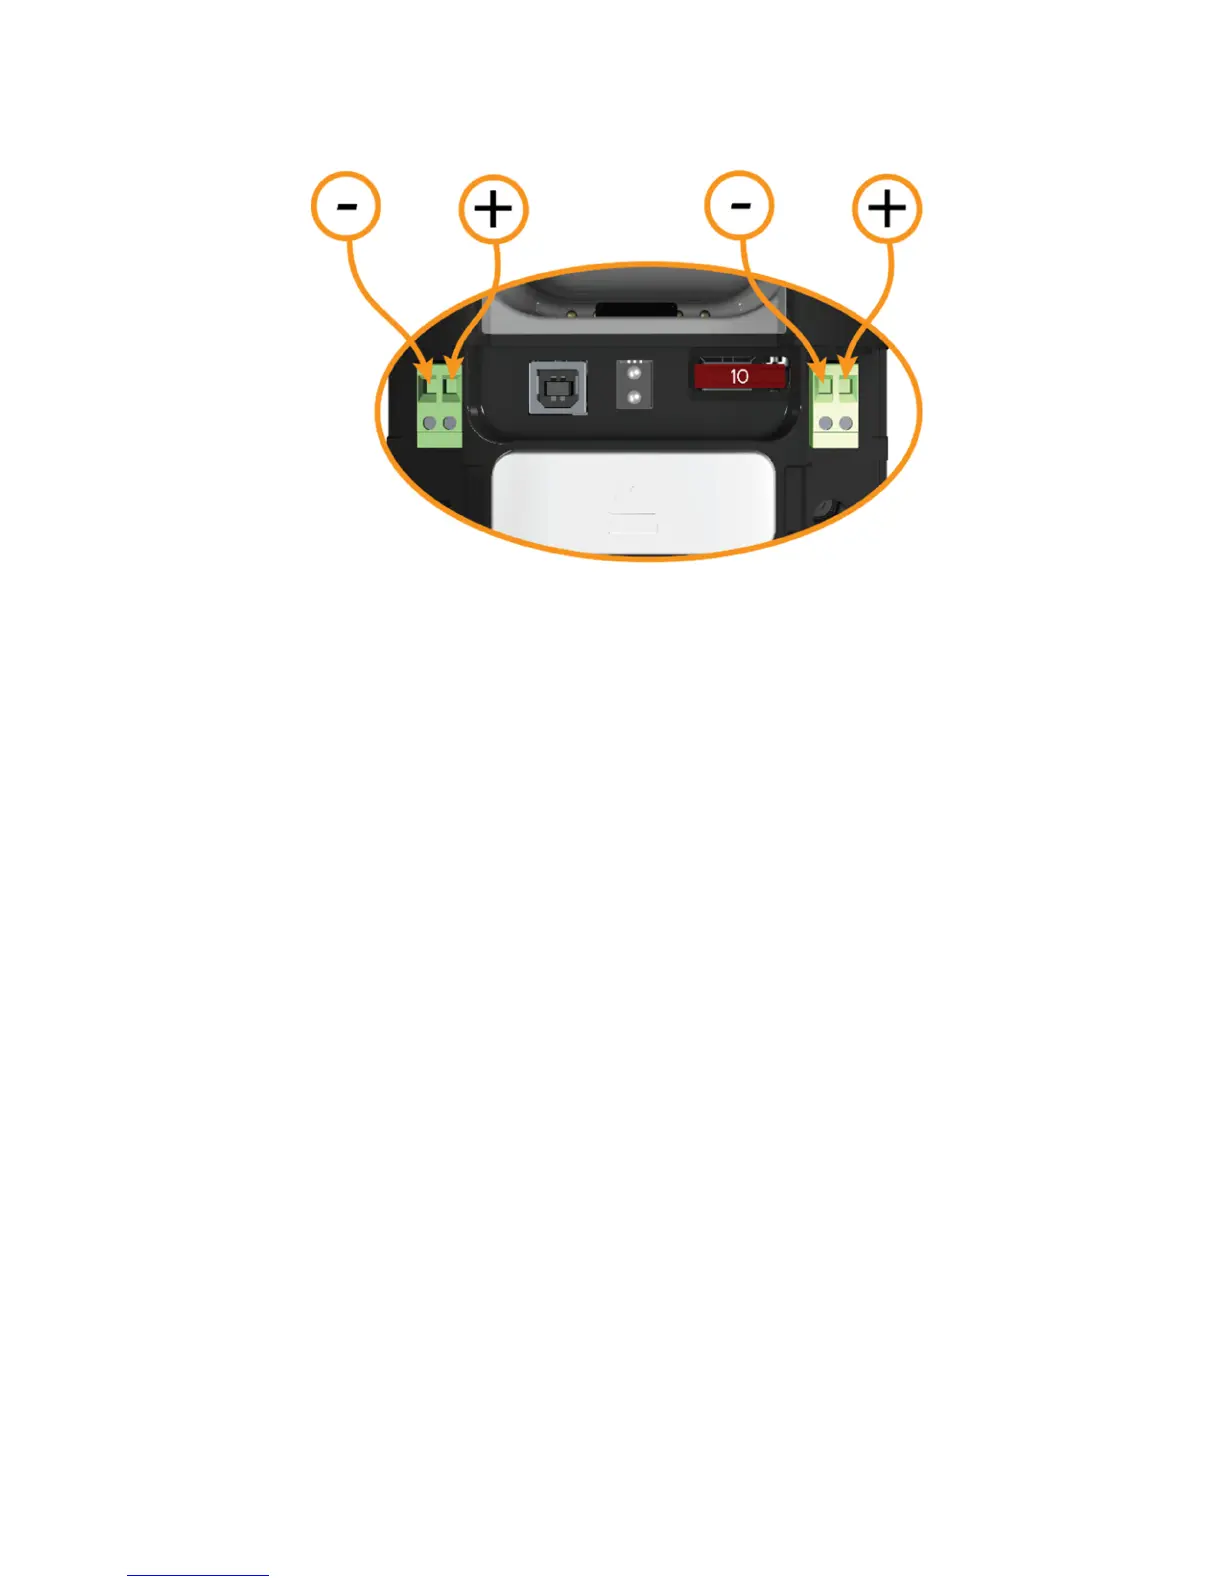
2. Using 18 AWG wire or thicker, connect the terminals as shown overleaf, ensuring that the
positive (+ve) terminals are connected together and that the negative (-ve) terminals are
connected together.
3. Replace the front panels on the charger stations.
Note: Do not use the rear power connector when in the ‘daisy-chain’ configuration. All power
must be supplied through the front hard wiring connectors.
5 CONNECTING THE CAMERA TO A PC
The camera has embedded storage which is used for:
• Changing the start-up image
• Storing images
• Storing videos
• Storing camera diagnostic information
• Updating the camera software
• Storing a copy of the Configuration Tool Software (see section 6)
• Storing a copy of the manual
5.1 Changing the Start-Up Image
A custom start-up image can be loaded into the camera as follows.
1. Generate an image file on a computer in the following format:
Name: Splash.bmp
File format: Bitmap
Dimensions (HxV): 320 x 240 pixels
Bit depth 24 Bit
File size: 230,454 bytes