Quick Start Guide: CloudVision Appliance 31
Appendix H
CloudVision Worksheet
Print and complete the CloudVision worksheet with the following information.
Step 1 Locate the MAC addresses for the CloudVision appliance, see Locate the MAC Addresses for
the CloudVision Appliance (page 5).
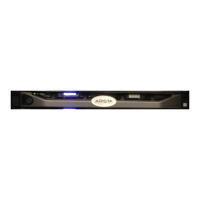
The information tag is a slide-out label panel which contains system information such as
Service Tag, NIC, MAC address for your reference.
Step 2 DHCP Server Entries: Using the IDRAC MAC and HOST NIC1 MAC.
Input entries into the DHCP Server on Subnet1 for DHCP assigning above IDRAC IP and
HOST IP addresses to those MACs. (iDRAC uses NIC1 for it’s network connectivity.)
Step 3 DNS Server Entries: Input the Host and CVP Hostname/IP entry into your network DNS
Server as shown in Setup Steps for Single Node CVP (page 15) or Setup Steps for Multi-node
CVP Cluster (page 15).
Note CVP IP will not be DHCP configured, it will be statically configured.
See Table H-1 on page 32 for the worksheet.