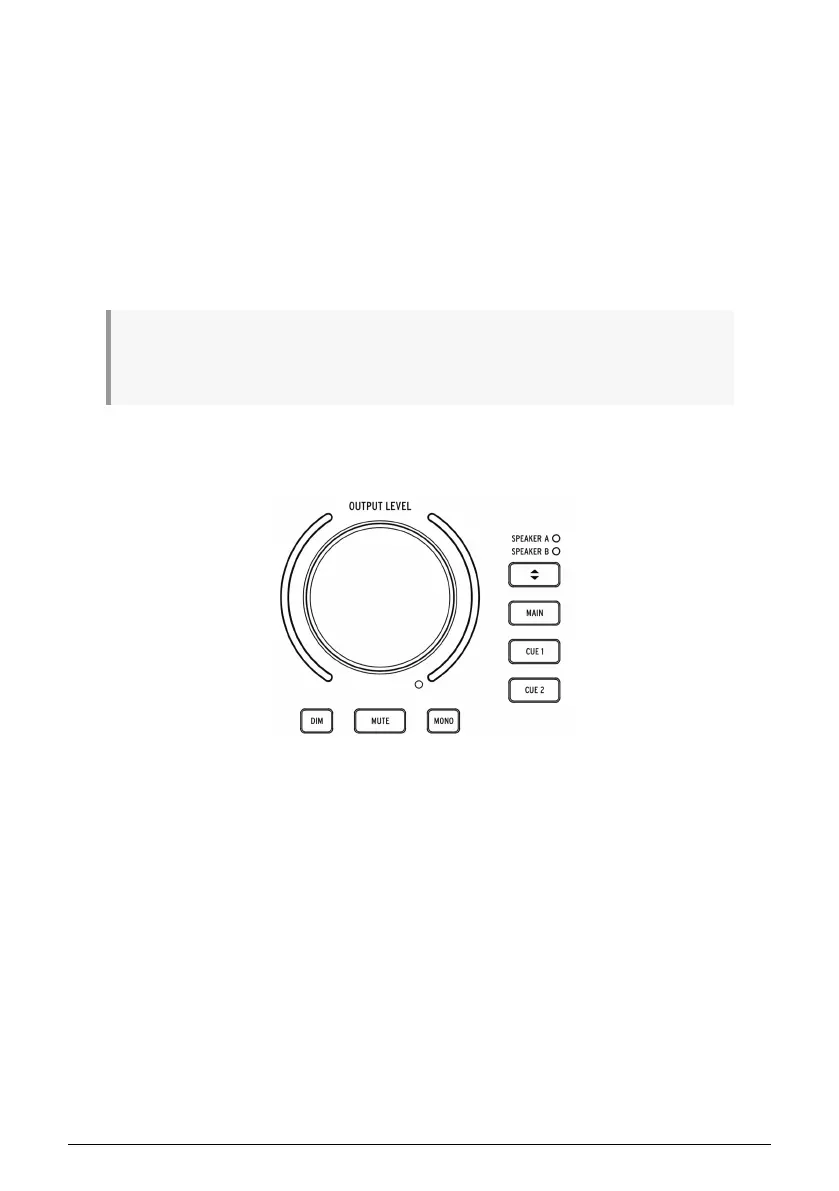
• Cue Select Buttons: These buttons select the audio source for the headphone
output by stepping through the three mix sources:
Cue 1
,
Cue 2
, and
Main
. These
mixes can be edited in the AudioFuse Control Center application. Please refer to
the AudioFuse Control Center User Manual to learn how to do this.
A4. Talkback: AudioFuse Studio contains a small "talkback" microphone inside its case. This
convenient feature lets you easily communicate with your performer if he/she is in another
room during the recording process. To use this feature, simply hold the Talkback button and
start talking. The built-in microphone can then send your voice to the talent's headphones
(or other destination of your choosing) so that the performer can hear your comments or
instructions from the control room. The level and routing of the talkback microphone can
be configured in the AudioFuse Control Center software under Settings (Gear Icon) > Audio
Settings > Talkback. Please refer to the AudioFuse Control Center section [p.45] for more
information.
Please note the Talkback uses Analog Input 8. It is possible to set TalkBack mode to avoid activating
the Talkback if the Input 8 is already in use. Please refer to the AudioFuse Control Center section for
more information:here [p.45].
A5. Output Section: This section contains controls pertaining to the speaker outputs. Here you
will find things like a master volume knob, VU meters, and other switching, routing, muting
and dimming functions.
• Master Volume Knob: This encoder sets the loudness of the active set of speakers.
Note that Speakers A and B can be adjusted independently or linked so that
loudness differences are maintained when switching back and forth. Linking
functionality is described in the AudioFuse Control Center application. Please
refer to that application's User Manual [p.45] to learn more.
• VU Meters: By default, these LED meters display the loudness level of incoming
mixes (Main, Cue 1, or Cue 2) or any Input channels that have "Listen" mode
engaged. When adjusting the Master Volume knob, these LEDs temporarily turn
blue to show the position of the knob from minimum (bottom) to maximum (top).
• Dim: Pressing this button reduces the speaker level and is commonly used when
having discussions or taking a phone call. By default, the sound level is reduced
by 20 dB but this can be adjusted in the AudioFuse Control Center application.
• Mute: This button mutes the output being sent to the speakers.
• Mono: This button switches on Mono mixdown mode. When switched on, the
button is lit and the mix is downmixed to mono.
8 Arturia - User Manual AudioFuse Studio - AudioFuse Studio