3.3. Using the Encoders
Once you have started Analog Lab Lite and configured the Audio and MIDI settings
correctly, all you need to do is select a Sound or Multi from the preset list and start
playing. Each of the encoders on the MiniLab MkII will assume their assigned parameters
immediately and you can begin experimenting by making your first edits inside that preset.
You’ll notice that the virtual MiniLab MkII has only 14 encoders (two rows of 7) instead of 16
like the physical keyboard. This is because encoders 1 and 9 are reserved for other functions
within Analog Lab Lite:
• Encoder 1: Filter Results list by selecting characteristics (scroll and click to select)
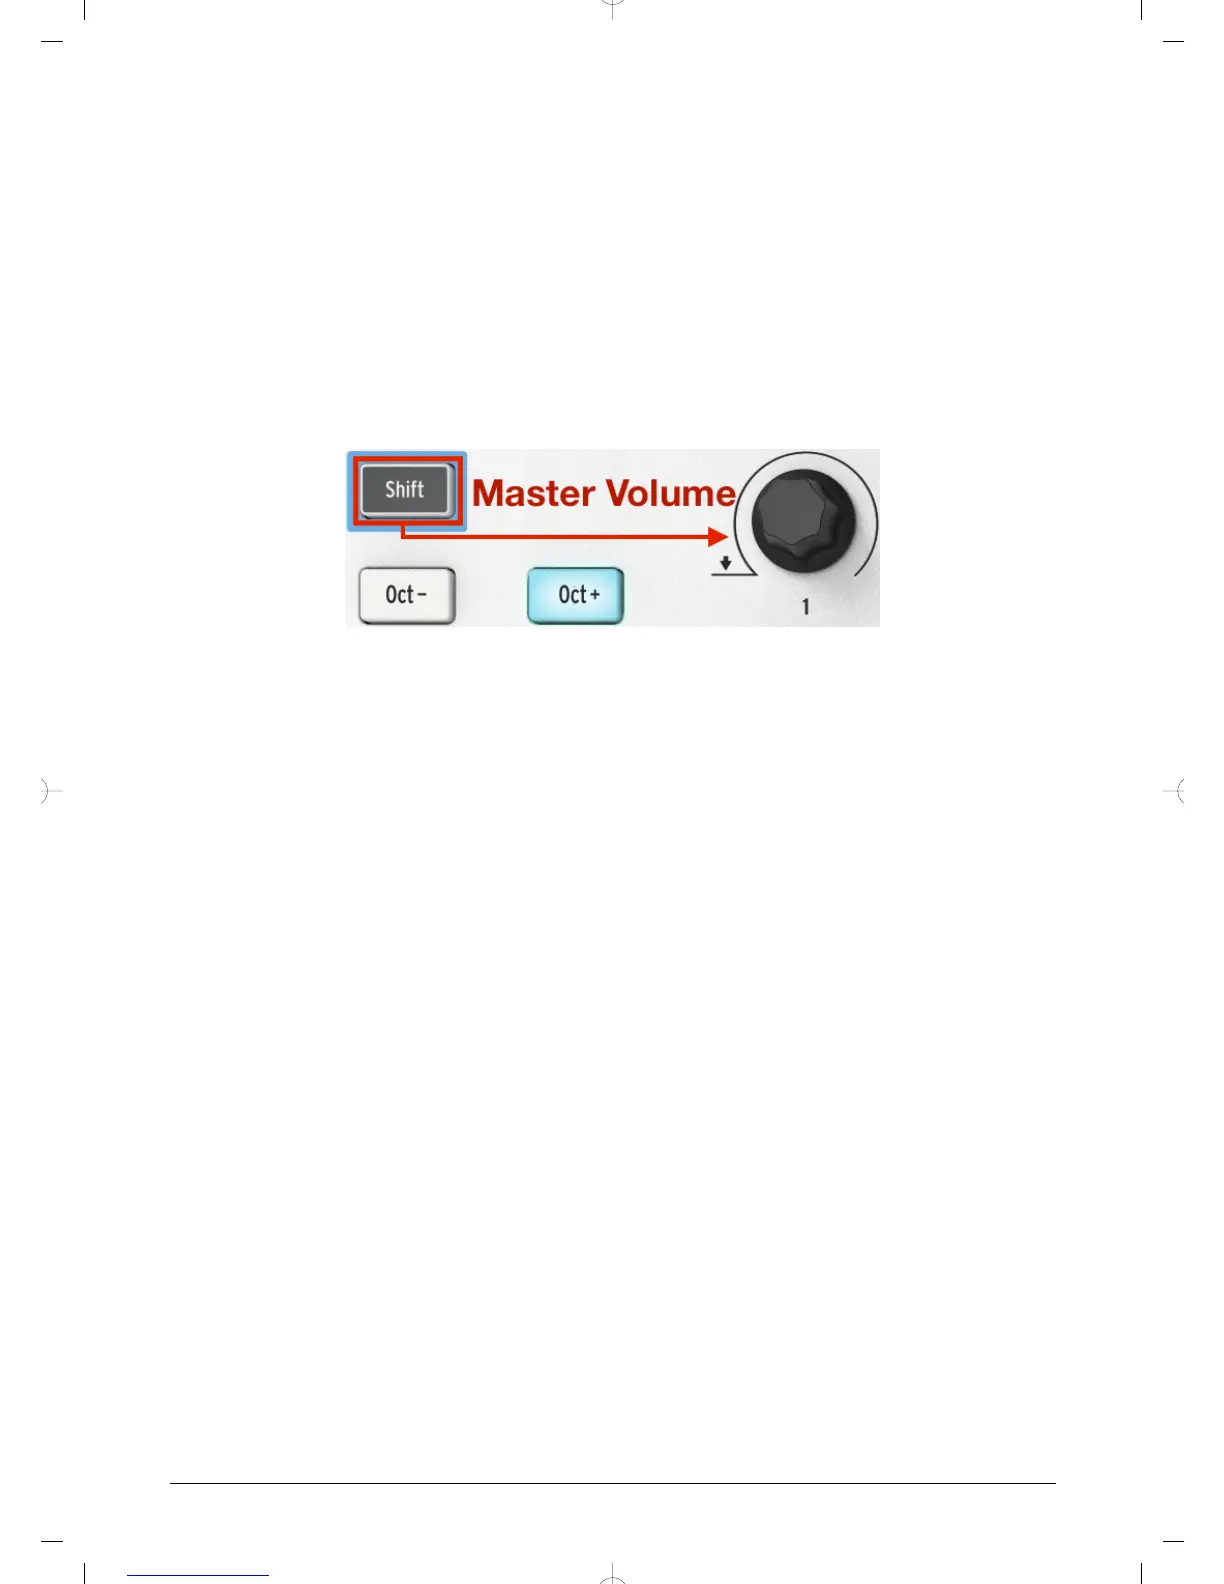
• Shift + encoder 1: Master Volume parameter
• Encoder 9: preset selection within the Results list (scroll and click to select).
The functions of encoders 1 and 9 are fixed when using Analog Lab Lite. But it is possible to
change the parameter assignments for every other encoder using the menu that appears
when you click the parameter name under the virtual encoder.
Shift + Encoder 1 controls master volume in Analog Lab
Lite.
Arturia - User Manual MiniLab MkII - MiniLab MkII and Analog Lab Lite 13
 Loading...