2. OVERVIEW
2.1. First step - Making the connections
Setting up the MiniLab MkII keyboard for use with Analog Lab Lite is fast and simple:
1. First install the Analog Lab Lite program on your computer and be sure to register
and authorize it (see Chapters 2 and 3 of the Analog Lab user manual).
2. Connect the MiniLab MkII keyboard to the computer. MiniLab MkII is powered
by its USB connection, so all you have to do is connect a USB cable from your
computer to the MiniLab MkII keyboard.
3. MiniLab MkII is a class-compliant USB device, so its driver will be automatically
installed when you connect MiniLab MkII to your computer.
4. Fire up the Analog Lab Lite software and read on!
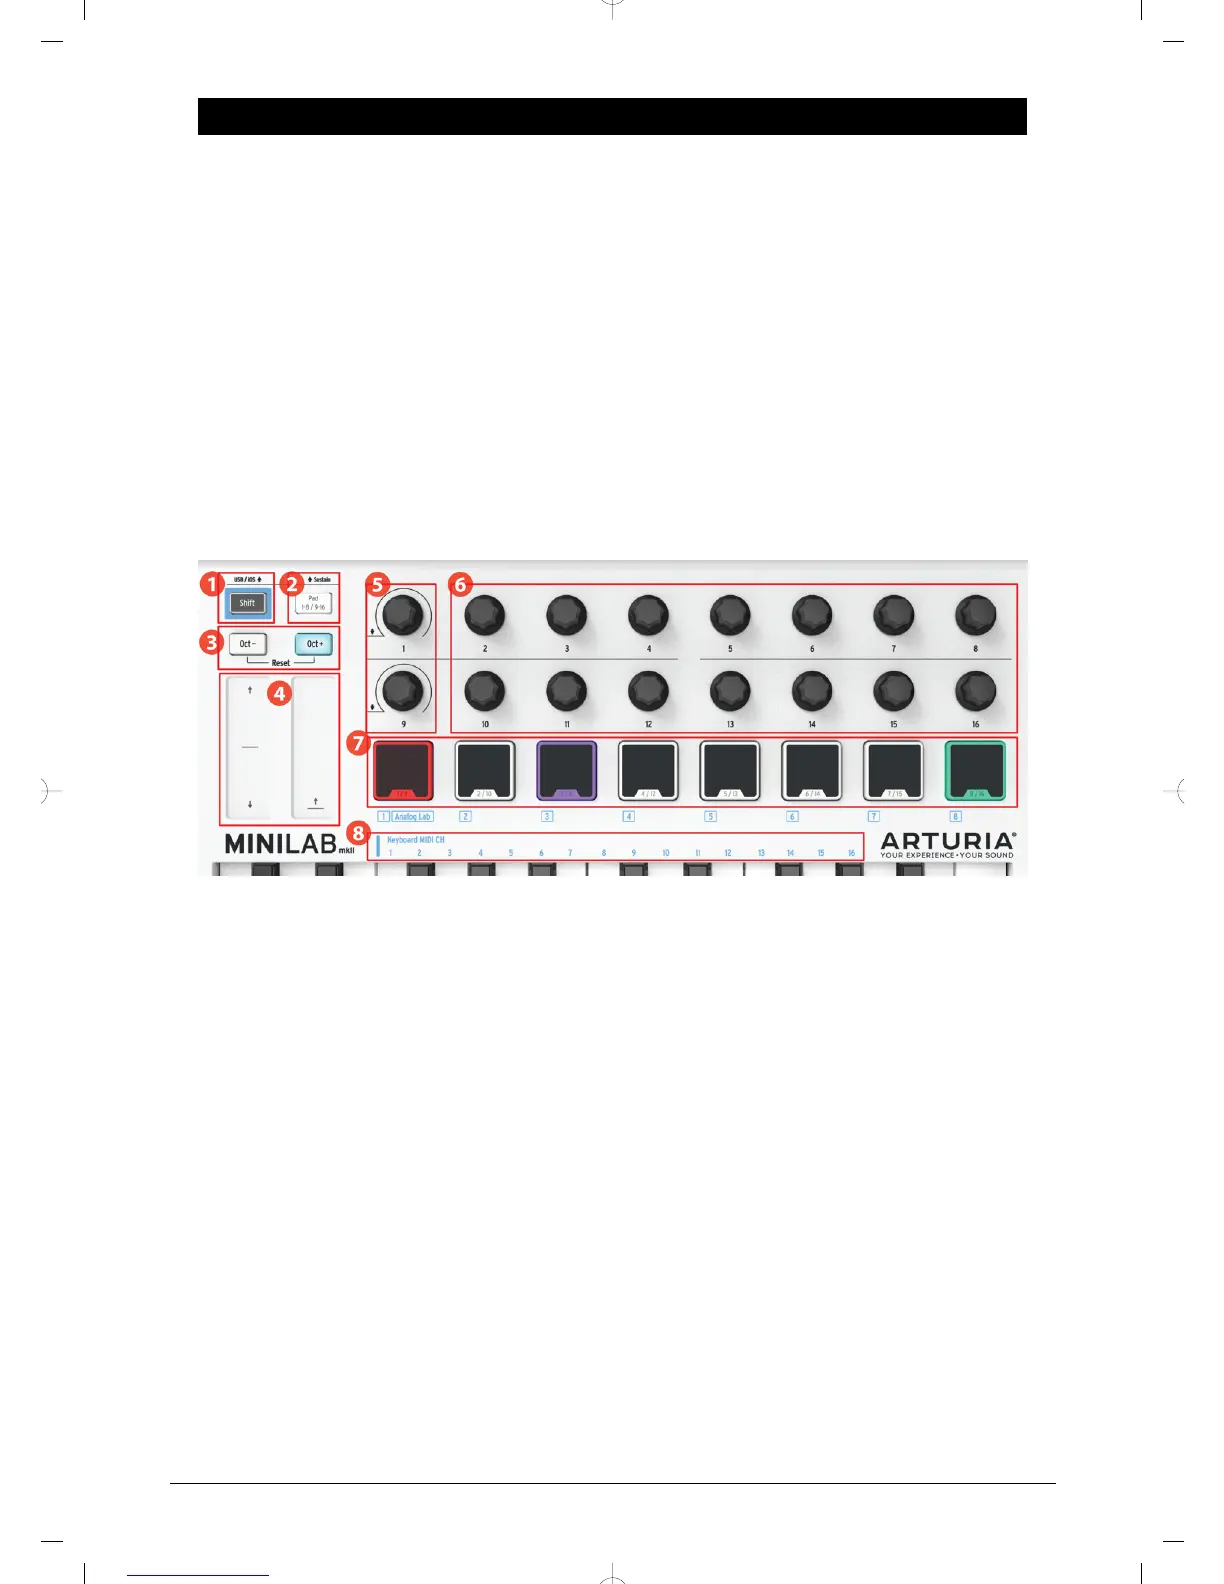
2.1.1. Front Panel
1. Shift button: Press Shift and one of the pads will light to show the current
Memory selection.
◦ Hold Shift and press a Pad to select a Memory.
◦ Hold Shift, press a key to select the MIDI Channel.
◦ Hold Shift, turn encoders 1 or 9 for alternate MIDI CC values.
◦ Hold Shift, press Oct+ and Oct- at the same time to send “All Notes
Off” and “Reset all controllers” commands over MIDI.
2. Pad 1-8 / 9-16 buttons: Use to access Pad banks 1-8 or 9-16
3. Octave - / + buttons: Shift the keyboard range +/- 4 octaves. Press both buttons
at once to reset the range to center.
4. Pitch / Mod Touch: strips Pitch bend and modulation are activated by pressing
the touch strips. “Return to Zero” or “Hold” settings can be selected for the Pitch
strip using the MIDI Control Center software.
5. Encoders 1 and 9: Analog Lab Lite: turn/click Encoder 1 to browse/select preset;
turn/click encoder 9 to browse/select filters.
6. Encoders 2-8 and 10-16: Analog Lab Lite: Memory #1 is pre-configured to control
AL Lite parameters with these encoders.
7. Pads 1-8 / 9-16 Analog Lab Lite: Play notes from pads 1-8; control various features
from pads 9-16.
8. MIDI Channel selector keys: Press the Shift button and then one of the keys to
select the current MIDI channel for MiniLab MkII.
Front View
4 Arturia - User Manual MiniLab MkII - Overview
 Loading...