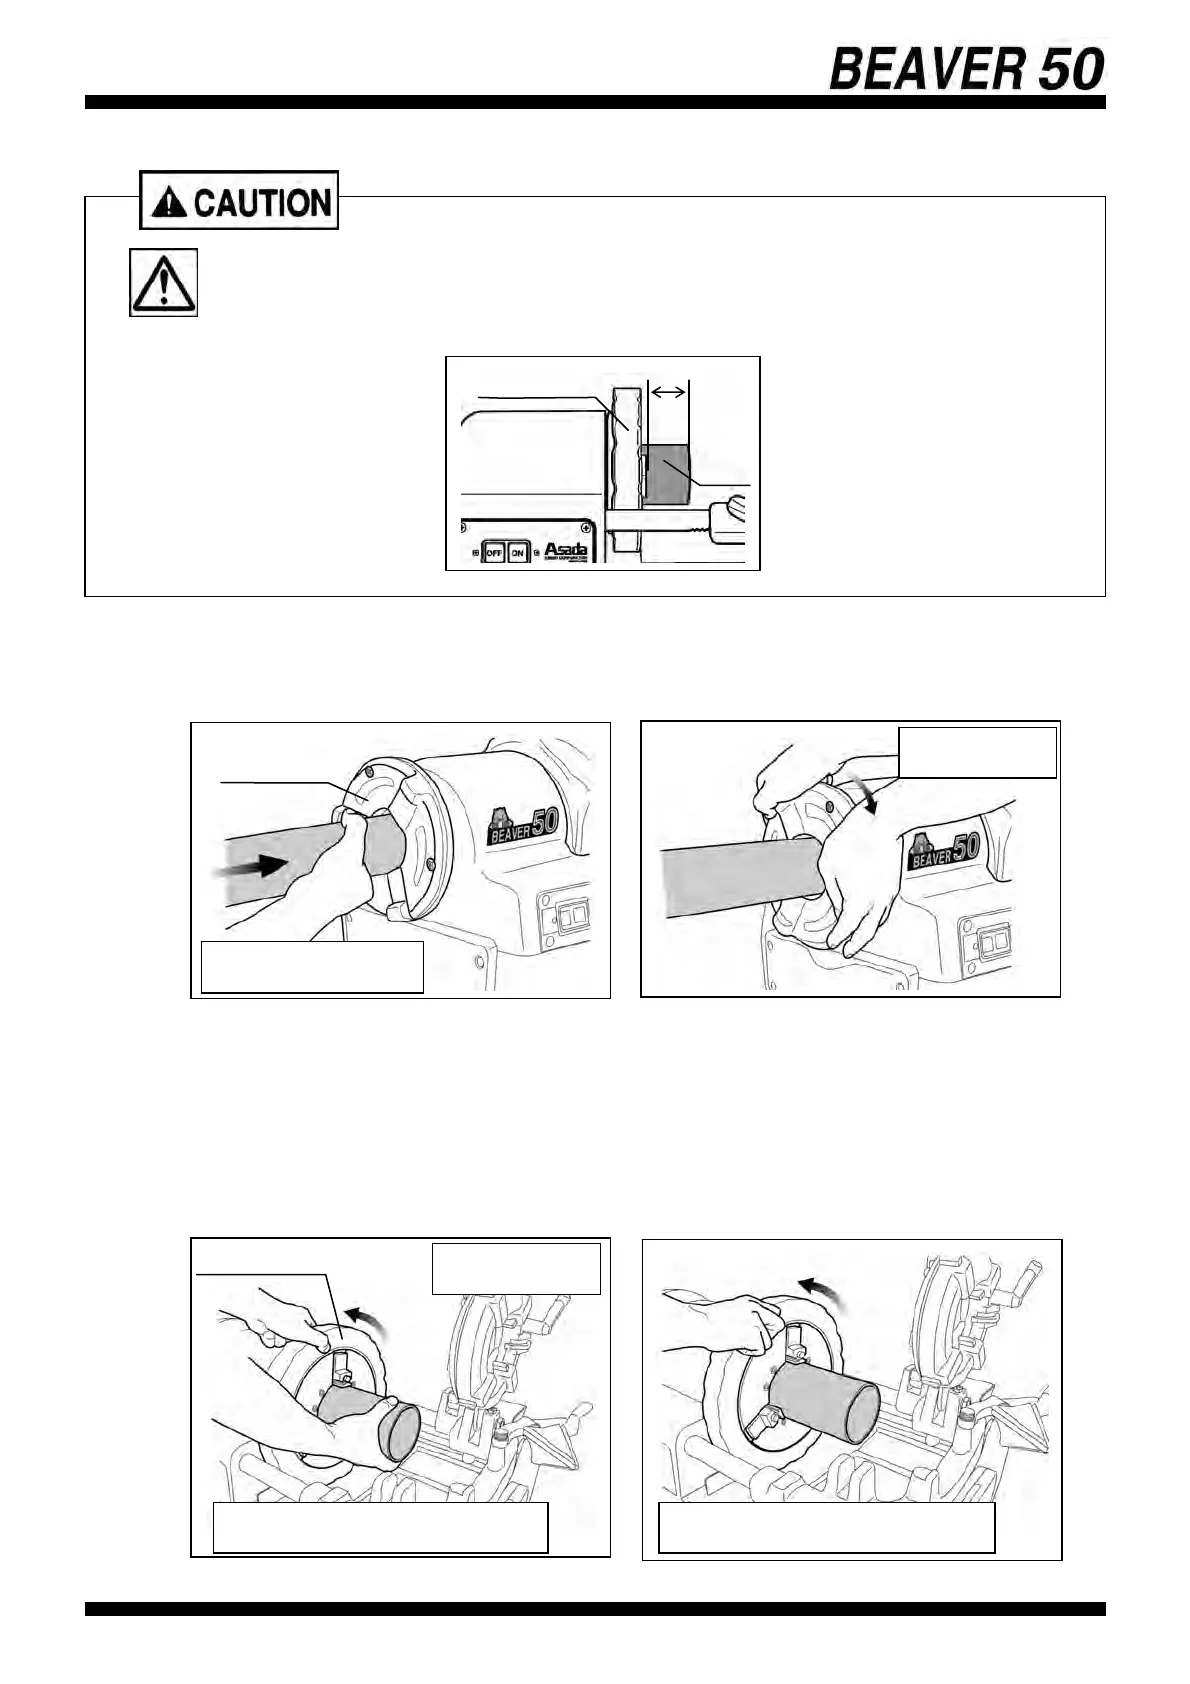
2)Setting the Workpiece
(1) Swing the Cutter and the Die-Head upward to out-of-way position and set the Reamer at the
back side.
(2) Insert the workpiece from the Scroll side and tighten the Scroll. (fig.4,5)
(3) Hold the workpiece on the Hammer Chuck side in right hand and tighten the workpiece
gradually with the Hammer Chuck. (fig.6)
(4) Make sure three jaws contact the workpiece.
(5) If three jaws do not properly contact the workpiece, the workpiece will shake and cutting and
threading cannot be performed properly.
(6) Chuck quickly and tighten the workpiece securely. (fig7)
14
• Do not thread the workpiece within 70 mm from the Hammer Chuck.
The Carriage will touch the frame before threading is completed and
the machine may be damaged.
〈5〉 〈4〉
Insert the work piece
Scroll
Tighten Scroll
〈6〉
〈7〉
Turn gradually
Hold the workpiece in right hand.
Hammer Chuck
Turn the Hammer Chuck quickly.
70mm
Hammer Chuck
Pipe