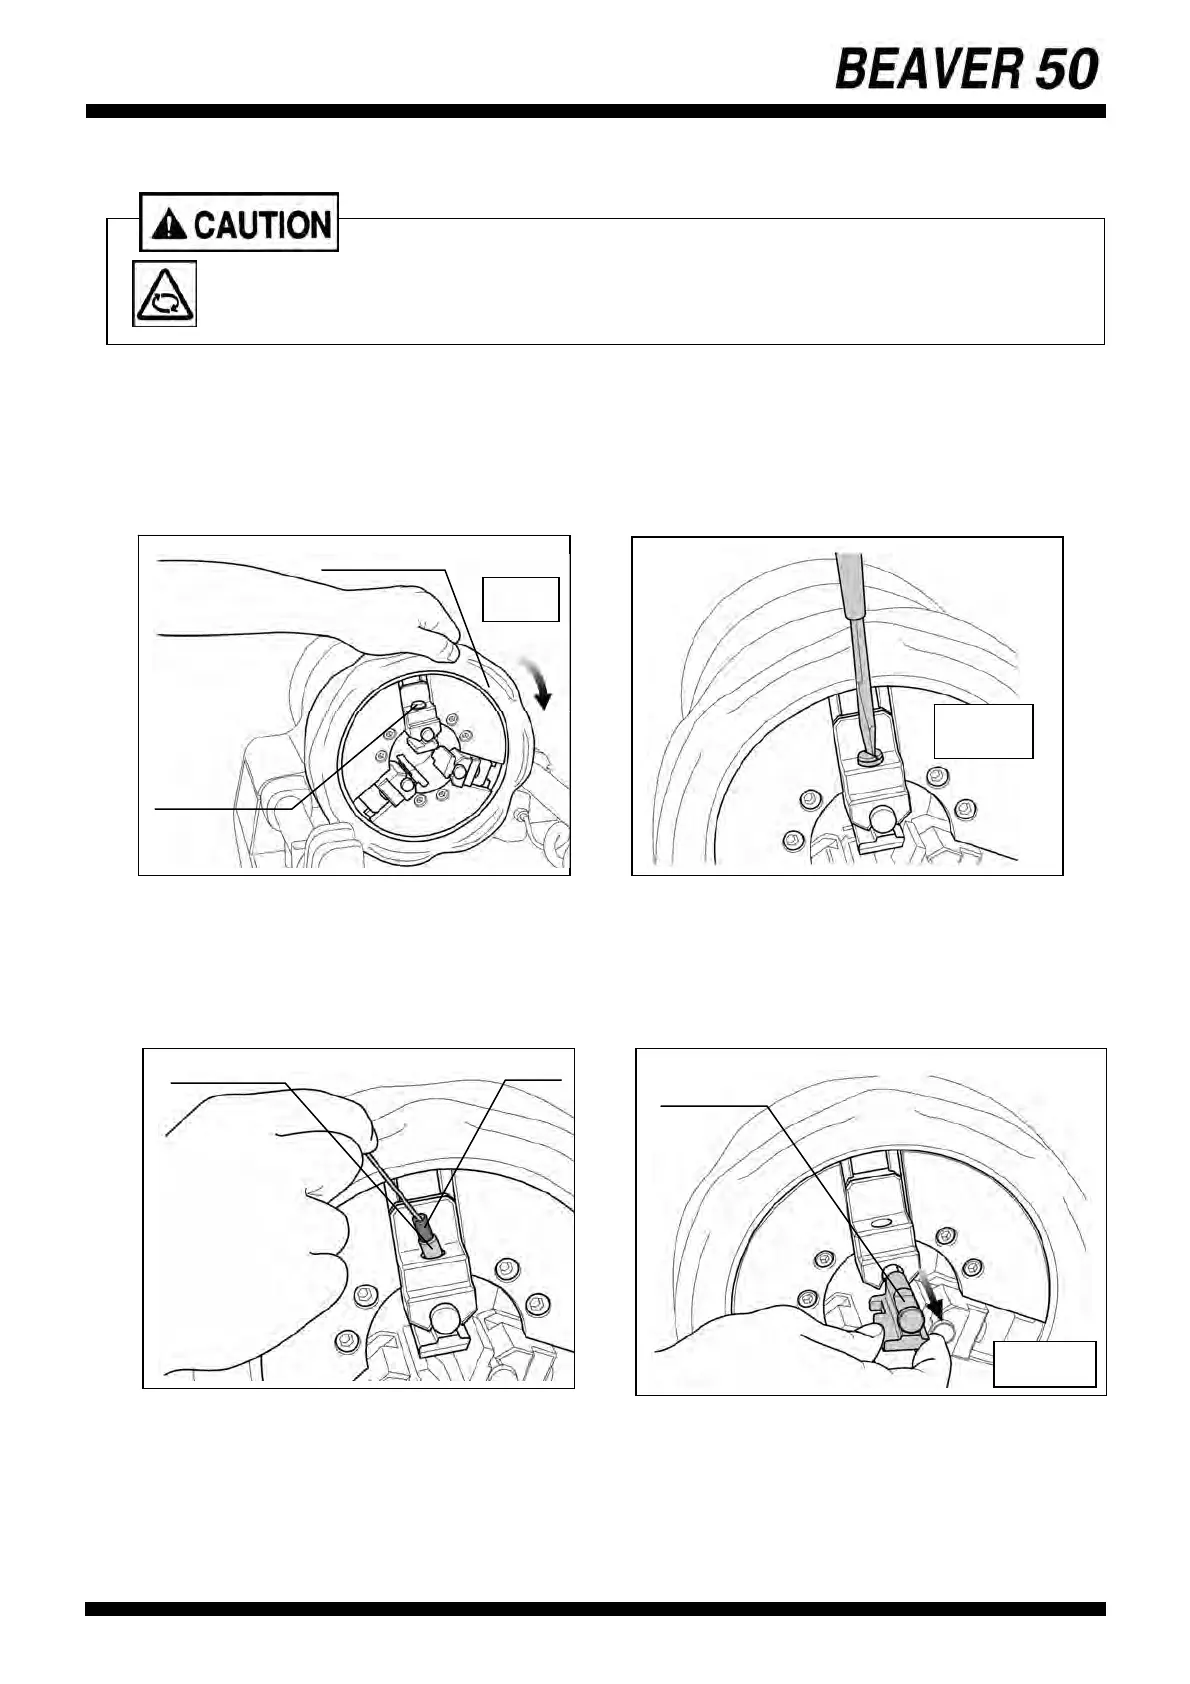
1-5) Replacement of Jaw Inserts
(1) Turn the Rack Handle counterclockwise so that the Carriage moves to the right end.
(2) Swing the Cutter upward to out-of-way position.
(3) Turn the Hammer Chuck and open up to until the Screwdriver enters. (fig41)
(4) Loosen the screws securing the Jaw Inserts. (fig42)
(5) Place a thin stick on the edge of the spring and pull out Spring(2) and the Chuck Pin. (fig43)
(6) Pull the Jaw Insert forward. (fig44)
(7) If three Jaw Inserts are to be replaced at the same time. Remove the other two Jaw Inserts.
(8) Wipe off chips, dirt, oil, etc. from the Jaw Insert mounting surface.
(9) Insert a new Jaw Insert up to the back and replace the Spring(2) and the Chuck Pin. Firmly tighten the
screw.
(10) Install other two Jaw Inserts in the same manner.
28
• Disconnect the Power Plug.
〈42〉
Loosen
〈41〉
〈43〉
Spring
Chuck Pin
remove
Jaw Insert
Turn
Hammer Chuck
screw
〈44〉