7-1) Adjustment of Thread Length
• The thread length has been adjusted within the standard length at the factory, but can be adjusted as required.
■ For Beaver Die-Head 1/2"-2"AT
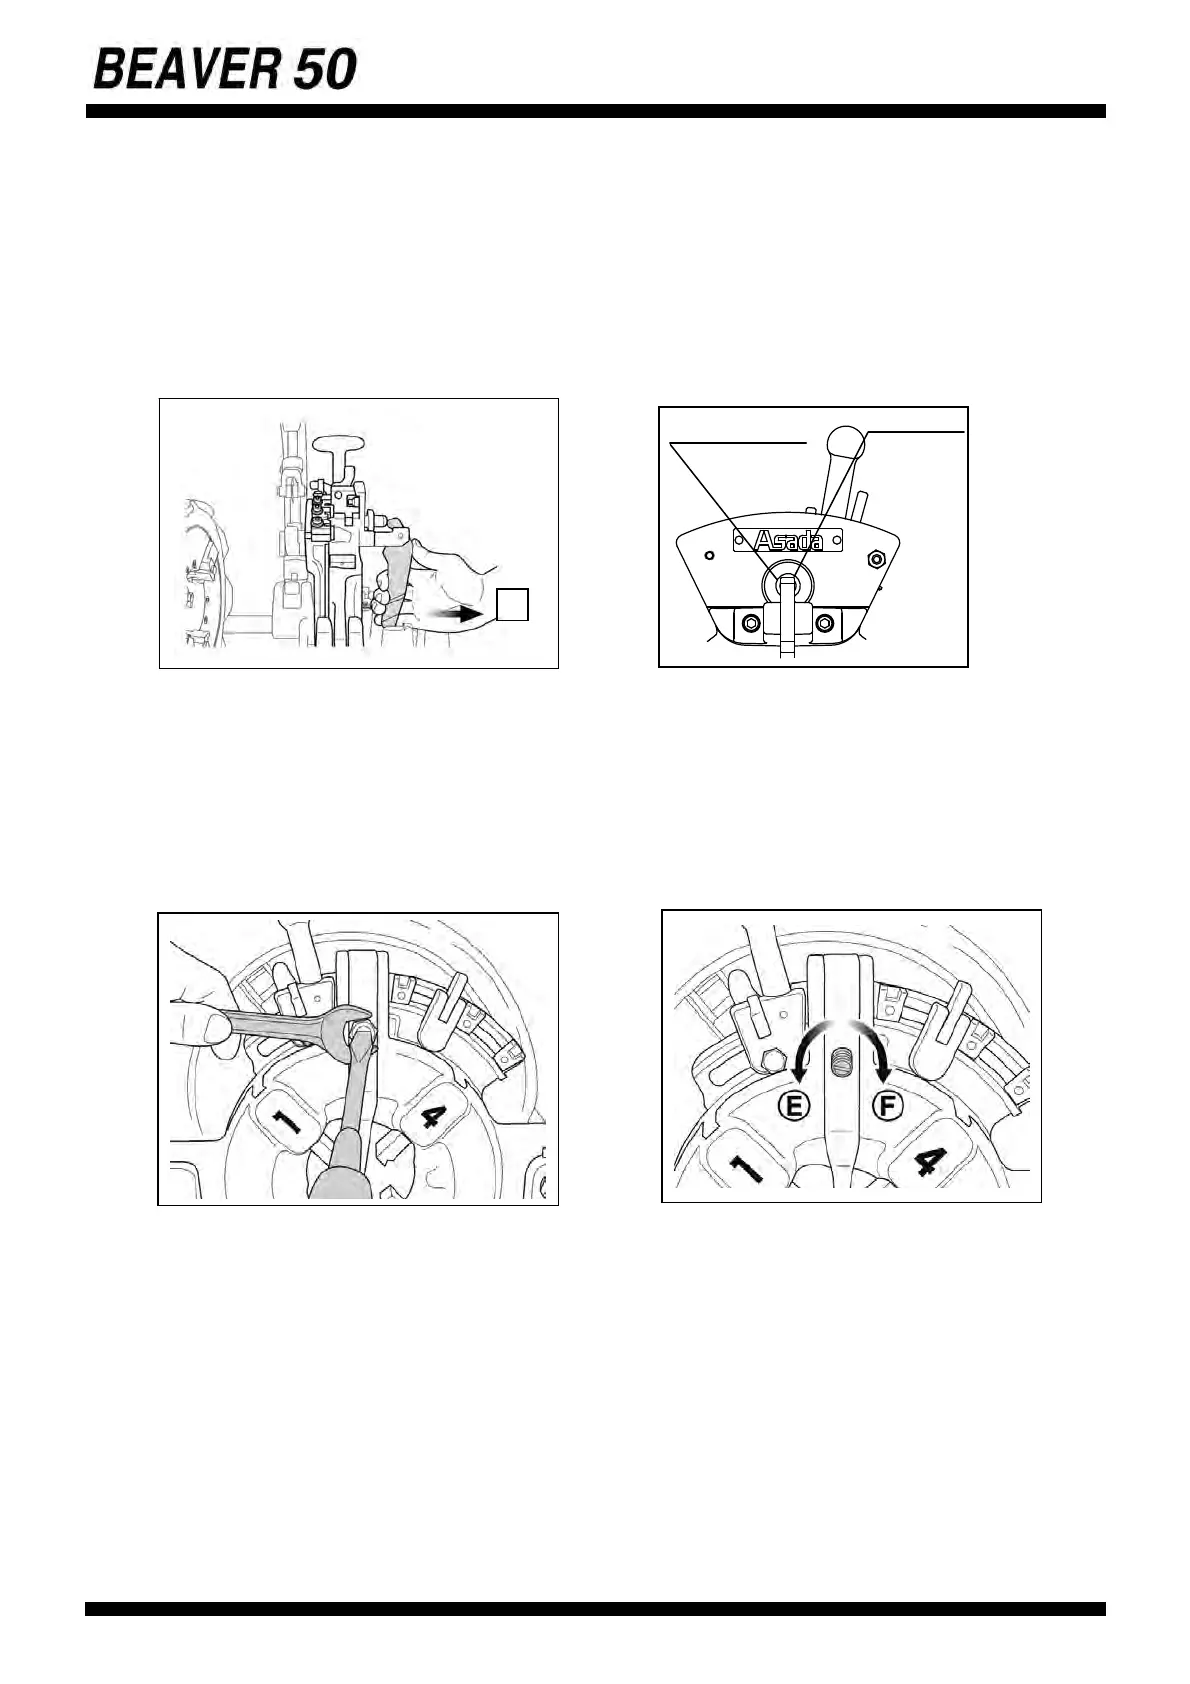
(1) Pull the Locking Lever toward A to open Die-Head. (fig.28)
(2) Loosen Lock Nut and turn Adjust Screw clockwise depending on the required thread length.
Right turning makes the thread length longer and left turning makes it shorter.
The thread length will be adjusted about 2.5mm by one rotation. (fig.29)
(3) After adjustment, tighten Lock Nut.
■ For Beaver Die-Head 1/2"-2"
(1)Hold set pin with a slot screwdriver and loosen hex nut. (fig.30)
(2)Turning set pin toward “E”, makes shorter threads and turning toward “F” makes longer threads.
The thread length will be changed about 2mm by half turn. (fig.31)
(3)Hold set pin with a slot screwdriver not to turn it and tighten hex nut.
7-2) Adjustment of Thread Depth
■ For Beaver Die-Head 1/2"-2"AT
(1)Loosen the Block Screw securing the Selector Block to the Cam Plate.
(2)Move the Selector Block to adjust the thread depth. Sliding toward H makes deeper threads and
G makes, shallower threads. The thread depth will change by 1.5 to 2 threads under or over
by one scale. (fig.32)
(3)Tighten the Block Screw to secure Selector Block and start threading.
(4)Check the cut pipe with a Taper Thread Gauge ,etc. and adjust it again if necessary.
23
〈28〉 〈29〉
〈30〉
〈31〉
A
Lock Nut
Adjust Screw