INSTALLATION AND OPERATION MANUAL
CR3 CR5, and CR7 Charging Racks Charging Rack Installation
10. Replace the top cover, see Figure 7. Opening the top cover of the Charging Rack, page 9.
11. Fasten the power cord to the wall depending on local regulations.
12. If more Charging Racks shall be connected, repeat the above steps 1-12 for the next unit.
Installation Test
1. When the fixed installation is completed, apply AC power by switching on the disconnect device.
2. The LED on the front of each charger should light up.
The LED is disabled on the Basic Charging Rack and will not light up. Put a handset into a charging
slot and check if the handset LED lights up.
2.5 Communication Cable Connection
This section is applicable for the Advanced Charging Rack only.
The communication cable connections are situated under the top cover of the Charging Rack.
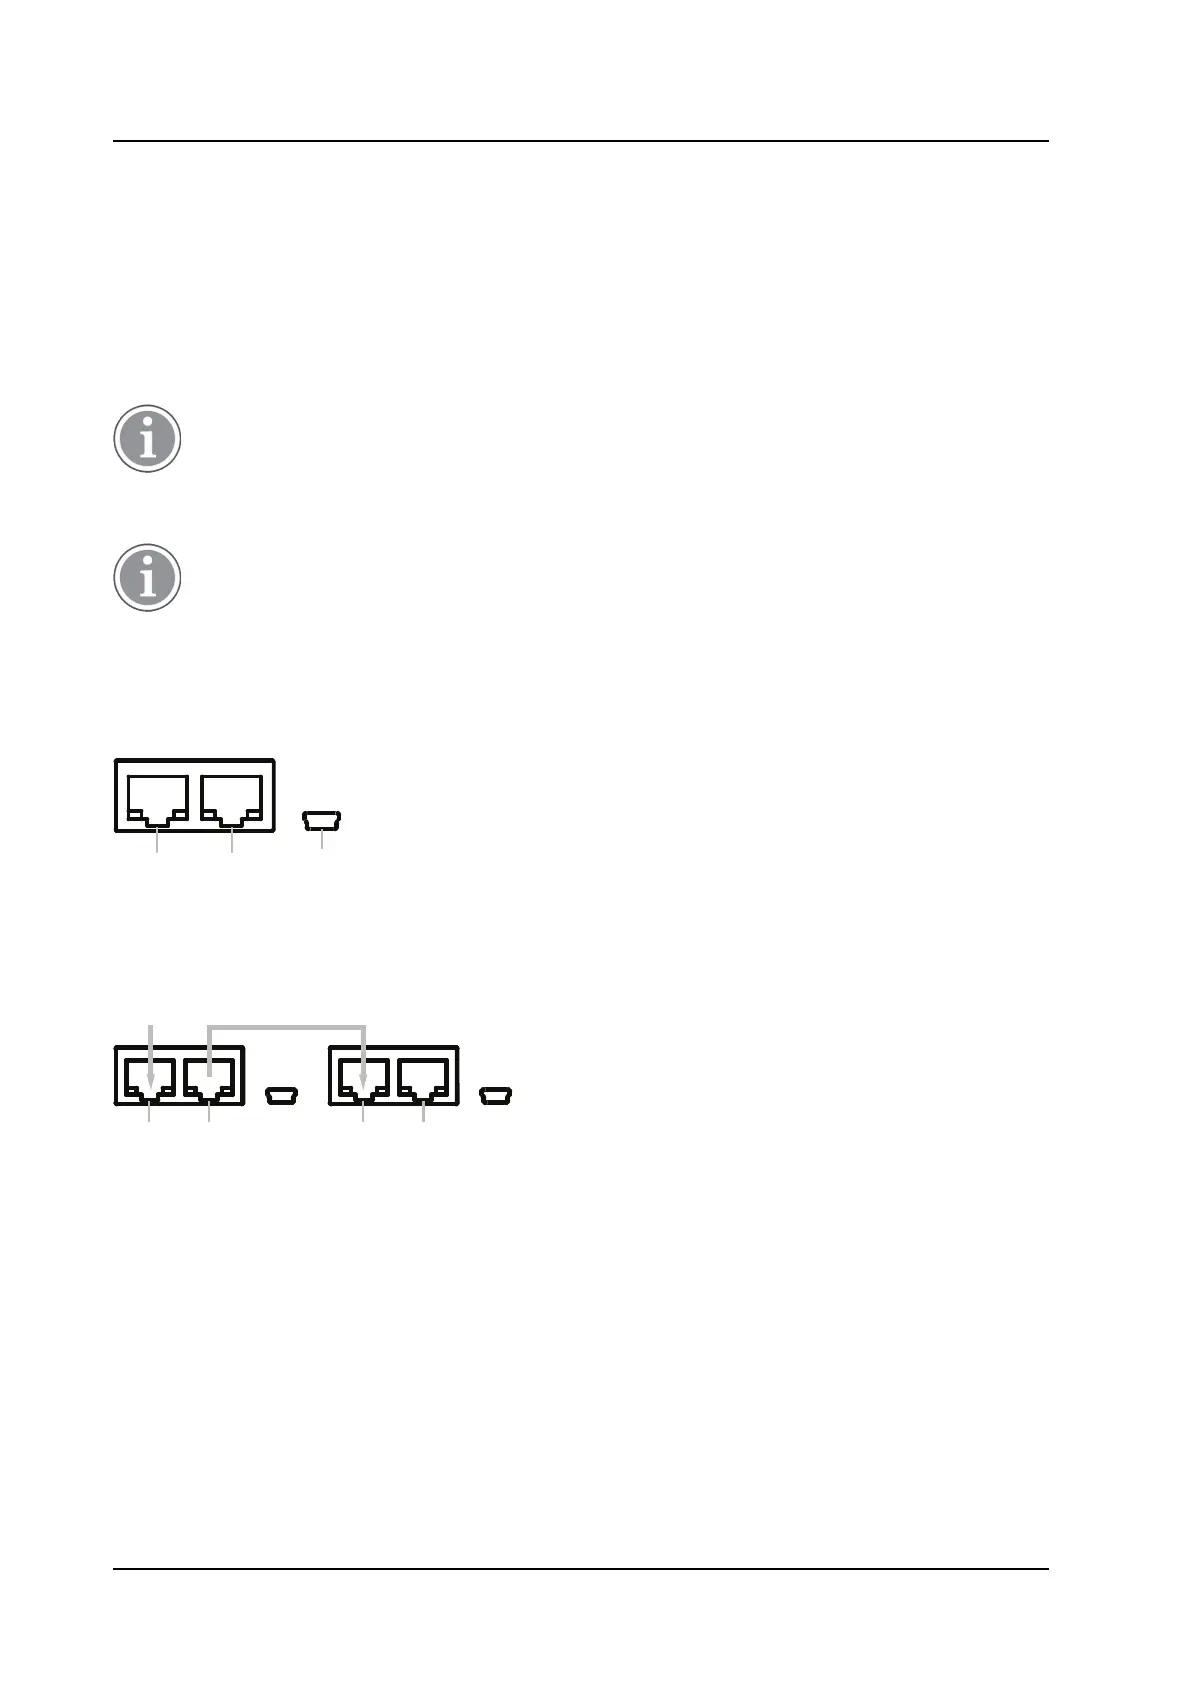
Figure 11. Communication connections inside the Charging Rack
When connecting several (up to four) Charging Racks over Ethernet, it is possible to connect them in series
using the two Ethernet connections. Power over Ethernet is not supported.
Figure 12. Connecting Charging Racks in series using Ethernet cables
LAN PC LAN PC
Rack Charger 1 Rack Charger 2
1. Open the top cover, see Figure 7. Opening the top cover of the Charging Rack, page 9.
2. If a single Charging Rack is used, connect the Ethernet cable or USB cable to the connections shown in
Figure 11. Communication connections inside the Charging Rack, page 12. If several Charging Racks
shall be connected in series, connect the Ethernet cables to the connections shown in Figure 12.
Connecting Charging Racks in series using Ethernet cables, page 12.
3. Let the Ethernet/USB cables run on top of the cable support holders, see Figure 9. Securing the mains
power supply cable, page 11.
4. Close the top cover.
The USB Interface supports USB 2.0 Full speed. One Mini-B Receptacle USB connector is used. The USB
connection is used for communication with a PC. Power over USB is not supported.
TD 92480EN / 30 October 2020 / Ver. L
12