HIRO Installation Manual GDO-12V1
11
© Copyright 2019
6.2 Door Preparation
6.2.1 Preparation
a. Check the door’s operation:
i. The door must travel smoothly and be easy to operate by hand.
ii. Adjust any tight or twisted guides.
iii. Clean the guides if there is any oil or wax present using a suitable white spirit. The only lubricant suitable for use on door guides is silicon
spray. DO NOT use WD-40, RP-7, petroleum grease, or similar.
b. Install the locking bar covers
7
if there are locking bar holes in the guides.
c. Affix the warning labels supplied with this opener in a prominent place where they are clearly visible.
d. Choose the side where the opener will be installed ensuring there is sufficient sideroom.
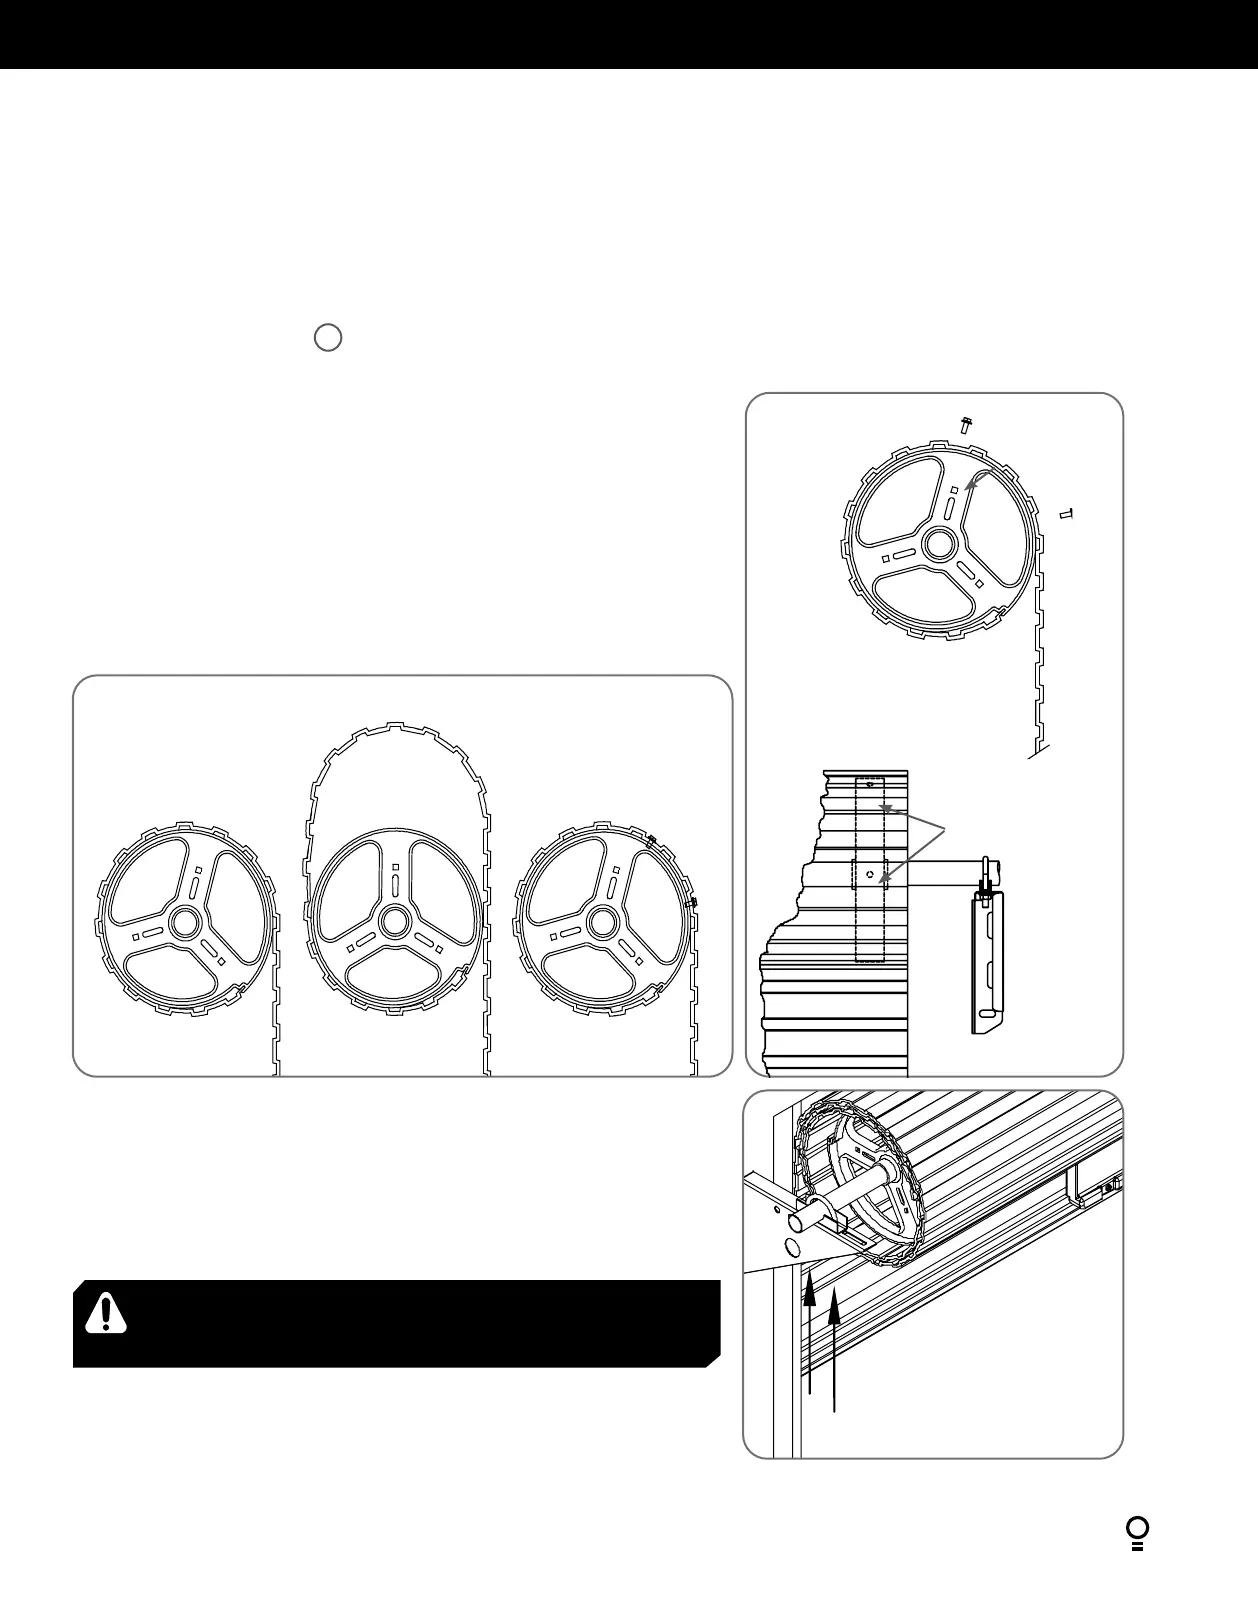
6.2.2 Pinning the Door to the drum:
Pinning the door’s curtain to its drum maintains security when the opener is closed. If
the curtain is not pinned the door can be partially opened manually.
a. Fully close the door.
b. Mark a minimum of two (2) drill holes on the drum to each end of the door (Fig.
6.2.1).
c. Drill holes using 3.2mm (
1
/
8
”) drill bit.
d. Fit M10 x 32mm screws and washers (not supplied) to each of the four (4) holes.
This screw should be positioned as low as possible in the grove, but make sure that
it does not alter the curtain’s normal lead in to the guide.
BALLOONING DOOR
PINNED DOORFREE DOOR
Pin Points
Screw into the
low part of grove
Check that the door is still balanced and smooth to operate. If it is not, the door may
require servicing (refer to door manufacturer’s instructions).
6.2.3 Door prop preparation
a. At the end opposite to where the opener will be fitted, check that each nut
securing the door axle, is tightened (to a torque setting of 40Nm) to the bracket.
(Fig. 6.2)
b. Open the door completely and tie safety ropes around the door roll approximately
300 mm from each end. Do not tie the ropes too tight as damage to the curtain
may ensue.
c. At the end where the opener is to be fitted, support the door with a safe and
suitable lifter.
NOTE - For minimum sideroom installations, the
door may have to be taken down.
Fig 6.2.2
Tighten nuts
Fig 6.2.1
d. At the end where the opener will be fitted, use pen to mark the position of the
saddle on the door bracket and the position of the door bracket on the wall to
assist in reassembling.
e. Remove the bolts and saddle from the door bracket.
f. Raise the door off the door bracket and secure in the support.
WARNING! Make sure the prop is snug under the door and is stable.
AVERTISSEMENT! Vérifier que le support est positionné correctement
sous la porte et ne risque pas de tomber.
Fig 6.1.2