① Press the START/STOP key to pause the measurement.
② Press the SCALE key 5 times.
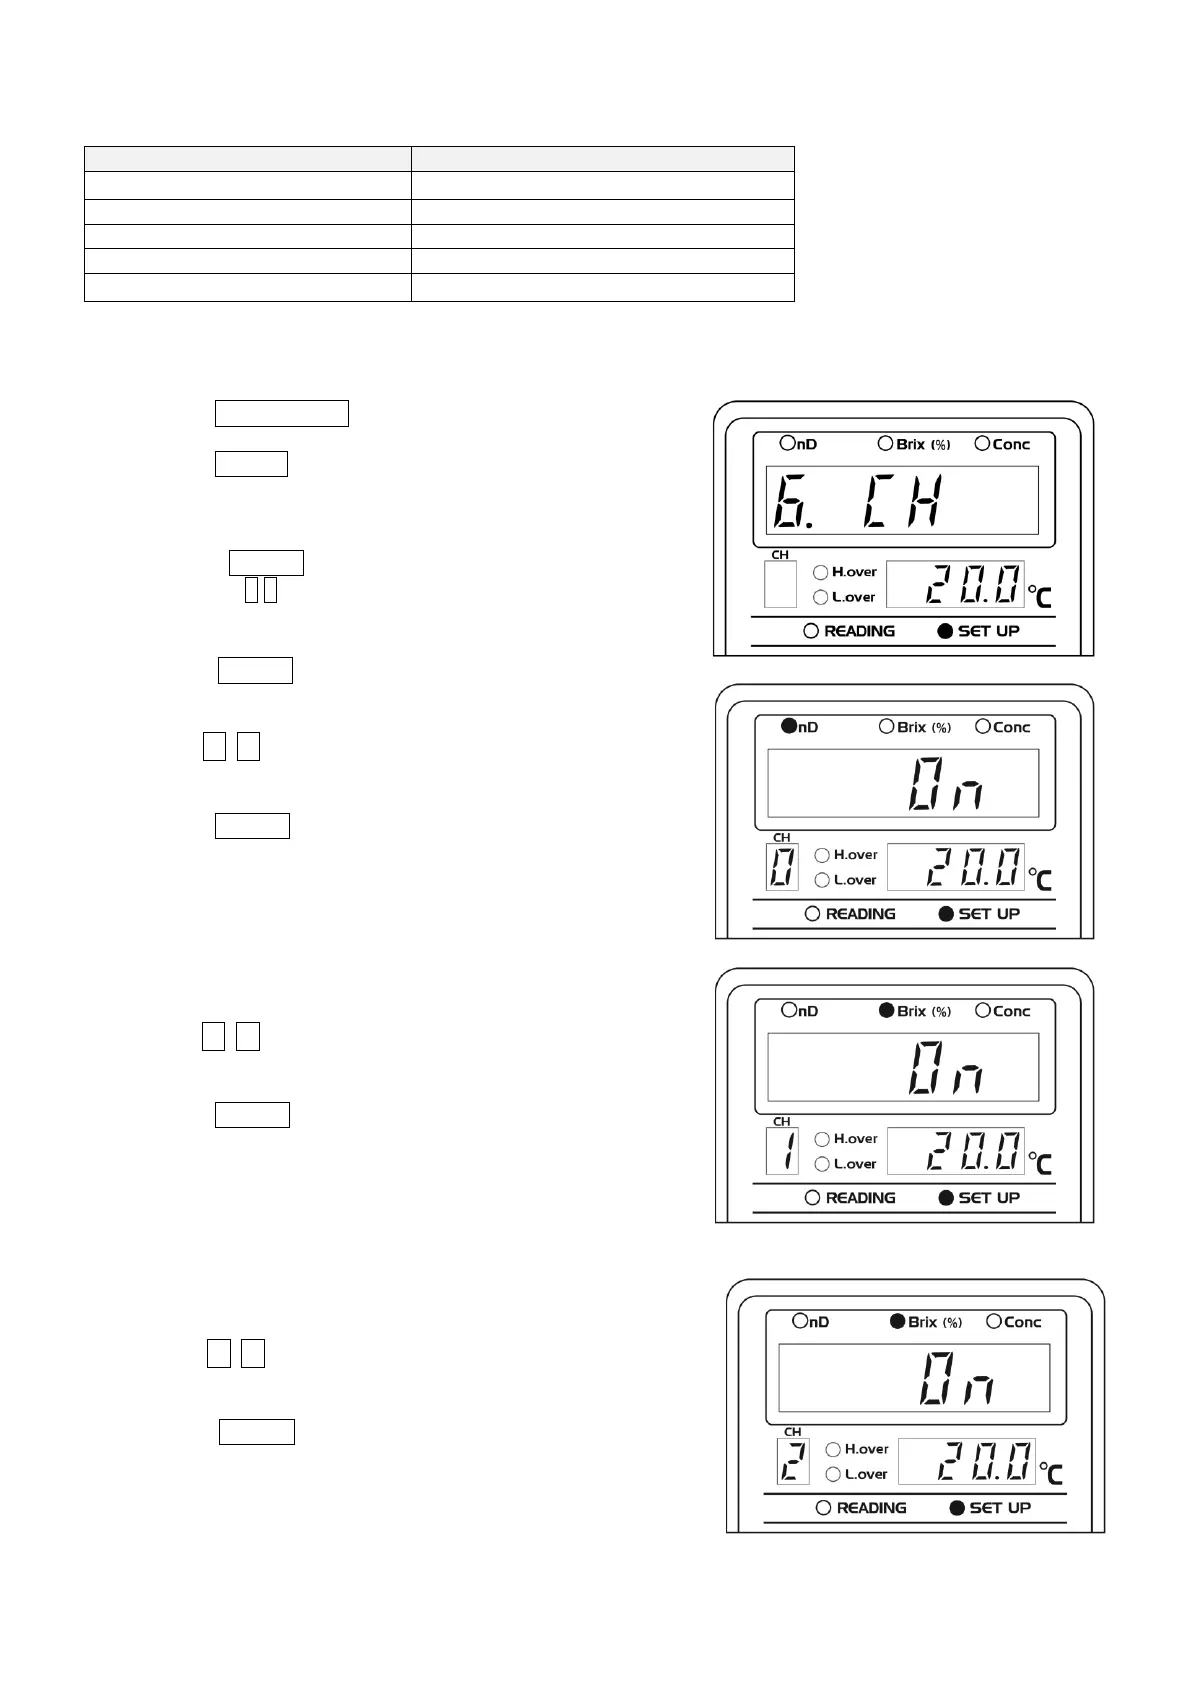
The SET UP light will then blink, and "SEt" will be
displayed on the measurement value display (Fig.11-1).
③ Press the ENTER key and the SET UP light comes
on.Using the ↑ ↓ keys, select "6. CH" (Fig.11-30).
④ Press the ENTER key to display the nD ON OFF setting
screen.
The nD LED will light up.
Use the ↑ ↓ keys to select ON or OFF (ON: nD will be
displayed on the measurement results display screen,
OFF: results will not be displayed)(Fig.11-31).
Press the ENTER key to confirm the selection.
⑤ The Brix CH1 ON/OFF setting screen will be displayed.
The Brix LED will light up and "1" will be displayed in
"CH."
Use the ↑ ↓ keys to select ON or OFF (ON: Brix will be
displayed on the measurement results display screen,
OFF: results will not be displayed)(Fig.11-32).
Press the ENTER key to confirm the selection.
⑥ The Brix CH2 ON/OFF setting screen will be displayed.
The Brix LED will light up and "2" will be displayed in
"CH."
Use the ↑ ↓ keys to select ON or OFF (ON: Brix will
be displayed on the measurement results display screen,
OFF: results will not be displayed)(Fig.11-33).
Press the ENTER key to confirm the selection.