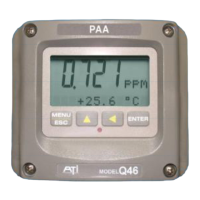
ATI Q46H/85 PAA System Part 7 – Calibration
50
O&M Manual
Rev F (8/17)
8. The screen will display the last measured ppm value and a message will be displayed
prompting the user for the lab value. The user must then modify the screen value with the
arrow keys and press ENTER. The system then performs the proper checks.
9. If accepted, the screen will display the message PASS with the new sensor slope reading,
and then it will return to the main measurement display. If the calibration fails, a message
indicating the cause of the failure will be displayed and the FAIL icon will be turned on. The
range of acceptable values for sensor slope is 20% to 500%. It may be necessary to rebuild
the sensor as described in section 5.1 PAA Sensor Preparation. Should the slope
value remain out of range and result in calibration failures, review the Service Section of this
manual, then contact the service dept. at ATI for further assistance.
The sensor offset value in % from the last span calibration is displayed on the lower line of the
Default Menus for information purposes.
7.2 Temperature Calibration
The temperature calibration sequence is essentially a 1-point offset calibration that allows
adjustments of approximately ±5 °C.
The sensor temperature may be calibrated on line, or the sensor can be removed from the
process and placed into a known solution temperature reference. In any case, it is critical that the
sensor be allowed to reach temperature equilibrium with the solution in order to provide the
highest accuracy. When moving the sensor between widely different temperature conditions, it
may be necessary to allow the sensor to stabilize as much as one hour before the calibration
sequence is initiated. If the sensor is on-line, the user may want to set the output HOLD feature
prior to calibration to lock out any output fluctuations.
1. Scroll to the CAL menu section using the MENU key and press ENTER or the UP arrow key.
2. Press the UP arrow key until Cal Temp is displayed.
3. Press the ENTER key. The message Place sensor in solution then press ENTER will be
displayed. Move the sensor into the calibration reference (if it hasn’t been moved already)
and wait for temperature equilibrium to be achieved. Press ENTER to begin the calibration
sequence.
4. The calibration data gathering process will begin. The message Wait will flash as data is
accumulated and analyzed. The °C or °F symbol may flash periodically if the reading is too
unstable.
5. The message Adjust value - press ENTER will be displayed, and the right-most digit will
begin to flash, indicating that the value can be modified. Using the UP and LEFT arrow keys,
modify the value to the known ref solution temperature. Adjustments up to ± 5 °C from the
factory calibrated temperature are allowed. Press ENTER.
Once completed, the display will indicate PASS or FAIL. If the unit fails, the temperature
adjustment may be out of range, the sensor may not have achieved complete temperature
equilibrium, or there may be a problem with the temperature element. In the event of calibration
failure, it is recommended to attempt the calibration again immediately.