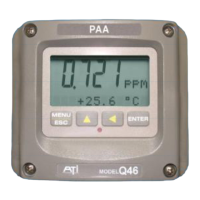
ATI Q46H/85 PAA System Part 7 – Calibration
51
O&M Manual
Rev F (8/17)
7.3 pH Calibration
The pH calibration menus will not be seen unless the optional pH sensor input is turned ON and a
special pH sensor is connected to the input of the instrument. See Section 6.24 Configuration
Menu [CONFIG] for more details.
The pH calibration functions appear in the CAL menu listing when the optional pH input is
enabled in the CONFIG menu. When enabled, the pH input signal is used to compensate the
PAA signal. Calibration of pH is performed in one of two methods; one-point or two-point. For
new sensors or for calibration in two different pH buffers with the sensor removed from the
process, choose a two-point calibration. For on-line calibrations with the sensor still mounted in
the process, choose a one-point calibration. For two-point calibrations, it is highly recommended
to use fresh pH buffers of 7 pH and 9.18 pH.
7.31 Two-Point pH Cal
1. Thoroughly clean the pH sensor and place it into the first pH calibration buffer, stirring it
several times before letting it rest in the beaker. Allow sensor to sit in solution long enough to
achieve temperature equilibrium with the pH buffer (maybe 5 minutes.) It is important that
both pH buffers be fresh and at room temperature.
2. Scroll to the CAL menu section using the MENU key and press ENTER or the UP arrow key.
3. Press the UP arrow key until Cal pH Type is displayed.
4. Press the ENTER key. The display will begin to flash. Using the UP arrow key, adjust the
displayed number to a 2 pt calibration type. This will allow the user to offset+slope adjust the
sensor input for two separate pH point. Once value has been adjusted, press the ENTER key
and the message Accepted! will be displayed.
5. Scroll to the next menu item by pressing the UP arrow key once. The menu item Cal pH
buf1 will be displayed.
6. Press the ENTER key. The display will begin to flash. Using the UP and LEFT arrow keys,
adjust the displayed number to the known value of the pH buffer. The exact temperature
compensated number for pH buffers is typically written on the side of the buffers shipping
container. Once value has been adjusted, press the ENTER key.
7. The message Accepted! will be displayed, or an error describing the cause the failure. If the
cal point was accepted, rinse the sensor in distilled or de-ionized water and move it into the
second pH buffer. Stir it slightly several times and let the sensor rest in the beaker.
8. Scroll to the next menu item by pressing the UP arrow key once. The menu item Cal pH
buf2 will be displayed.
9. Press the ENTER key. The display will begin to flash. Using the UP and LEFT arrow keys,
adjust the displayed number to the known value of the second (higher or lower value) pH
buffer. Once value has been adjusted, press the ENTER key.
10. The message Accepted! will be displayed, or an error describing the cause the failure. The
system is now two-point calibrated for pH.
 Loading...