2 Installation
2.1 Regulation installation
and maintenance conditions
The appliance must be installed and the maintained
by an approved professional in accordance with the
prevailing regulations and code of practice, in particular:
- The legislation on the handling of refrigerants.
- Floor heating system installation.
- Low voltage electrical installations - Rules.
2.2 Unpacking and reservations
2.2.1 Receipt
Carefully check, in the carrier's presence, the general
appearance of the appliances and check that the
outdoor unit is not laid on its side or back.
In the case of any dispute, state any appropriate
reservations to the carrier in writing within 48 hours and
send a copy of this letter to the After-Sales service.
2.2.2 Handling
The outdoor unit should not be laid on its side or back
during transport.
If not kept upright during transport, the appliance could
be damaged through displacement of the refrigerant
and deformation of the compressor suspension.
Any damage caused by transportation of the unit lying
down is not covered by the warranty.
If necessary the outdoor unit may be tilted only during
manual handling (to go through a door or use a staircase).
This operation must be conducted very carefully and
the appliance must be immediately restored to upright
position.
2.2.3 Accessories provided
Accessories provided with the outdoor unit (gure 10).
Accessories provided with the hydraulic unit (gure 11).
2.3 Installation position
The choice of the position for installation is particularly
important insofar as any later movement is a delicate
operation requiring the intervention of a qualied person.
Choose the site of the outdoor unit and the hydraulic
unit after discussion with the customer.
Observe the maximum and minimum distances between
the hydraulic unit and the outdoor unit (gure 13); the
guarantee of the performances and the system's service
life depend on this.
2.4 Installation of the outdoor unit
2.4.1 Installation precautions
" The outdoor unit must only be installed outdoor
(outdoors). If a shelter is required, it must have
broad openings on the 4 walls and observe the
installation clearances (gure 12).
• Choose a site that is preferably sunny and sheltered
from strong cold predominant winds (mistral,
tramontana, etc…).
• The unit must be easily accessible for future installation
and maintenance work (gure 12, page 13).
• Ensure that it is possible to make the connections to
the hydraulic unit easily.
• The outdoor unit is able to withstand bad weather but
avoid installing in a position where it is likely to be
exposed to signicant dirt or owing water (under a
defective gutter for example).
• Water may drain away from the outdoor unit when it
is operating. Do not install the appliance on a paved
terrace; choose a well-drained place (e.g. gravel
or sand). If the installation is in an area where the
temperature can be lower than 0°C for a long period,
check that the presence of ice does not present any
danger. A drainage pipe can also be connected to the
outdoor unit (see page 14).
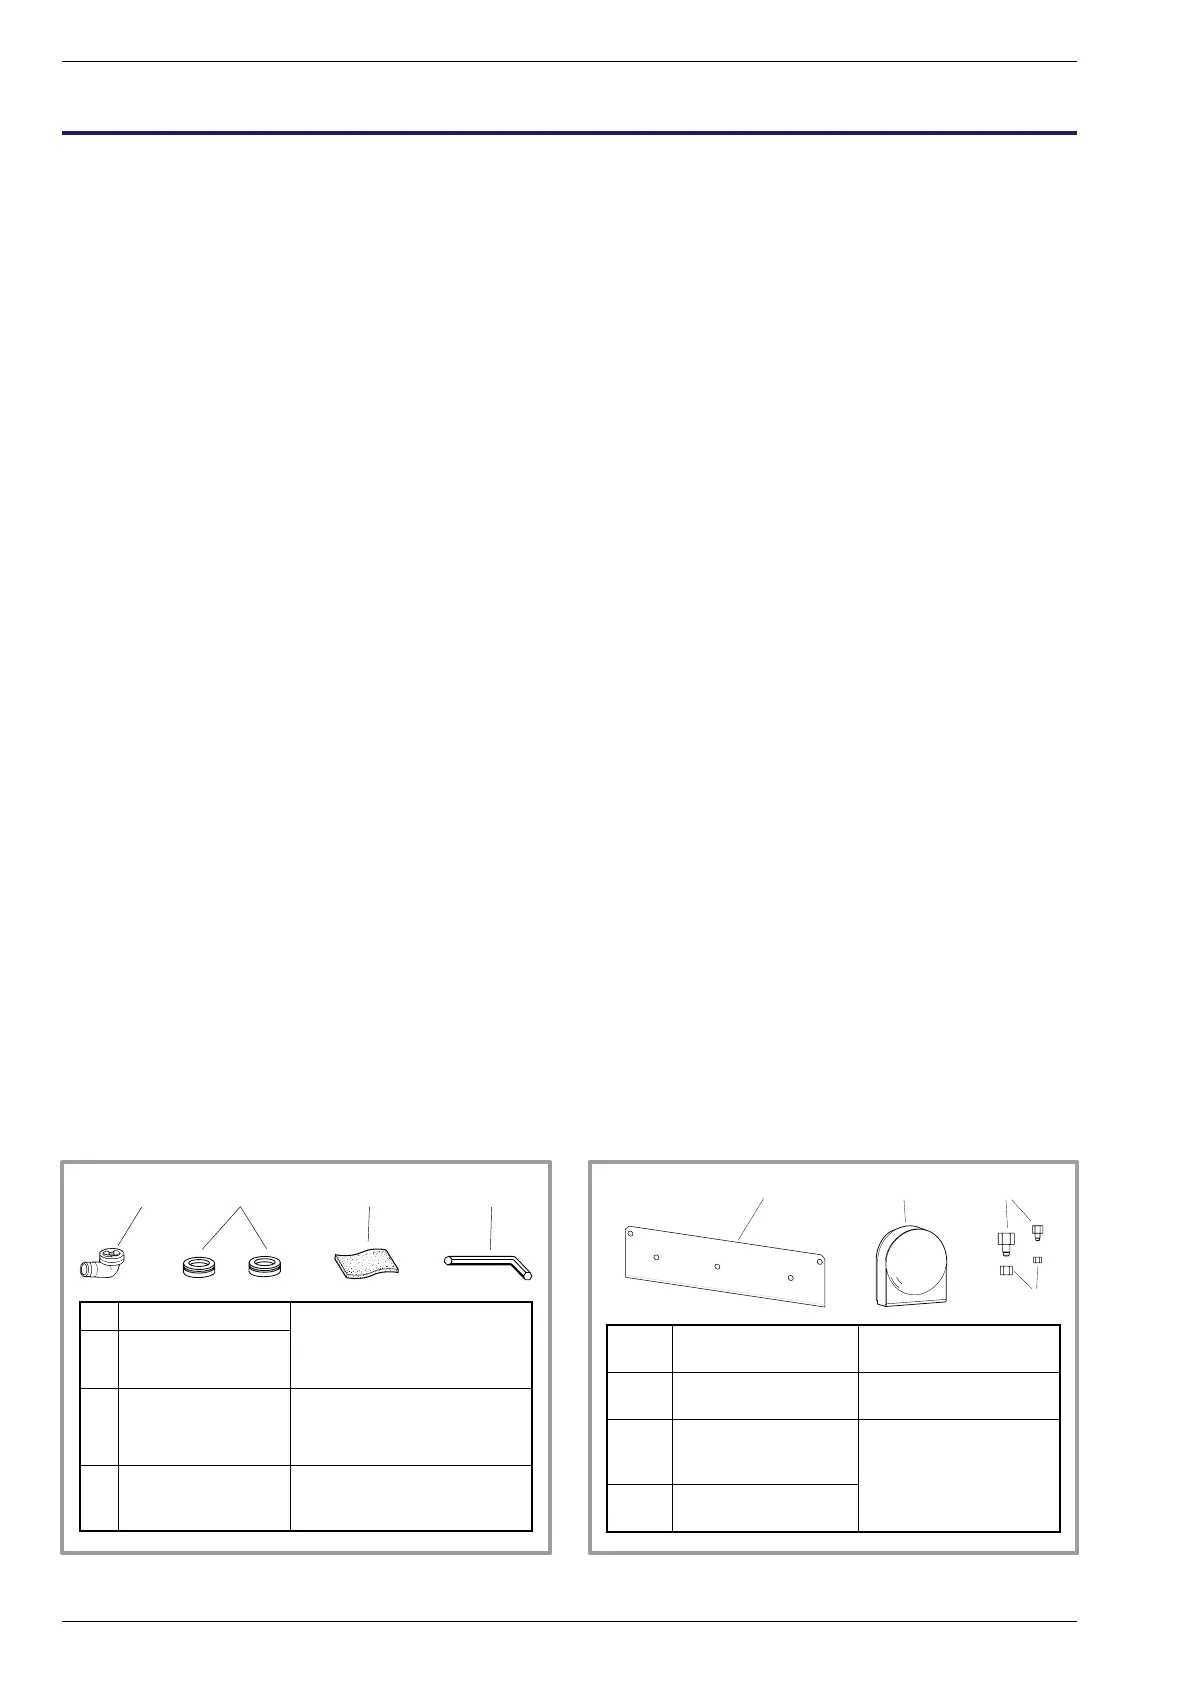
1
3
2
4
1 Elbow
For draining away the
condensates.
2
Plug (x2)
3
Flexible insulation
plate
For lling the empty
space at the input to the
interconnection cable.
4 Hex / Allen key To open the valves.
gure 10 - Accessories provided with the outdoor unit
5 Bracket
To secure the
hydraulic unit.
6 Outdoor sensor
To monitor the
outdoor temp.
7
Adapter
1/2" - 5/8" and/or
1/4" - 3/8"
To connect the ared
connection and the
hydraulic unit.
8
Nut 1/2"
and/or 1/4"
gure 11 - Accessories provided with the hydraulic unit
Installation and operation manual "1397 - EN"
Heat pump split single service alféa Evolution
- 12 -