SmartROC T45-10 4 Operation
43
5.
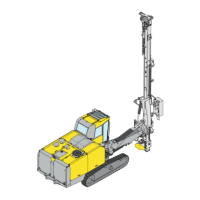
Positiontherigandboomuntilthepositioningiscorrectforthefirsthole.
è
Whenthetrammingandpositioningleversareused,themenuchangestothe
Navigationmenu.Thebarsinthemenuturngreenwhenpositioningiscorrect.
6.
Releasethesemiautopositioningbutton .
7.
SetuptherigaccordingtoinstructionsinMachinePositioning.
8.
Setthemodeselectortodrillmode .
è
ThemenuchangestotheDrillingmenu.
9.
Settheholedepthcountertozero .
è
HolelengthandtargetvaluesfromthedrillplanarepresentedintheDrilling
menu.
10.
Drillthefirsthole.
è
Thedrillingstopswhenthetargetisreached.
SavingDrillPlan
Thedrillplanmustbesavedafterdrilling.
Condition
p
AUSBstickisintheUSBport.
1.
SelectDrillplanunderDataSaveintheDatamenuandpressEntertoconfirm.
2.
SelectCopyLogsToUSB.
è
ThedrillplanissavedtotheUSBstick.
AddingaHoleinaDrillPlan
1.
Positionthedrillbitintheintendedlocationofthehole.
2.
GototheDrillplanmenu.
3.
SelectAddholeandpressEnter.
4.
ConfirmthenewholebyselectingAddholeiftheinformationfortheholeiscorrect.
DeletingaHoleinaDrillPlan
1.
GototheDrillplanmenu.
2.
Selecttheholetodelete.
3.
SelectDeleteholeandpressEnter.
 Loading...