- 52 -
OPERATIONS OVERVIEW General
• When no button is pressed the display will return
to its default mode - normal time display.
• When setting the time, holding the buttons (2) or
(3) pressed, the time will change more rapidly.
• With this mini-clock you can set and activate three
pre-set times. Each pre-set time is deactivated
after the set heating period has ended. It has to be
activated again for each new heating action.
Settings
Commisioning
• After connecting the power all symbols in the
display will blink. Now the actual time has to be
set before the heater can be operated.
• Press button (1); time blinks. Set time with
buttons (2) or (3).
• Press button (1); time is displayed, colon blinks.
Setting the time
• Press button (1) longer then 3 sec.; time blinks.
Set with buttons (2) or (3). Briefly press button
(1); time is displayed, colon blinks.
Setting heating period
• Press button (1) longer then 3 sec.; time blinks.
Wait till the display indicates "setting heating
period"; heating symbol and time blink. Set
heating period (10 to 120 min) using button (2) or
(3). Press button (1); time is displayed, colon
blinks.
Setting pre-settings
• By pressing button (1) once, twice or three times
you will select pre-set time 1, 2 or 3.
• The display shows e.g. pre-set time 1 and symbol
1. Set the pre-set period with buttons (2) or (3).
• With button (4) you can activate or deactivate the
pre-set period. When activated the symbol "ON"
appears and the symbol "1, 2 or 3".
Operation
Switching ON the heater
• Press button (4). The heating period lasts
..minutes. The display shows: remaining heating
time and symbol 7.
Switching OFF the heater
• Press button (4). The heater will run idle for about
3 minutes. The display shows: actual time.
Continuous operation
• Press and hold button (3), then press button (4);
now the heater will be operating till button (4)
(heater off) is pressed.
Activating/ deactivating pre-set time
• Select pre-set time 1, 2 or 3 by pressing button (1).
• Activate the selected time by pressing button (4).
• The display shows: symbol "ON" as well as the
selected pre-set time, "1, 2 or 3".
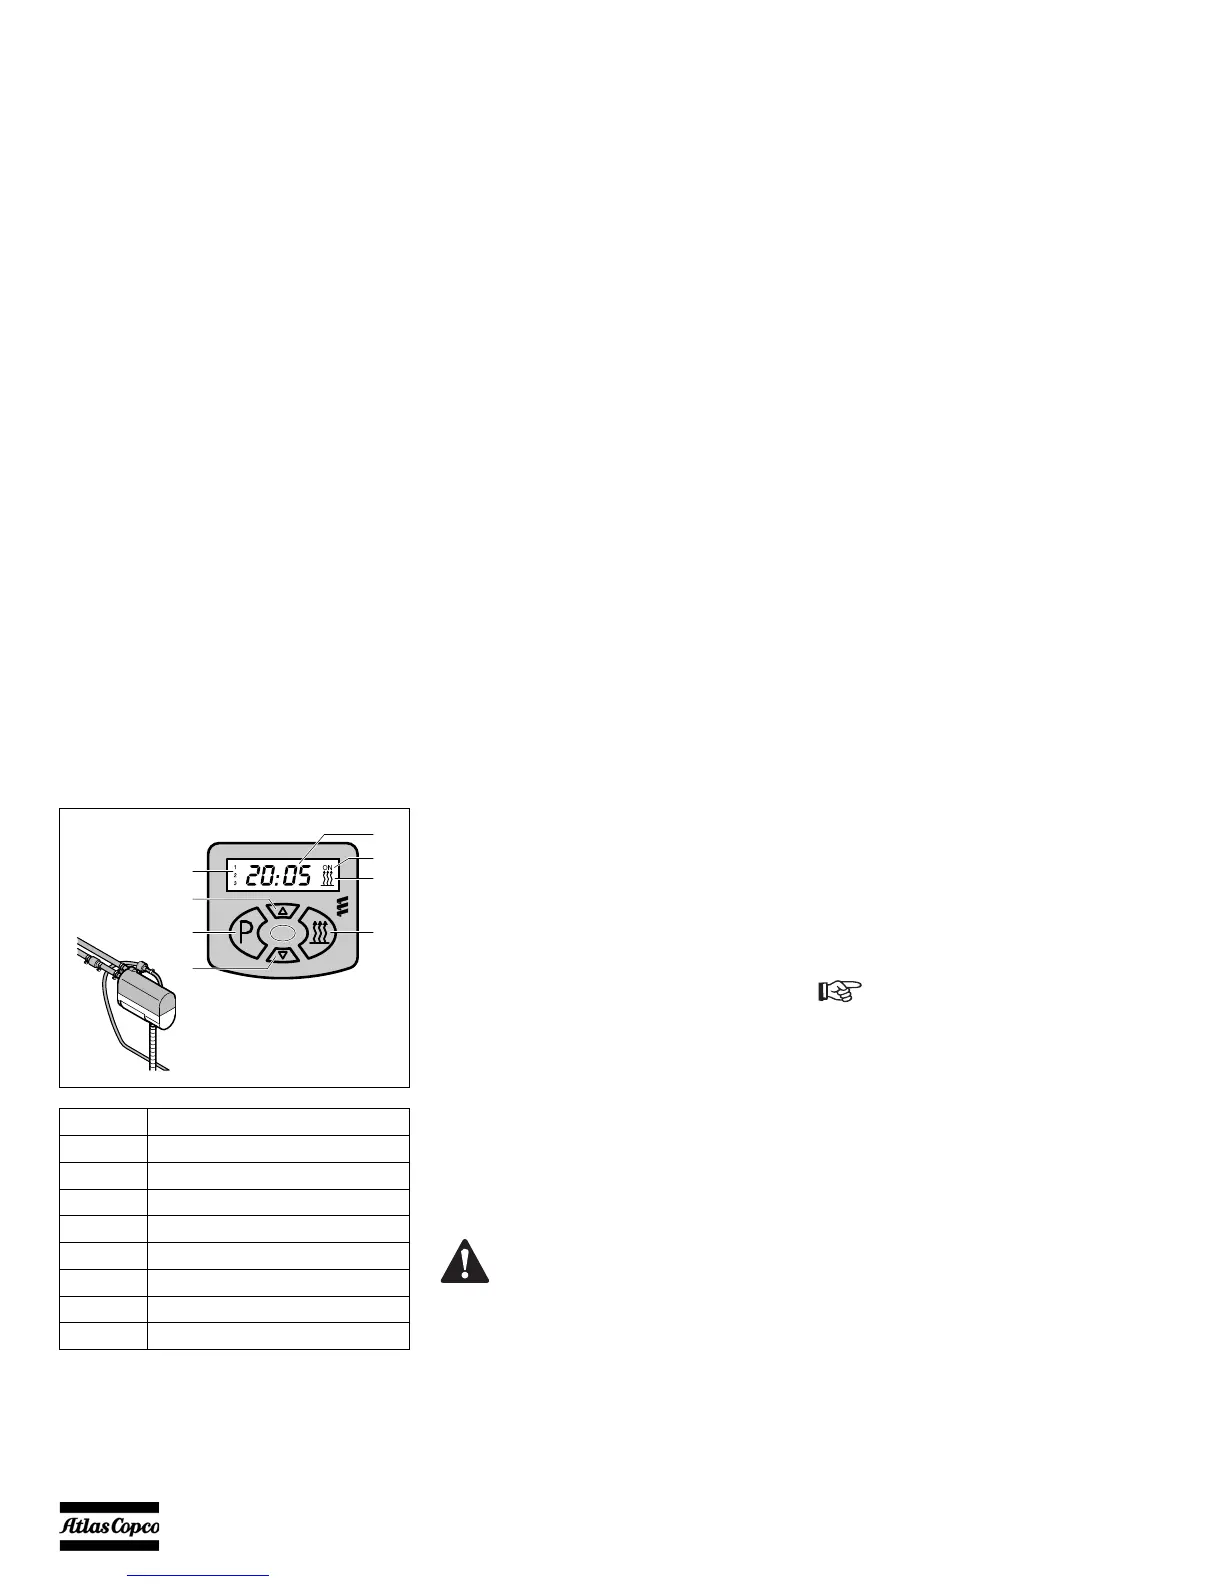
Reference Name
1 Button Mode
2 Button Time down
3 Button Time up
4 Button ON/OFF select pre-set time
5 Time, pre-set time and heating time
6 Symbol pre-set time is active
7 Symbol heating ON
8 Symbol pre-set time 1,2 or 3
 Loading...