Do you have a question about the Atomos Ninja Blade and is the answer not in the manual?
Safe usage guidelines for batteries, chargers, and power supplies.
Precautions for secure mounting, avoiding trip hazards, and general safe usage.
Essential precautions for handling spinning disks and SSDs to prevent damage.
Explanation of icons and text conventions used throughout the manual.
Details of the hardware warranty, exclusions, and upgrade process.
Legal terms governing the use of ATOMOS software with the Ninja Blade.
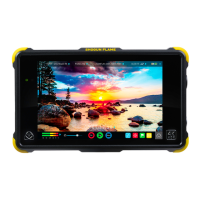
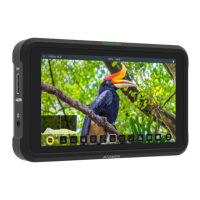
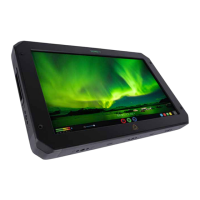
Introduction to the Ninja Blade's features, workflow integration, and storage.
How to obtain software updates and register the product for warranty.
A comprehensive list of items found in the Ninja Blade box.
Guidance on selecting compatible hard drives and SSDs for the device.
Information on choosing between HDDs and SSDs, and their suitability.
Handling precautions for drives to prevent data loss or damage from impacts.
Strategies for backing up recorded footage and long-term storage.
Notes on HDMI cable usage, potential hazards, and handling.
Guidance on selecting a standard 1/4" camcorder mount.
Step-by-step guide to installing a disk drive into the Master Caddy.
Critical warnings about static discharge affecting disk drives.
Proper care, charging, and safety for Ninja Blade batteries.
How to insert, remove, and utilize the primary and secondary battery slots.
Explanation of the device's ability to swap batteries without interruption.
Instructions for powering the Ninja Blade on and off safely.
Details on HDMI, LANC, and Audio connections for video and audio.
Location and method for inserting the Master Caddy.
Information on the 1/4" screw mounts for camera rigs.
Overview of the device's modular design and potential add-ons.
Guide to the home screen elements and displayed data.
Details on adjustable settings like video format, quality, and time.
Overview of icons for features like waveform and focus assist.
Explanation of the primary REC, PLAY, and MENU icons.
How to start, stop, and monitor recordings using the REC button.
Accessing and playing back recorded footage via the PLAY button.
How to navigate and use the device's menu system.
Understanding the file naming structure for recorded clips.
Setting scene, shot, and take numbers for file naming.
Adjusting system date, time, and timecode configurations.
Customizing screen brightness and enabling screen lock.
Viewing device info, powering off, and home screen indicators.
Choosing between ProRes and Avid DNxHD codecs.
Checking battery levels and understanding the battery indicator.
Guide to formatting HDDs/SSDs for optimal performance with the Ninja Blade.
Setting a custom unit name for file naming purposes.
How to read the indicator for remaining recording time.
How the device manages power between multiple batteries.
Selecting and adjusting analogue and digital audio sources.
How audio channels are output during playback mode.
Steps to connect, verify signal, and prepare for recording.
Essential checks before starting a recording session.
Matching internal camera format with Ninja Blade recording settings.
Methods to start and stop recording via touch, LANC, or camera triggers.
Using camera signals to automatically trigger Ninja Blade recording.
Configuring timecode triggers for synchronized recording with cameras.
Overview of the Waveform Monitoring feature and its benefits.
Explanation of icons and data displayed in the Waveform Monitor.
How waveform monitoring aids in camera matching and color correction.
Detailed explanation of Luma Overlay, RGB Parade, and Vectorscope displays.
Utilizing Vectorscope Zoom for detailed color analysis.
Adjusting waveform size, dynamic range, and transparency.
Introduction to Peaking, False Colour, Zebra, and Blue Only Exposure.
The device's capabilities as a high-quality field monitor.
How to access and enable the Monitor Assist tools from the home screen.
How to use Focus Assist for sharp focus and False Colour for exposure.
Reference scale for interpreting False Colour and IRE values.
Using Blue Only to assess noise and overall exposure quality.
Overlays for framing, titles, and aspect ratio adjustments.
Customizing Focus Assist modes and Zebra threshold values.
Marking clips as Favorite or Reject for streamlined editing.
Applying tags to clips during playback review.
How to clear Favorite or Reject tags from clips.
Process for exporting XML files containing clip metadata and tags.
How unit, scene, shot, and take numbers organize recorded files.
How the device mitigates data loss from disk interruptions.
Steps for recovering interrupted recordings or corrupted files.
Overview of Timecode modes (HDMI, Time of Day, Record Run, Auto Restart).
Using HDMI timecode for camera record control.
How pulldown is used to convert frame rates for different broadcast standards.
Manual methods for detecting and removing 3:2 pulldown for 24p footage.
Automatic handling of 2:2 pulldown for 25p, 29.97p, and 30p footage.
Overview of playback capabilities and using the Ninja Blade as an HD deck.
How files are structured and accessed on different disk formats.
Using the scrub bar and basic controls like Play/Pause, Frame Forward/Backward.
Moving between previous and next clips during playback.
Setting In/Out points to loop specific sections of footage.
How interlaced footage is displayed and its use in determining progressive content.
Linking the Master Caddy Docking Station for file access.
List of compatible editing software for ProRes and DNxHD.
Benefits and compatibility of the exFAT file system.
Methods for copying recorded footage to a computer.
Detailed instructions for importing Ninja Blade footage into FCP.
How to import XML files with Favorite/Reject tags into FCP X.
Using AC adapter and D-Tap for powering the Ninja Blade.
How converters enhance functionality with additional inputs/outputs.
Procedure for downloading and installing AtomOS firmware updates.
Steps to resolve issues and recover from failed firmware updates.
Details on main unit, dimensions, construction, power, and battery systems.
Specifications for video/audio interfaces, input/output, and supported formats.
Requirements for storage media and drive handling recommendations.
| Display resolution | 1280 x 720 pixels |
|---|---|
| Aspect ratio | 16:9 |
| Product color | Black |
| Playback resolutions supported | HD 1080i60, 1080i59.94, 1080i50, 1080p30, 1080p25, 1080p24, 1080p23.98, \\r (In/Out)\\r 1080pSF23.98, 1080pSF24, 1080pSF25, 1080pSF30, 720p60, 720p59.94, \\r 720p50, SD 480i, 576i |
| BNC input ports | 1 |
| HDMI ports quantity | 4 |
| HDD size | 2.5 \ |
| HDD interface | Serial ATA |
| Power consumption (standby) | 3.3 W |
| Power consumption (typical) | 6.8 W |
| Bundled software | FCPX/FCP7+ / Media Composer 5.0+ / Premiere 5.5+/ EDIUS 6.0+ / Vegas Pro 10+ / Lightworks |
| Weight | 595 g |
|---|---|
| Dimensions (WxDxH) | 140 x 87 x 41 mm |