Atomos Ninja Blade – User Manual Edition 1: Feb 2014 6
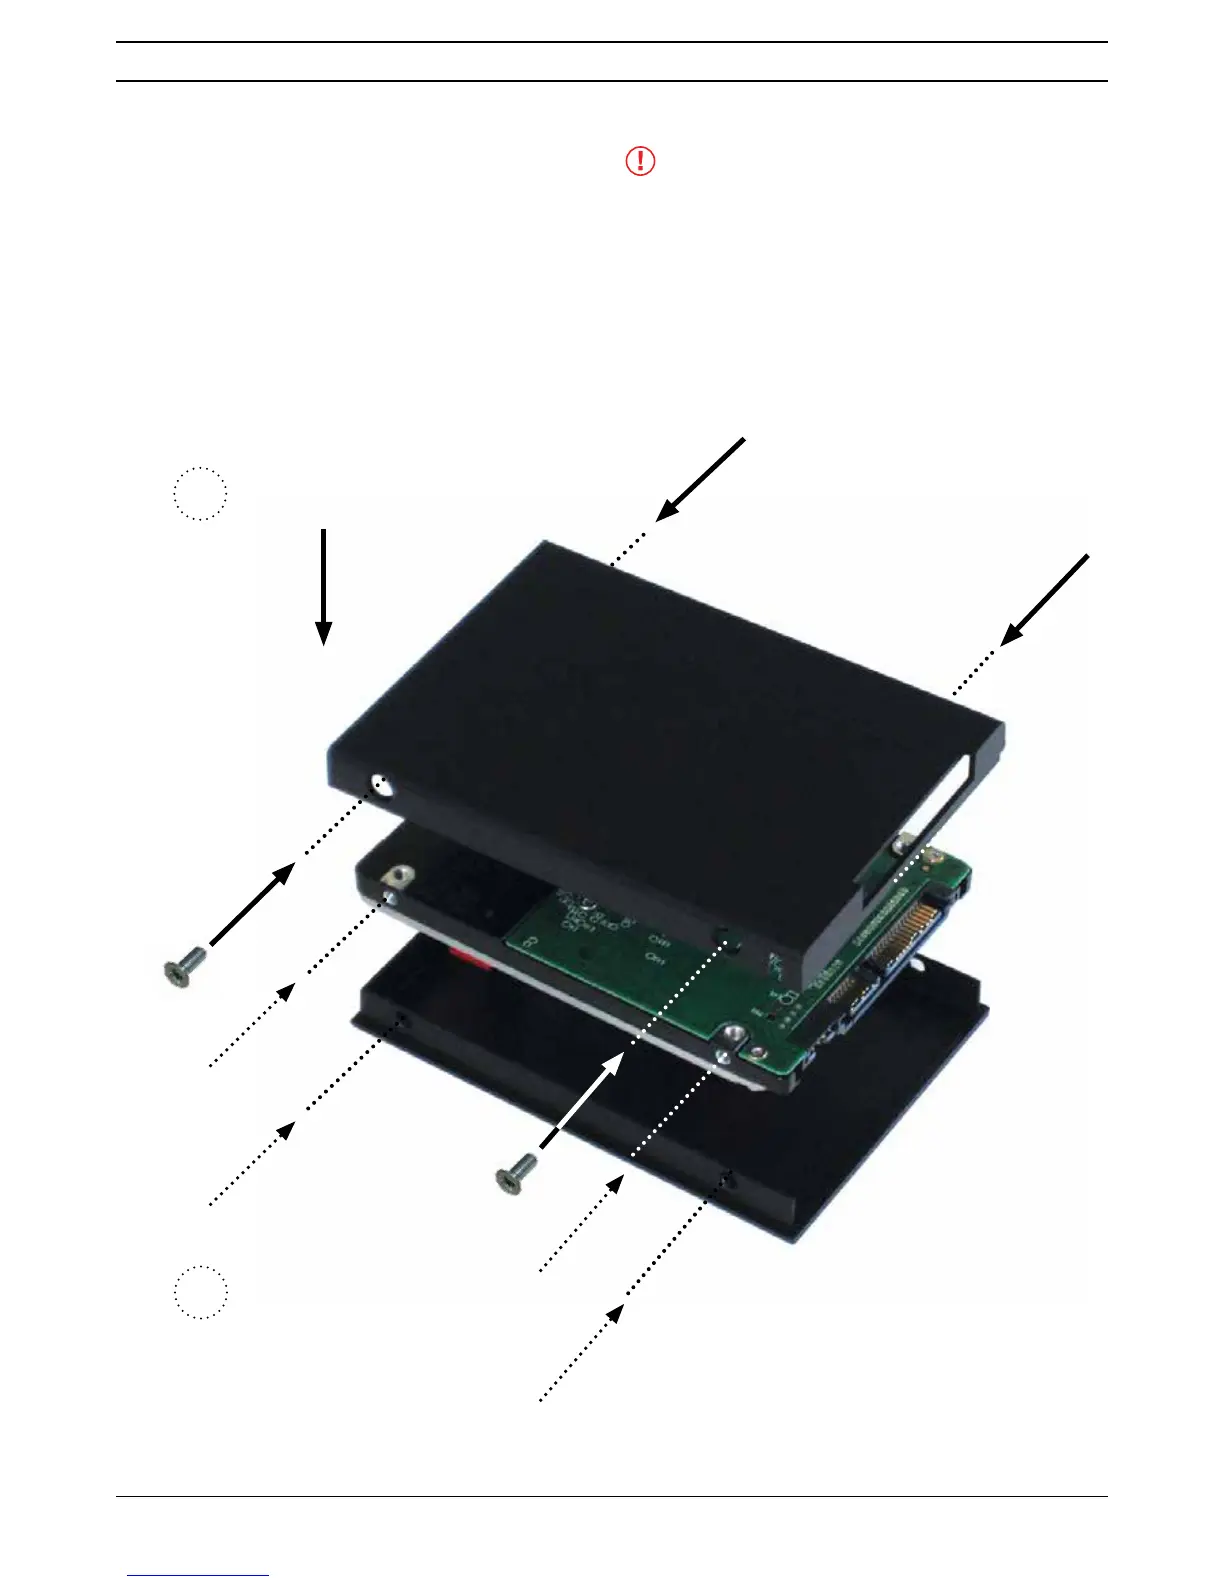
Mounting drives in the Master Caddy
This is simplicity itself. Just insert the disk into the caddy, and secure with
four screws. The caddy is light and the disk just needs to be held securely.
'RQ·WRYHUWLJKWHQWKHVFUHZV7KHUHDUHQRFRQQHFWLRQVWRPDNHEHFDXVH
pushing the caddy into the Ninja Blade or the Docking station makes all
the connections for you.
7KH0DVWHU&DGG\FDQ·WEHLQVHUWHGWKHZURQJZD\URXQG$OZD\VPDNH
sure that the disk connector faces the slot in the Ninja Blade. You have
WREHTXLWHÀUPWRSXVKWKH0DVWHU&DGG\LQWRSODFHEXWGRQ·WSXVKWRR
KDUGMXVWLQFDVHVRPHWKLQJLVQ·WVHWXSRUDOLJQHGSURSHUO\7KHUHLVYHU\
little that can cause problems and the most likely thing is that the Master
&DGG\LVQ·WSURSHUO\ÁXVKZLWKWKHGULYHLQVLGH$TXLFNYLVXDOFKHFNZLOO
FRQÀUPWKLV
Spinning disks and SSDs are very sensitive to damage from static
electricity. Please observe all the usual precautions when handling
them, especially DO NOT EVER touch the exposed SATA connector
as static electricity may be harmful to your disk.
3. Mounting disks in the Master Caddy
1
2
Carefully assemble the
Master Caddy and disk
Ensure all 3 parts aligned
and insert 4 x screws (supplied)
Do not over-tighten screws or
alignment can not be guaranteed.
:HVXJJHVWVTXHH]LQJWKHFRUQHUV
together near the screw you are
WLJKWHQLQJIRURSWLPDOÀW
Insert screw
Align all parts
Insert screw