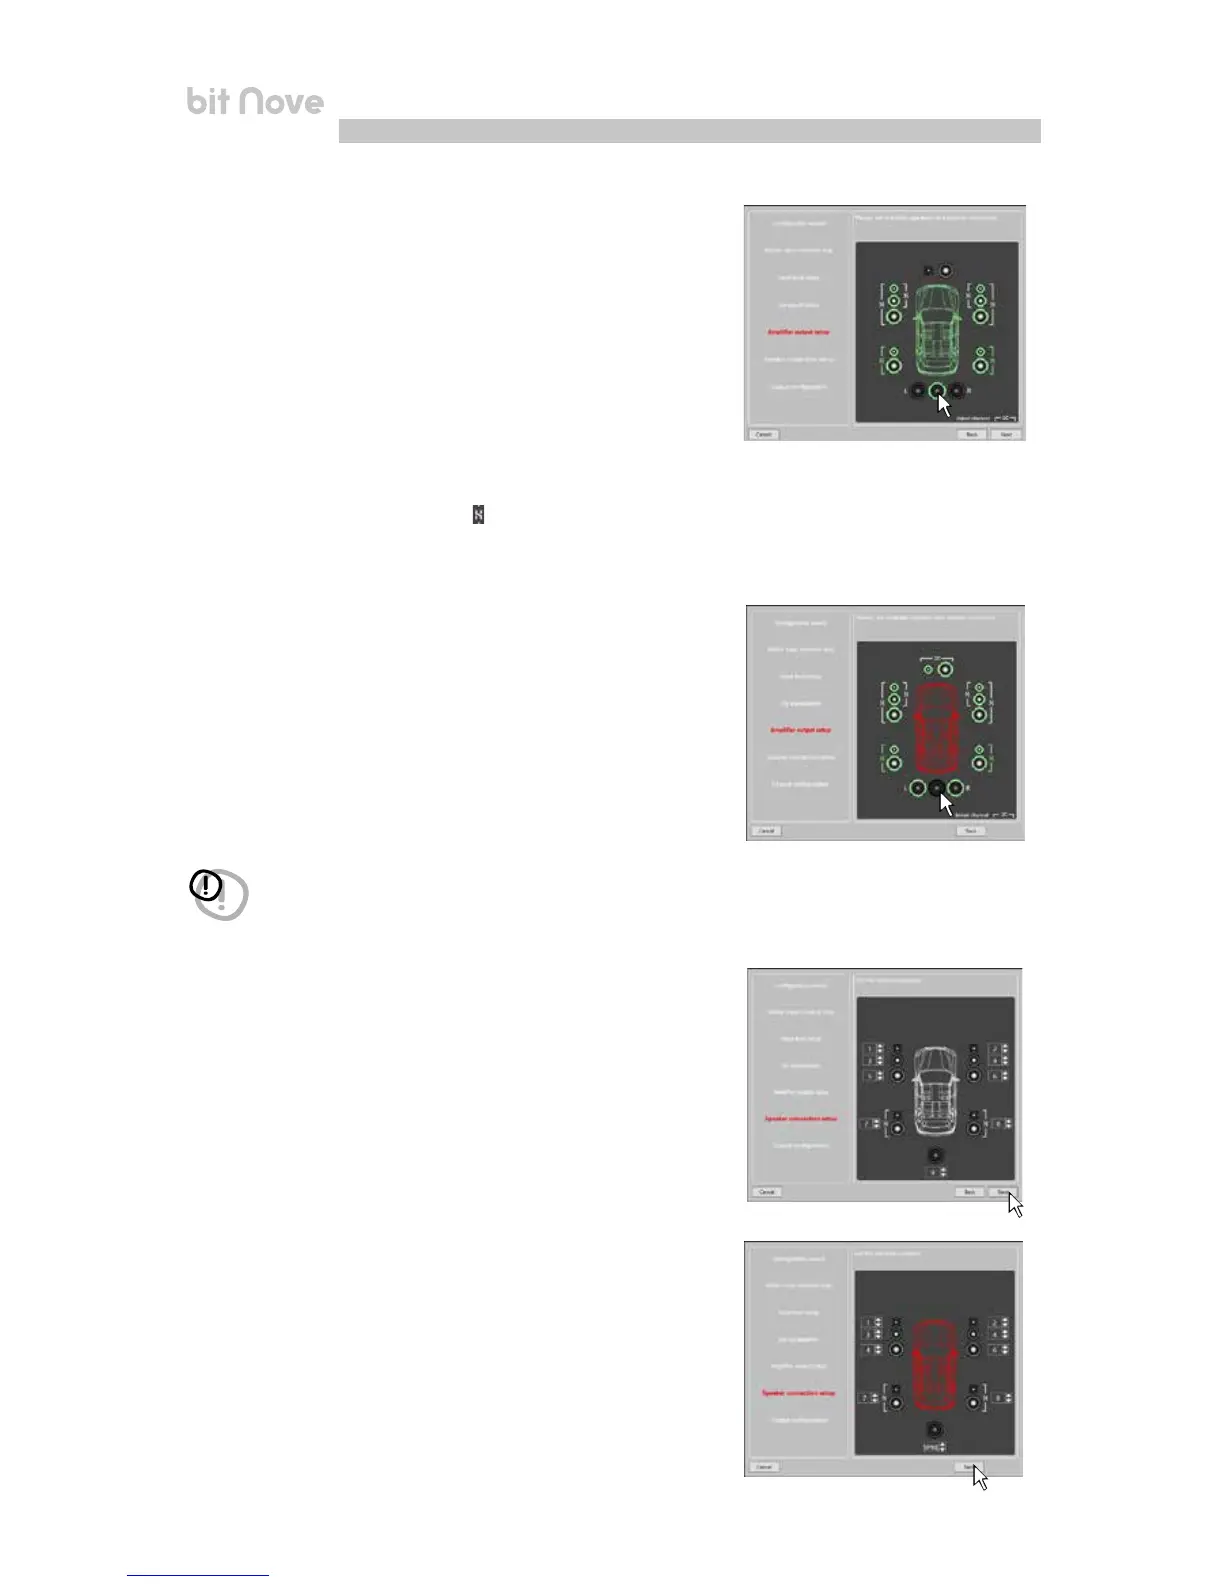
8. Speaker Connection Setup
The speakers in the system can be activated
by simply clicking on them.
The software assumes that if the Left tweeter, midrange or
woofer are selected, the Right ones are also activated.
Once the software is started, this choice will affect
the crossover type and frequencies with Default settings.
If passive crossover filters are not used, each speaker
corresponds to an output channel.
If the sum of the crossovers and/or speakers exceeds
the occupation of 8 PRE output channels, the software will not
allow you to proceed with the next operation. Check the crossovers
configuration again or, using BACK, the speakers setup.
WARNING: one coaxial speaker is considered a as
Tweeter + Woofer + 2 way passive crossover.
Selection of passive crossovers for groups of speakers
The presence of passive crossovers managing functional speaker
groups can be indicated.
E.g.: if the audio system features passive crossovers, the software will
ask you to set them by clicking on
, otherwise press NEXT.
A 2 or 3 way passive crossover occupies a single output channel.
9. Output Configurations
bit Nove features 9 output channels. In this specific step
of the procedure you can assign any signal to one
of the output channels.
E.g.: The 3 way front can be controlled as:
- multi amplified (6 output channels are needed);
- passive midrange + woofer amplified separately
(4 output channels are needed);
- 3 way passive (2 output channels are needed).
During the selection, the software will automatically notify that
the 9 output channel limit has been respected, the warning
message will disappear and the NEXT button will appear.
For convenience, if output 1 is assigned to the left Tweeter, the
software will automatically assign output 2 to the
right Tweeter. During the procedure, if the left midrange speakers
are also assigned to output 1, the software will display a warning
message. Simply change the assignment of one of the two
numbers in red and the software will automatically position it to
the first available channel.
Press BACK to return to the previous step.
Press NEXT to continue with the configuration.
Press CANCEL to exit the procedure.
7