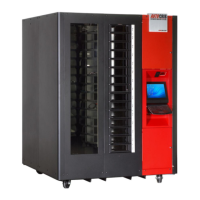
Commonly Performed Procedures – Hardware and Software
22 | P a g e
Commonly Performed Procedures
- Perform a Calibration Sequence. (This will be performed automatically every time the RoboCrib software is
restarted).
o Restart the RoboCrib software.
o Select “OK” when prompted to calibrate the machine
- Exiting RoboCrib software on the touch screen to access the Microsoft Windows desktop.
o Ensure the RoboCrib software is in the main login screen.
o Double click on the AutoCrib logo in the upper left portion of the screen.
Insert the Exit username and press “OK”
Insert the Exit password and press “OK”.
NOTE: If an Exit username and password has not been setup, go into the Tools > Security module of the
AutoCrib software and create a new user.
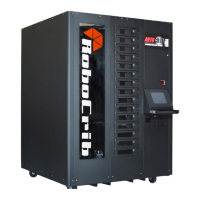
- Proper Loading Procedure
o Before installing the RoboCrib, use the test pies to select a proper bin size for the items.
o ITEMS MUST NOT PROTRUDE FROM BIN TRAY PERIMETERS! Therefore, if an item does not fit
easily into the bin, choose a large bin size.
o Print the “Reorders by RoboCrib” report which is found in the Standard Reports module within the
Purchasing report category.
o Create a purchase order and a tag for the RoboCrib.
o Print the “Inventory Input Sheet – RoboCrib” report which is found in the Standard Reports module within
the Purchasing report category.
o The proper bins will align to the door. The RoboCrib program will display the item and the bin it is
assigned to. Once the bin has been stocked, close the door. The RoboCrib program will display the next
item to be stocked and the bin it is assigned to. Continue this process until the stocking procedure has
been completed.
o The process may be cancelled at any time. The tag will still apply to all items that have not been stocked.
When ready to restart the stocking process, follow the same procedure as above. (The RoboCrib will
start with the next bin on the tag.)
o IMPORTANT: The stocking screen does not timeout. Therefore, make sure the main login screen is
present once the restocking procedure has been completed.
o DO NOT USE THE MANUAL SWITCHES TO RESTOCK!!!
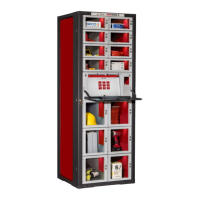
- Removing Walls
o The panels are keyed in a clockwise sequence beginning with the Bin Door panel.
o Exception: the Right Front Panel can be removed independently.
o To remove the screws from the panels, you must use a pin-in-hex 5/32 hex driver and a 7/16 socket
driver.
o Once the screws have been removed, lift the panels up to disengage the keys.
o To replace the panels, replace the right rear panel first and proceed counterclockwise.
o Make sure to set the bottom edge of each panel in the channel on the frame.
- Console Mode (Instructions on the use of the Console function can be found under Software Operations)