Avantik Cryostat QS11 / QS11UV
Avantik
36 Commerce St.
Springfield NJ 07081 / USA
387 779 - English
29
2-5-3 TRIMMING AND FIRST CUTS
After the specimen and the knife are adjusted,
further gradual feed for trimming can be
carried out using the function <trimming>. For
different sectioning series, deeper layers of the
specimen can be reached with the function
<trimming>.
The pre-selected trimming value is indicated
by a corresponding LED which then lights up.
To select another trimming value, press
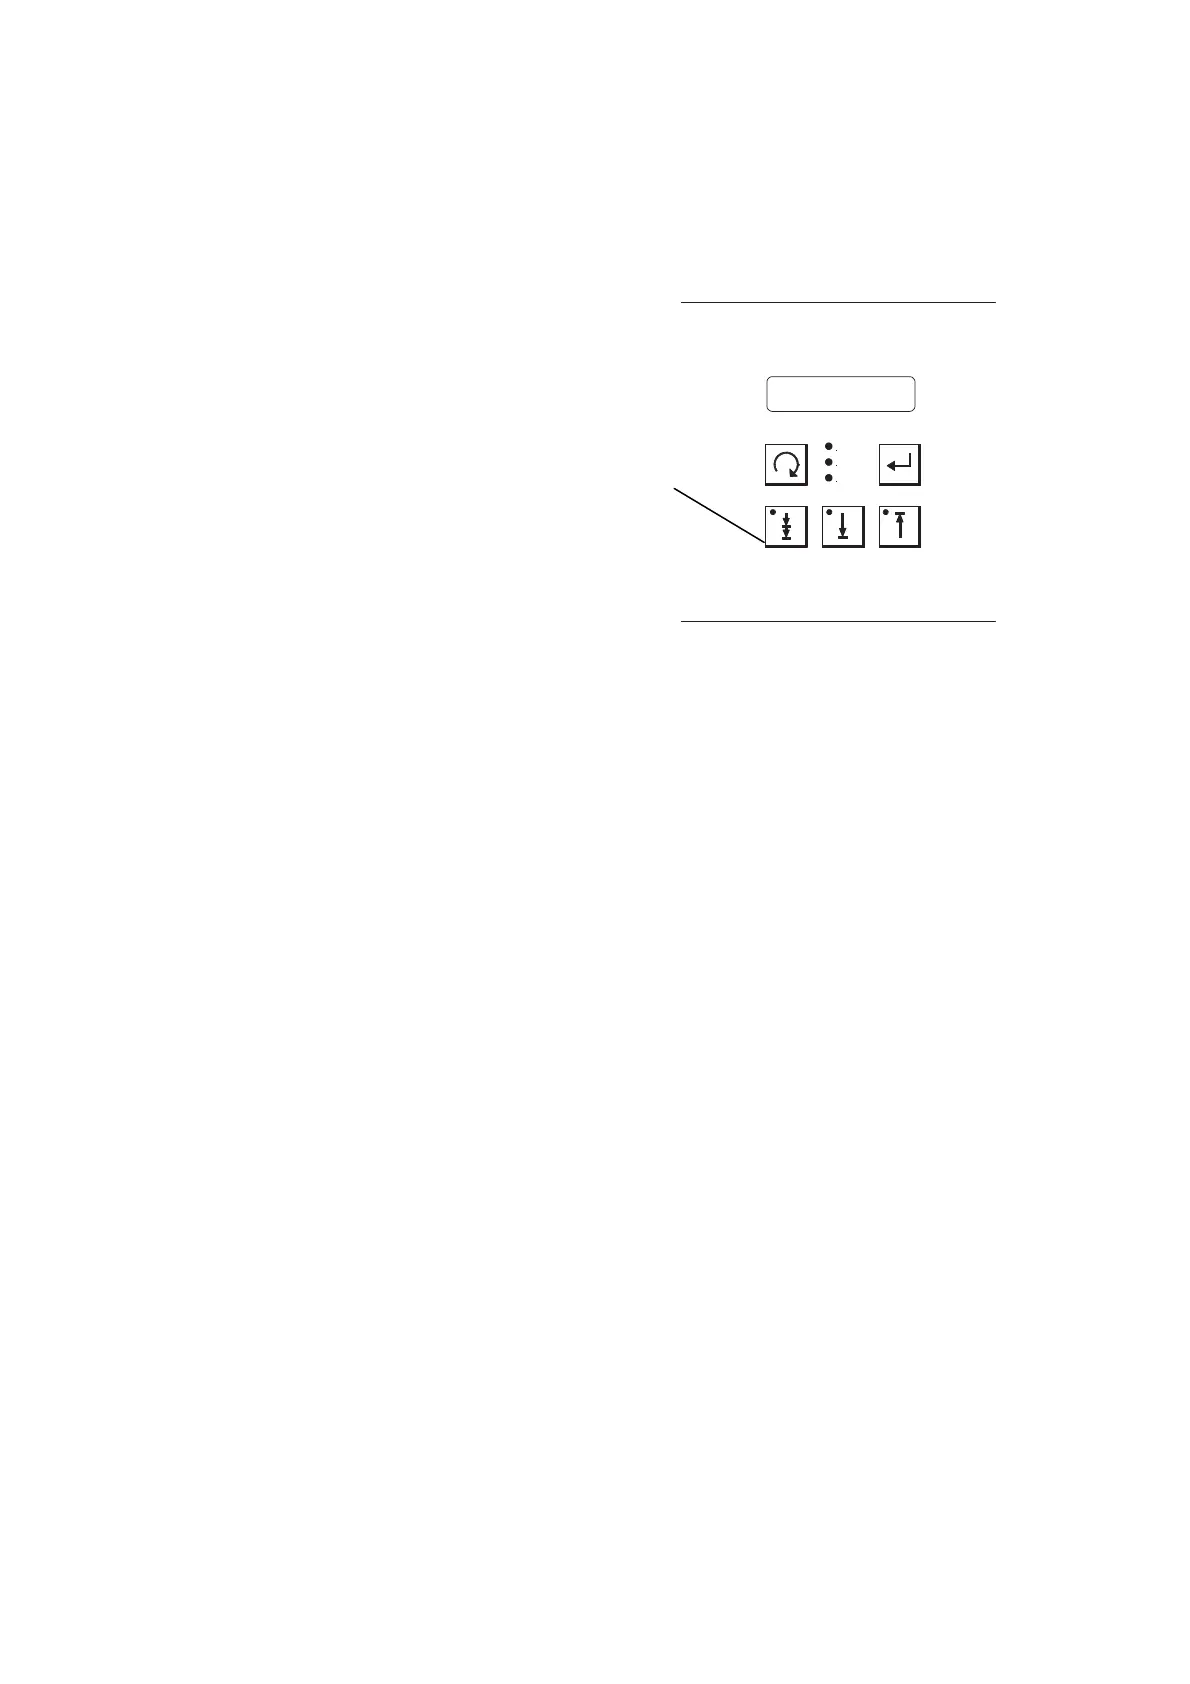
buttons (fig. 2.2 and 2.3).
Button (fig. 20.1) is used for trimming,
available as pulse or permanent function.
The <pulse function> is used when there is still
some distance between specimen and knife
edge.
Press the button (not longer than 2 sec.).
Whenever the button is pressed, the sp
ecimen
holde
r together with the specimen moves
forwards by the trimming value which was pre-
selected.
To select the <permanent function> press the
button for more than approx. 2 sec. Then the
yellow LED in this button lights up continuously
and permanent trimming is selected. In
addition, the yellow LED lights up to show that
the selected trimming value is activated. The
feed is carried out at each handwheel rotation
in the upper reversal point. Press the button
once more, to turn off the permanent trimming.
The yellow LED in this button goes off.
The yellow LED (fig. 20.1) also goes off.
However, the yellow LED lights up to indicate
that the function fine sectioning is activated.
The <permanent function> is used to get faster
to the desired sectioning level.
2-5
-4 FINE F
EED
After having adjusted knife and specimen as
well as having trimmed the specimen,
sectioning can be started.
Turn the handwheel continuously in one
direction to feed the specimen at the selected
section thickness.
The pre-selected section thickness is indicated
by the corresponding LED which then lights
up.
To select another section value, press button
(fig. 2.2).
Fig. 20
COUNT
SUM
TRAVEL
1