Avantik Cryostat QS11 / QS11UV
Avantik
36 Commerce St.
Springfield NJ 07081 / USA
387 779 - English
14
2 OPERATING INSTRUCTIONS
2-1 SETTING UP THE CRYOSTAT
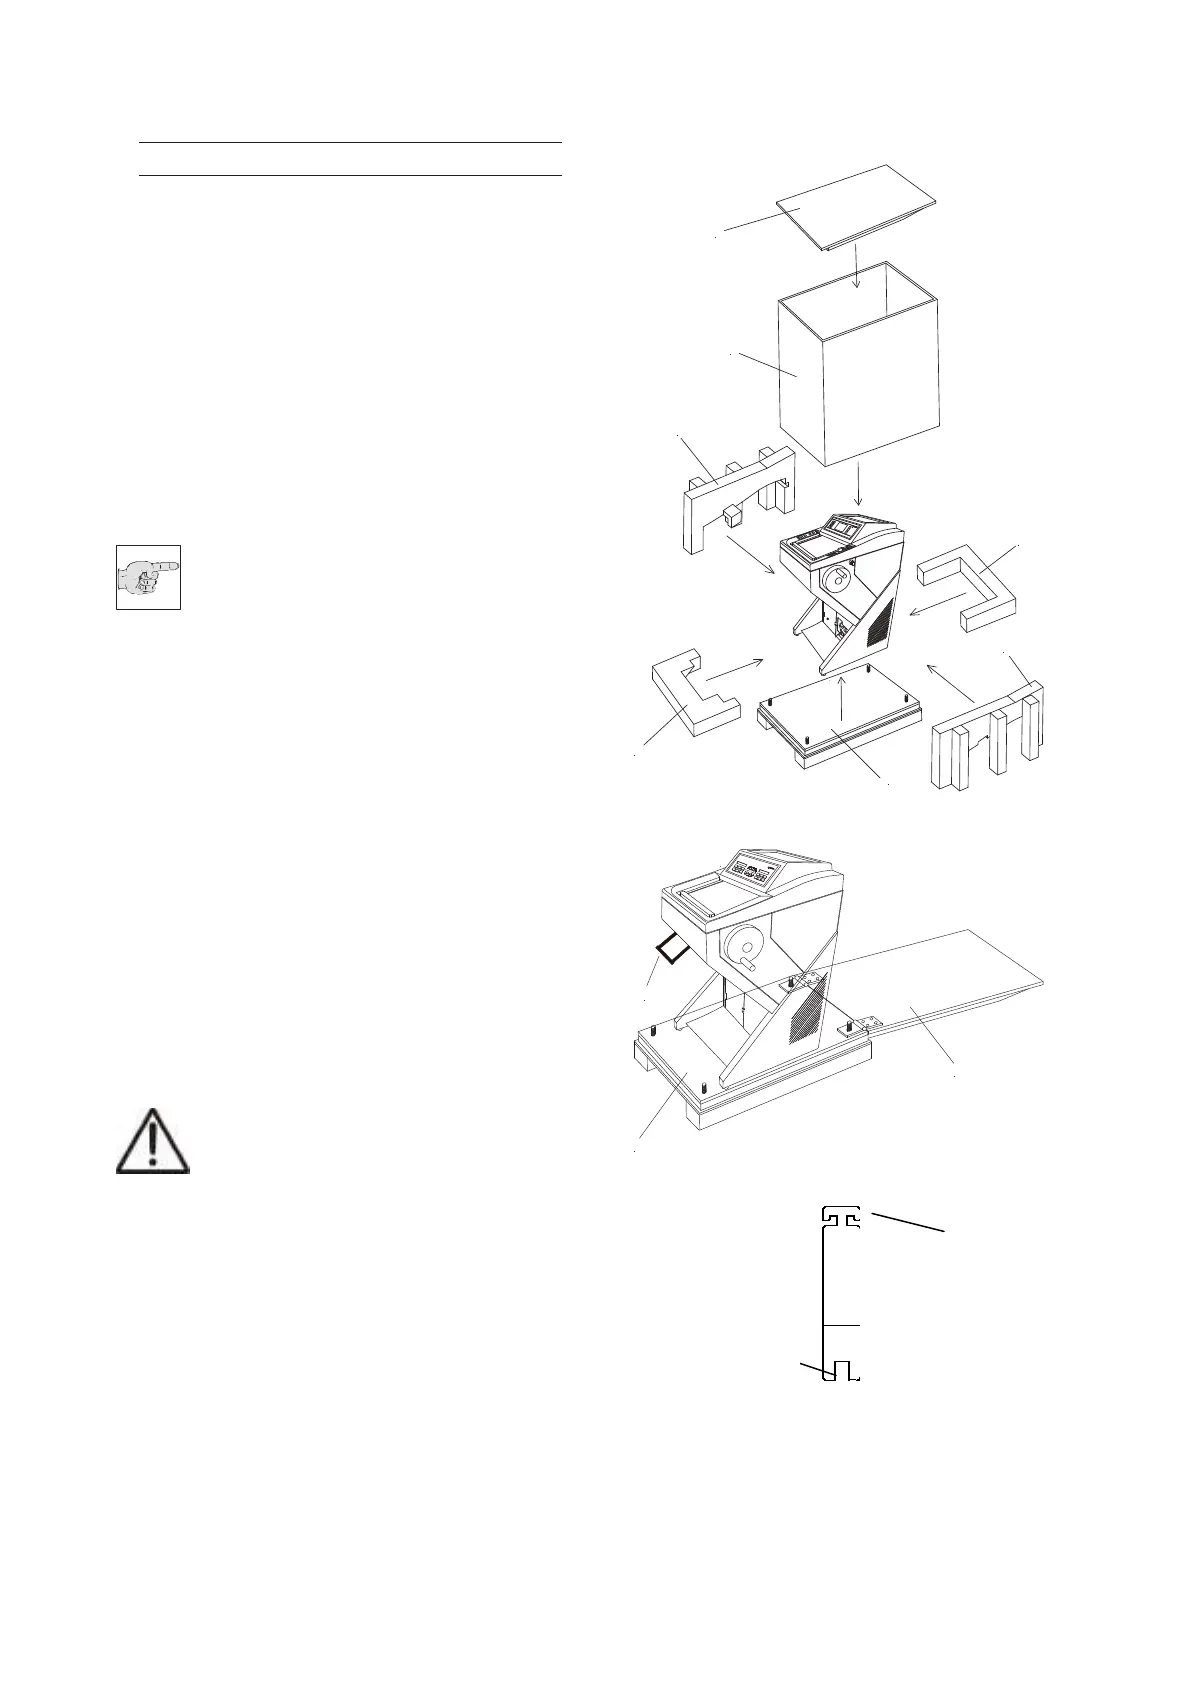
Unpacking the instrument:
• Cut through the three packing straps and
remove the packing.
• Remove the upper wooden cover (fig. 3.1).
• The hinges of the upper wooden cover are
secured with tape.
• Remove this tape.
• Lift the packing (fig. 3.2) over the instrument.
• Remove the upper and lower supporting
foams (fig. 3.3, 3.4, 3.5, 3.6) from the
cryostat.
Note:
The upper wooden cover now serves
as an incline (fig. 3a.1) on which the
cryostat can be moved from the palett
to the floor by using the handle (fig. 3a.2)
• The hinges of the upper wooden cover (fig.
3.1) are inserted into the screws of the
bottom plate (fig. 3a.3). The correct side for
this is marked with arrows.
• The tool (fig. 3b.2, size 30) for the height
adjustment of the setting feet of
the cryostat
is
packed together with the accessories of
the cryostat (separate carton on the foot rest
of the cryostat).
• Turn the setting feet completely upwards via
this tool so that the cryostat stands with its
rollers on the bottom plate (fig. 3a.3).
• Via the handle (fig. 3a.2) roll the cryostat
from the bottom plate (fig. 3a.3) over the
wooden cover (fig. 3a.1). In doing so, the
rear side of the instrument must show to the
incline (fig. 3a.1).
Caution:
The instrument is very heavy. While
the instrument rolls down on the
incline, it must be guaranteed that the
instrument does not move in an uncontrolled
way.
• Now the cryostat can be rolled to its site of
installation.
• For possible return shipments, please keep
the packing.
Fig. 3
Fig. 3a
Fig. 3b
H
M
5
5
0
M
V
D
3
0
1
2
1
2
3
6
5
4
7
1
3
H
M
5
2
0
2
1
2