Avantik Cryostat QS11 / QS11UV
Avantik
36 Commerce St.
Springfield NJ 07081 / USA
387 779 - English
58
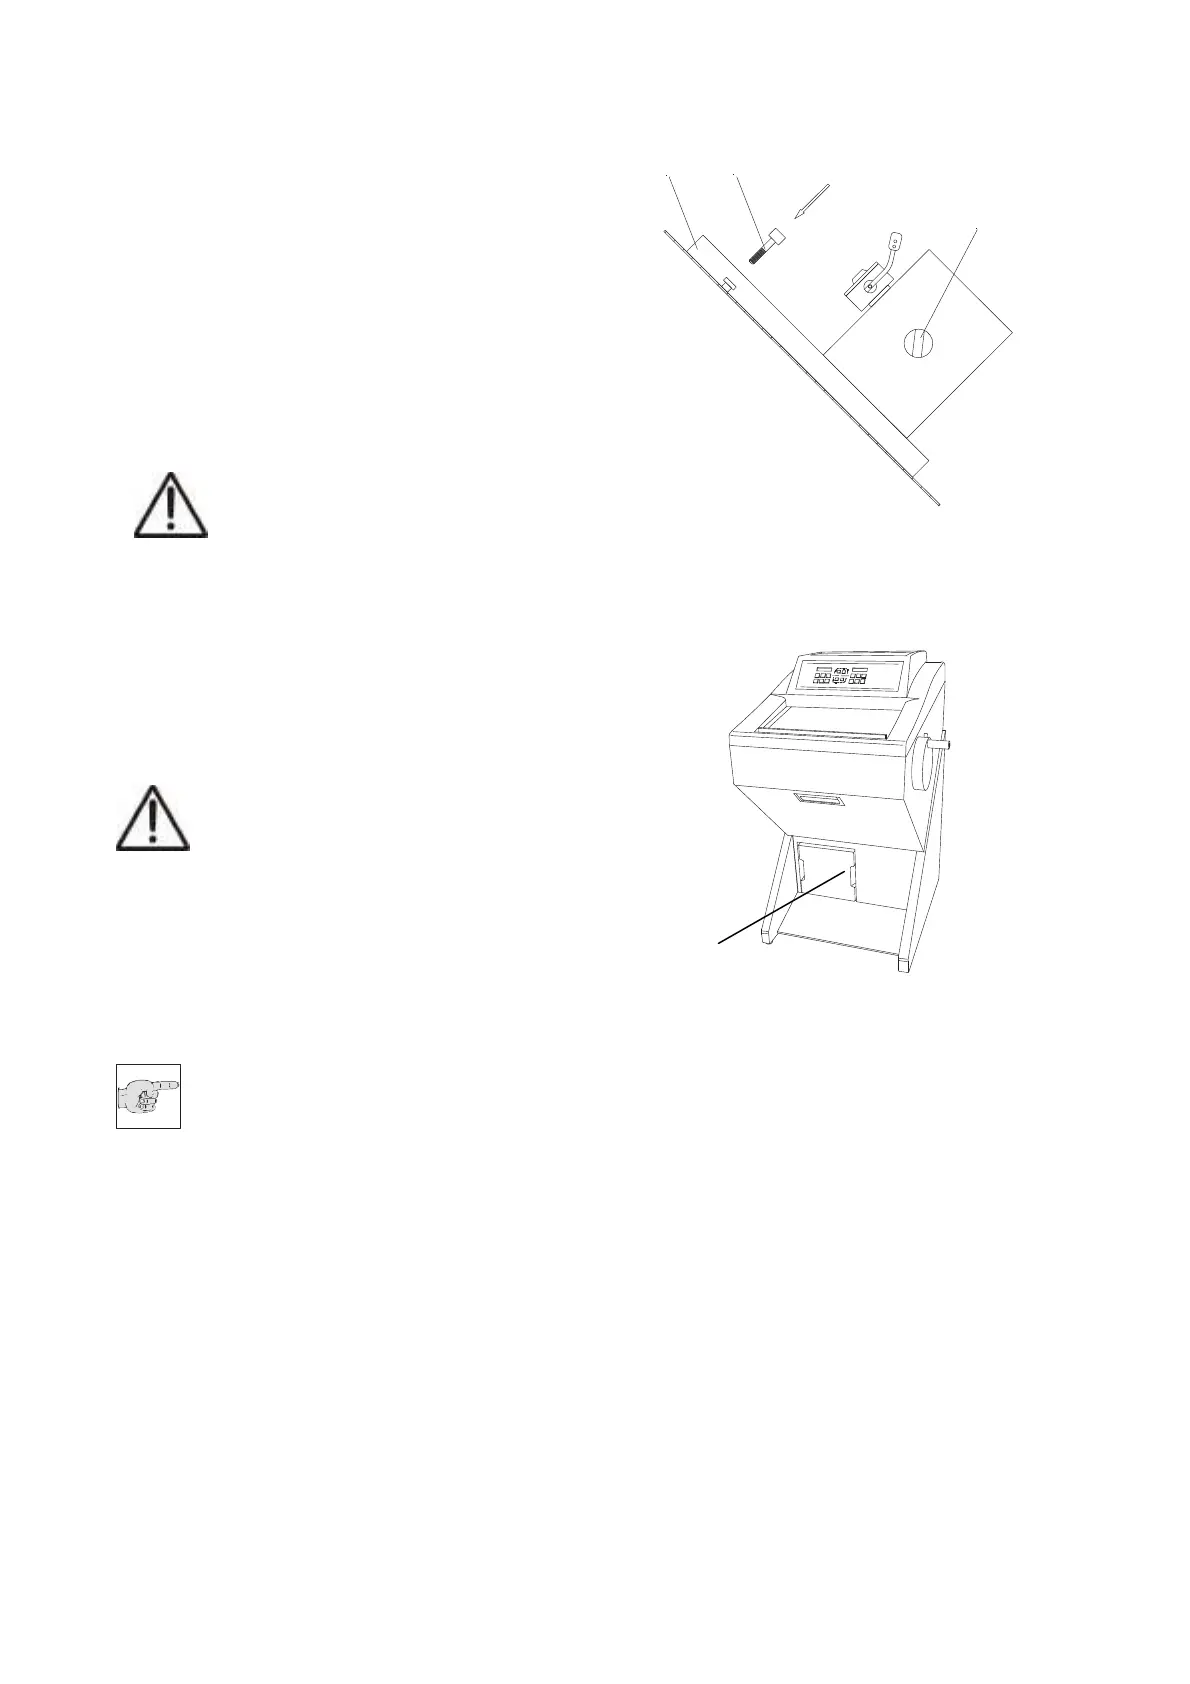
5-2 REMOVING THE MICROTOME
• In the left rear part of the microtome there is
the so-called connector housing including
one electrical connection.
• Bring the handwheel handle into its lower
position, i.e. the specimen clamping is also
in its lower position.
• Unscrew the Allan screw (fig. 25.1) in the
middle of the front part of the microtome
base plate via an Allen screwdriver size
5 mm.
Caution:
It is recommended for all further work
to wear isolating gloves because of
the danger of freezer burns on the frozen
microtome.
• Move the microtome to the left side until the
stop. This way, the clutch on the right side
of the microtome becomes free.
• Move the microt
ome forwards and remove
it
from the cryo-chamber.
• Thoroughly clean and wash the interior.
Caution:
Chloric cleaning agents must not be
used for cleaning purposes. In case of
a malfunction hazardous gases might
be generated together with the cooling brine
Tyfoxit of the cooling system.
• Pull off the red stopper at the bottom of the
chamber. The cleaning liquid is collected in
the container (fig. 26.1) with a volume of
4,8 l at the front lower side
Note:
Please observe the filling level!!
• The red stopper must be inserted after
cleaning as otherwise cold air leaks out
during cooling operation. Thus generating
frost built-up.
• The installation and re-setting up of the
instrument is carried out in reverse order.
Fig. 25
Fig. 26
3
1
2
1