35146AJ
19
Search – Search for a camera in the Camera List.
Delete or Disable [x] – Deleting a camera will remove the camera and
all associated video from the recorder. To remove the camera but keep
the video, select Mark as Disabled instead.
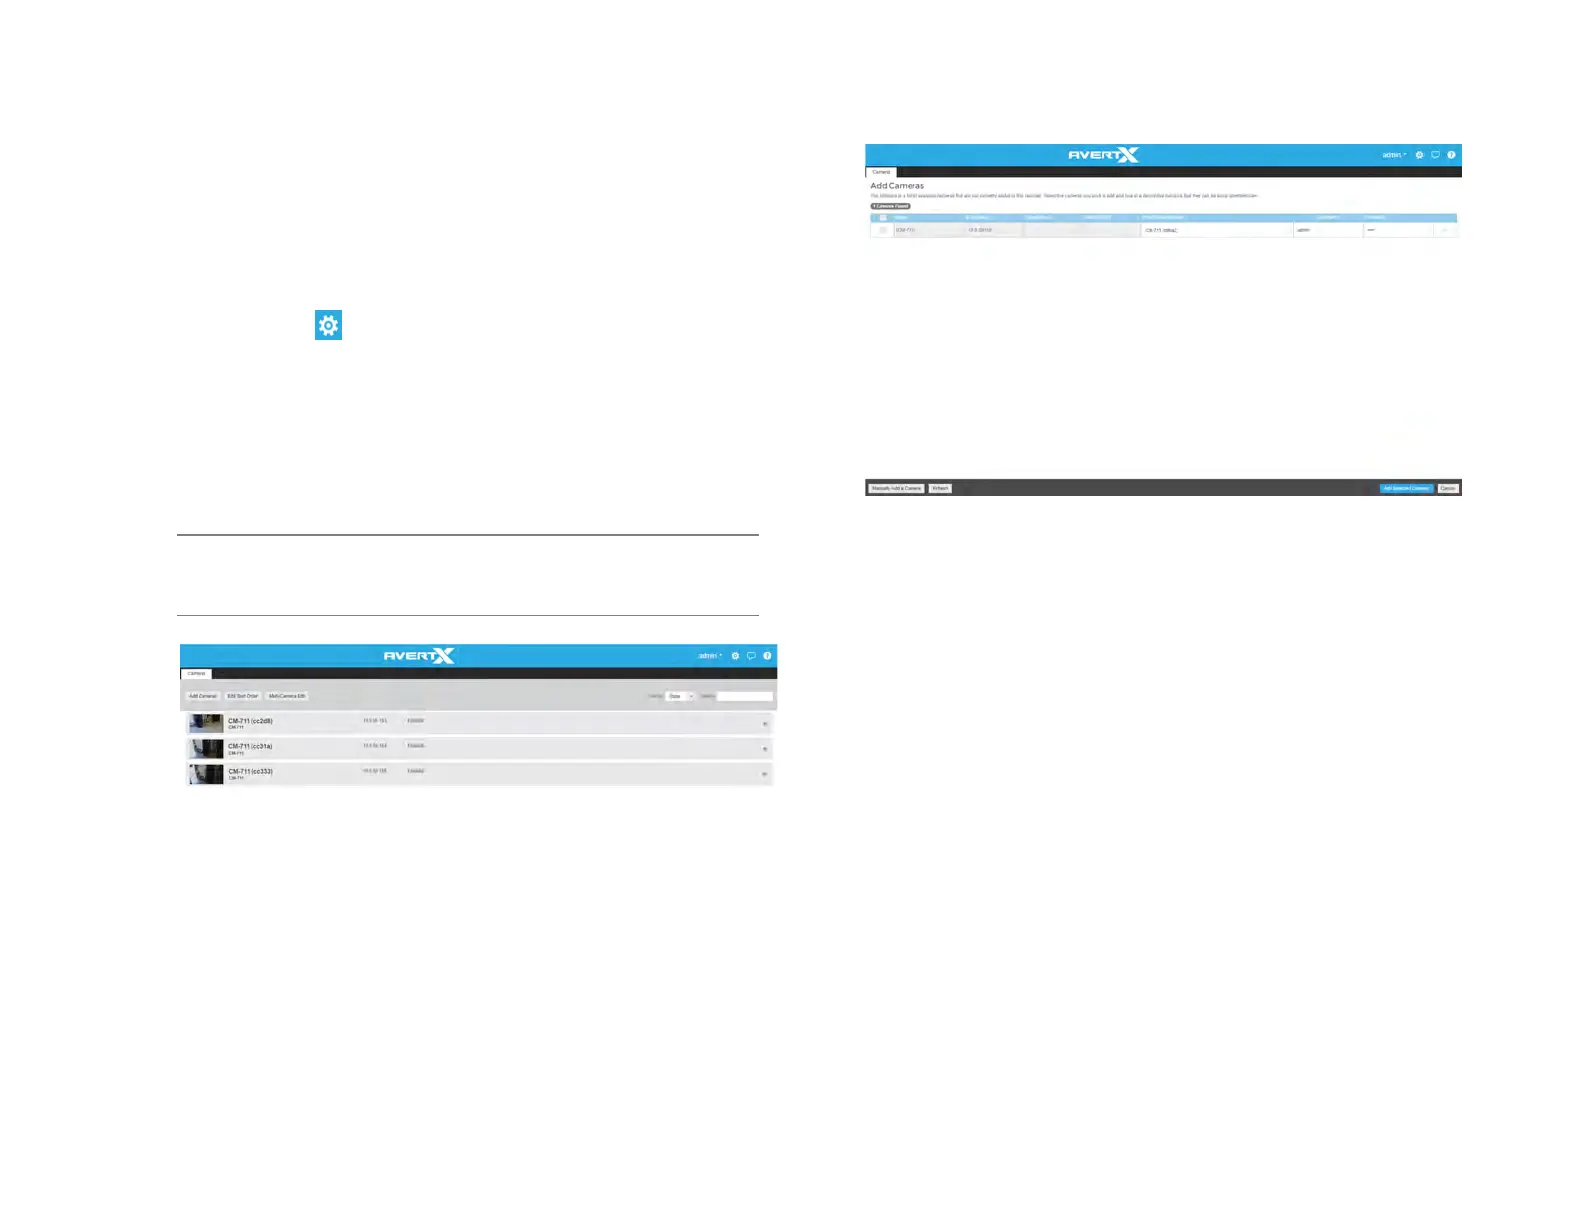
Add Cameras
1. Click Setup .
2. Under the System Settings tab, click Cameras.
3. Click Add Cameras. The add camera menu will appear, and
automatically discover supported cameras available on the
physically connected network.
4. Check the appropriate boxes to select the camera(s) you wish to
add.
5. Enter the appropriate credentials (username and password) for the
cameras you wish to add, and then click Add Selected Cameras.
Note Supported cameras will automatically populate the
manufacturer’s default username and password when
possible.
Manually Add a Camera – Enter camera information manually to add it
to the Camera List.
Refresh – Refresh the camera list to reflect changes.
Add Selected Cameras – Check the boxes to add the cameras
selected from the Add Camera list to the Camera tab.
Camera Name – The make and model of the camera.
IP Address – The IP address of the camera.
Subnet Mask – The subnet mask of the camera.
Static/DHCP – Set the device to Static or DHCP
Enter Custom Name – Enter a custom name for the camera to make it
more easily identifiable.
Username / Password – The necessary credentials to access the
camera.