35146AJ
20
Camera Auto-Discovery
ProConnect recorders automatically configure cameras attached to the
onboard PoE switch. Cameras not connected to the PoE switch will
automatically be discovered, but need to be configured via the Add
Camera menu.
Note Automatic configuration Plug N Play (PnP) of cameras
attached to the PoE switch can be disabled by navigating to
Networking, clicking the Plug and Play tab, and unchecking
the box labelled Enable Plug and Play.
Add Cameras Manually
If you do not see the camera you wish to add in the Add Cameras list, it
may be necessary to add it manually.
1. Click Setup .
2. Under the Settings tab, click Cameras.
3. Click Add Cameras, then Manually Add Camera.
4. Enter the appropriate connection information to add the camera,
including Protocol, IP Address, Port, Manufacturer, Model,
Username, Password, and Camera Name.
5. Click Add Camera.
Note Cameras can be added using AvertX, ONVIF or RTSP
protocols. If RTSP is selected, the stream URLs need to be
input manually. Consult your camera manufacturer’s
documentation for URL stream information.
Note The camera image will not be immediately available. The
image will be visible after clicking Apply and the connection to
the camera is made.
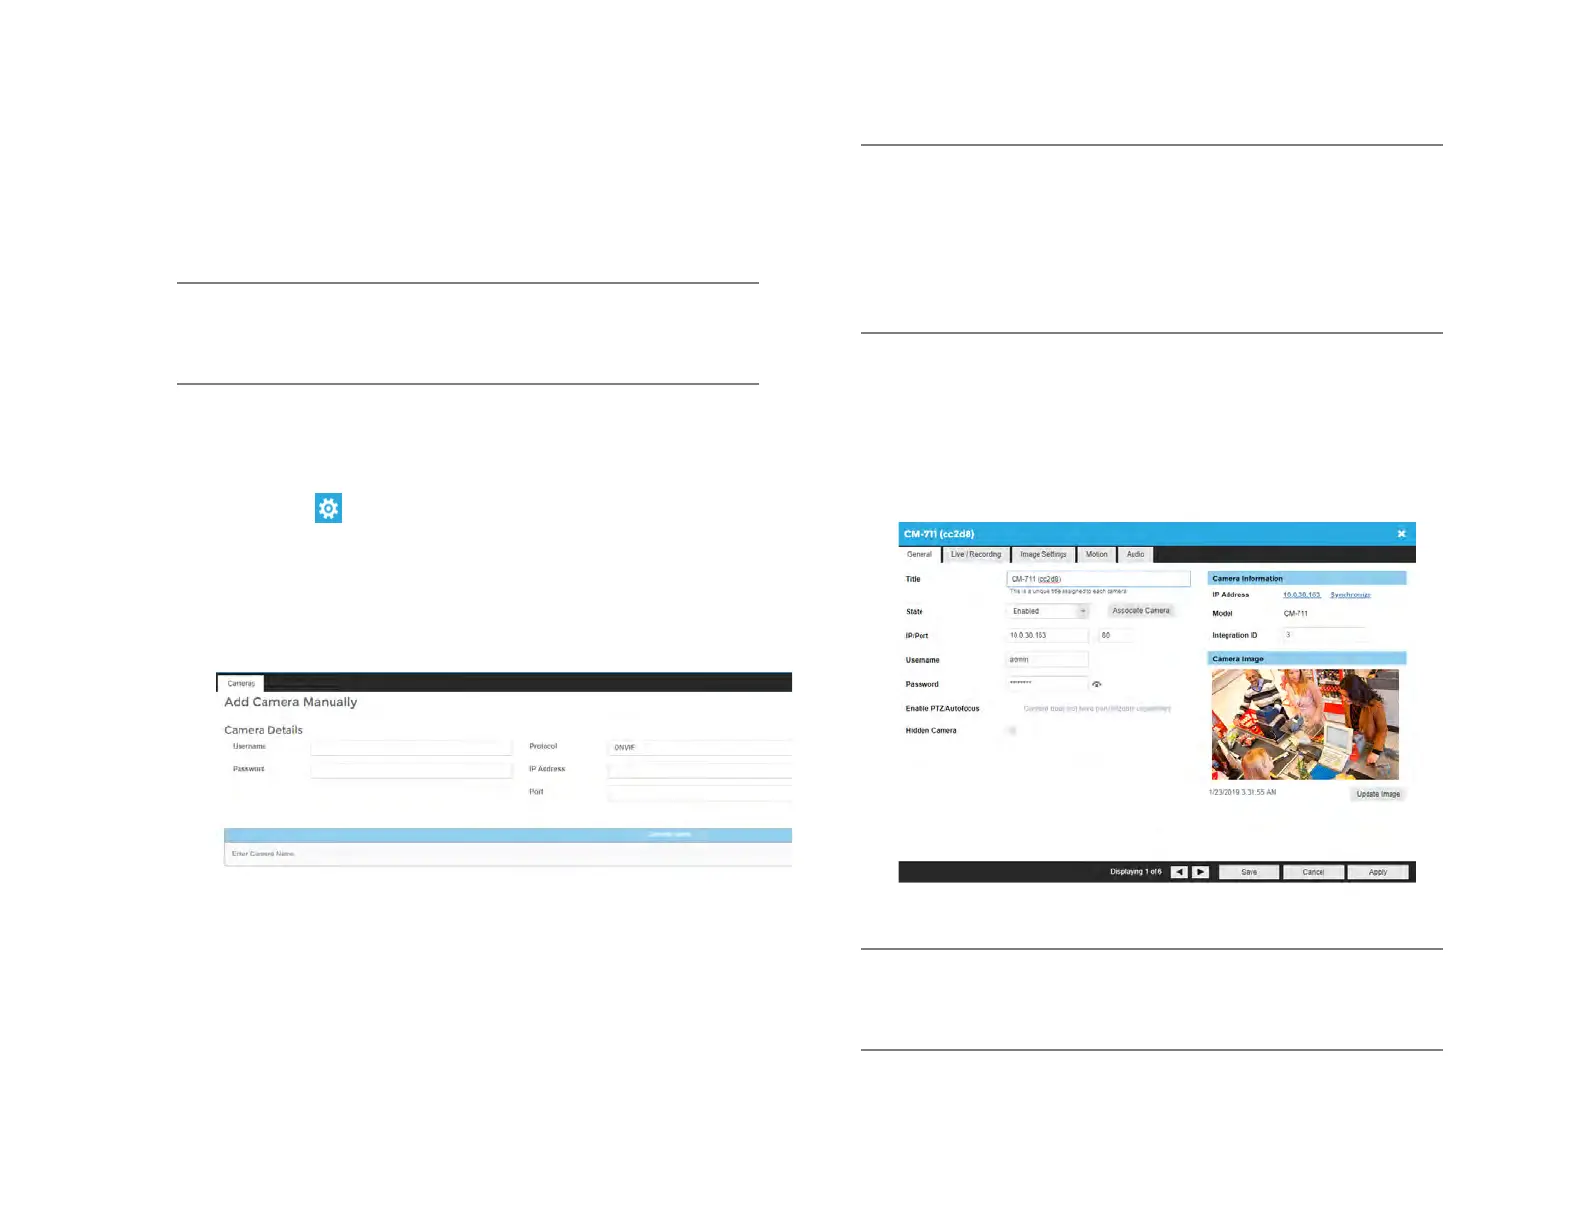
Edit Cameras
To edit an existing camera in the Camera List:
1. Click the desired camera in the Camera List.
2. In the camera window, make the desired changes, and then click
Update Image to update the camera image.
3. Click Apply, and then click Save.
Note Automatic configuration Plug N Play (PnP) of cameras
attached to the PoE switch can be disabled by navigating to
Networking, clicking the Plug and Play tab, and unchecking the
box labelled Enable Plug and Play.