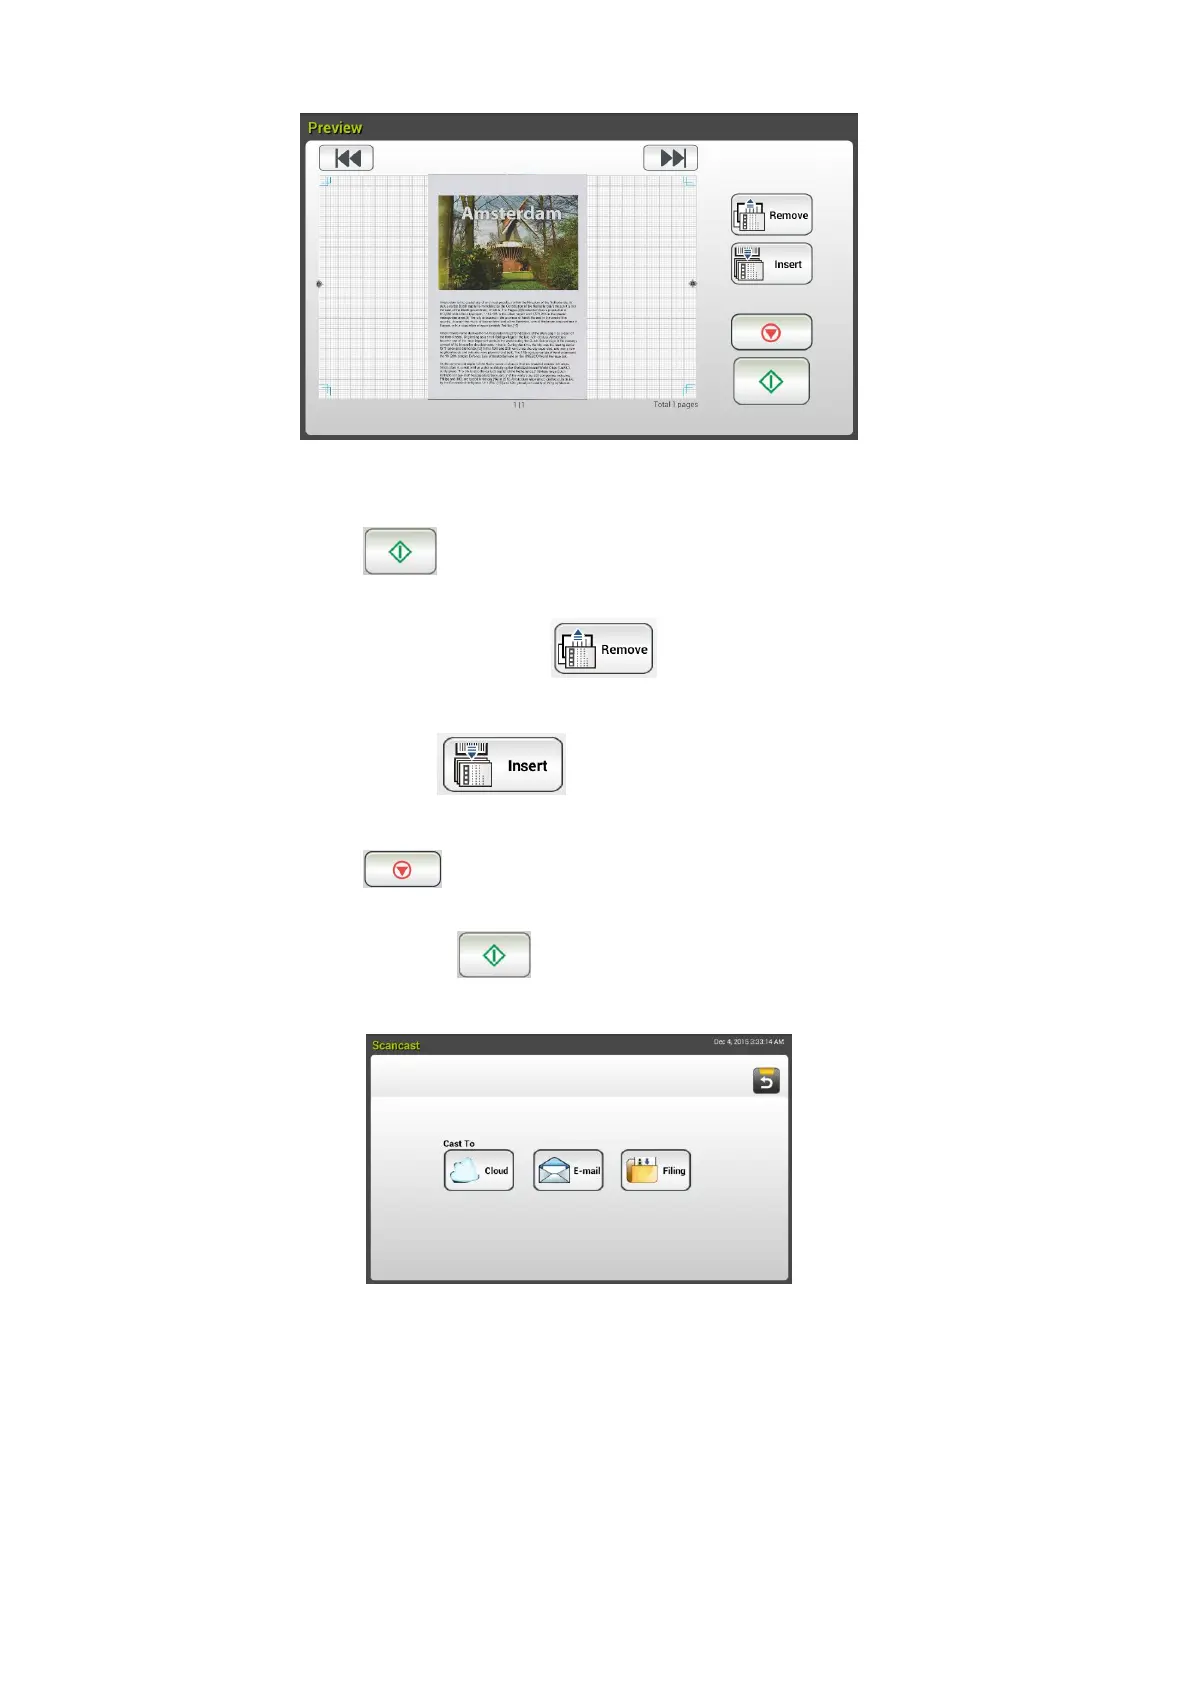
8. On the Preview screen,
Start: If the scanned image is OK, press the [Start] button
( ) on the touch panel to distribute the scanned image.
Remove: If the scanned image is not satisfactory, tap the
[Remove] button ( ) to delete the scanned image.
Insert: You may also insert more pages by taping the [Insert
Pages ( )] button on the bottom of the screen.
Cancel: If the scanned image is not OK, tap the [Cancel] button
( ) to abort the job.
9. If the [Start] ( ) button has been selected, the [Scancast]
window for multiple destinations appears.
10. Choose a [Cast To] destination for your scanned image. Choice: Cloud,
E-mail, Filing.
- Cloud: Choose your desired cloud servers from a selection of
Evernote, and Google Drive.
- E-mail: Enter [To/From] E-mail address.
- Filing: Choose your network folder from a selection of Local or
Network. If Network is selected, the available network servers will
be displayed at the right box. You may use the Up-arrow or
Down-arrow button to scroll from the list.