Page 4 AXIS 233D Installation Guide
Install the Hardware
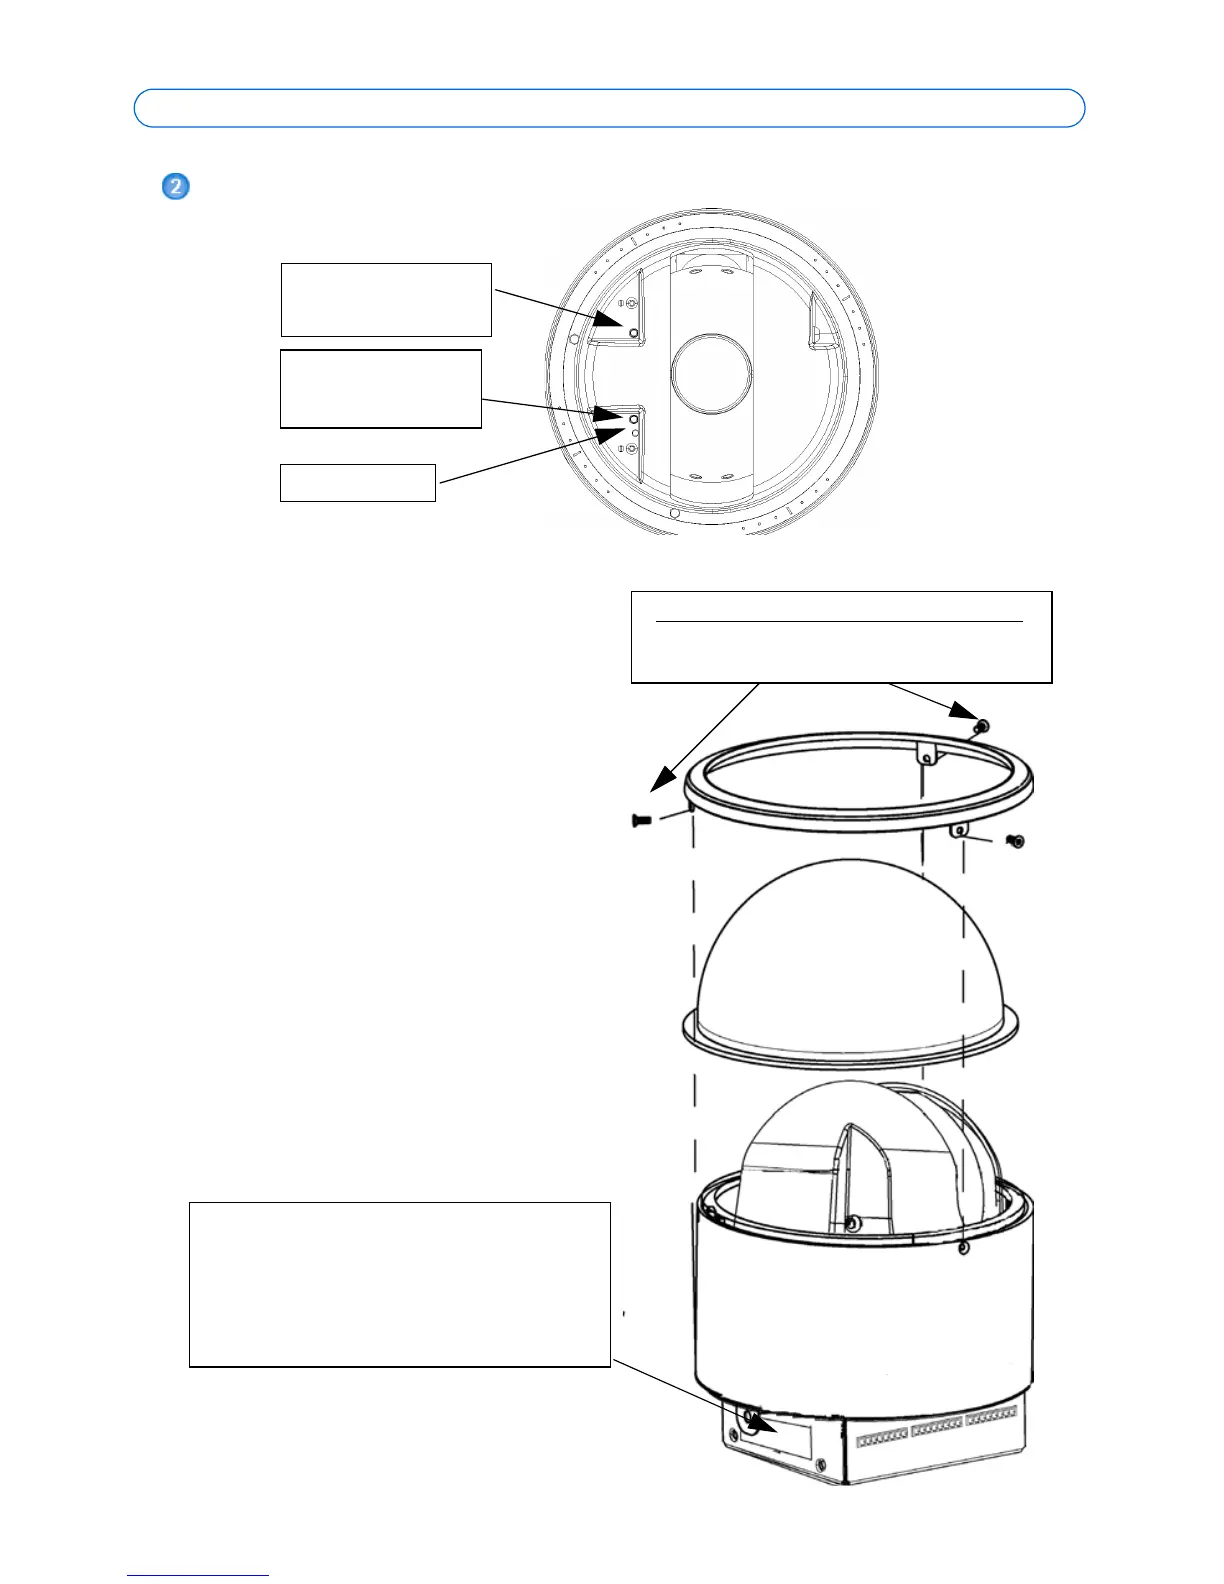
Place dome bubble on camera
1. Place dome bubble on the camera
base.
2. Place black ring with coordinates
over dome. Turn ring till it comes
into the slots.
3. Different screws are used for
fastening the black ring depending
on which ceiling mount is being
installed.(See figure to right)
4. Tighten screws to hold ring and
dome securely. Follow instructions
for your chosen camera mounting.
Dimensions
HxWxD = 209 x 170 x 170 mm (8.23” x
6.69” x 6.69”)
Weight = 2.5Kg (5.5 lbs) excluding power
supply
Status LED
Black
Red
Control button
Restart
button
Top
ew
Drop Ceiling Mount use 3 M3x10 screws.
Hard Ceiling Mount use 3 Recessed screws
(do not tighten screws completely)
Note:
The camera’s serial number (S/N) is on
this label. You will need this number to
with this product. Put it in a safe place
for future reference.
set the camera’s IP address.
There is an additional label included