Azure Imaging System User Manual Page 11
3.2 Key denitions that apply to all imaging types:
1. Auto Image vs Manually Image
• Auto Image – determines your optimal exposure time automatically.
• Manually Image – enables you to set each parameter to your preferred specications.
2. Pixel Binning – refers to the pixel binning setting (i.e. how the pixels are grouped). The higher the
pixel binning, the lower the image resolution. 1x1 uses the full resolution of the camera, and other
possible settings are 2x2, 3x3, 4x4, 6x6, and 8x8. Therefore, choose 1x1 for the highest resolution
and widest dynamic range.
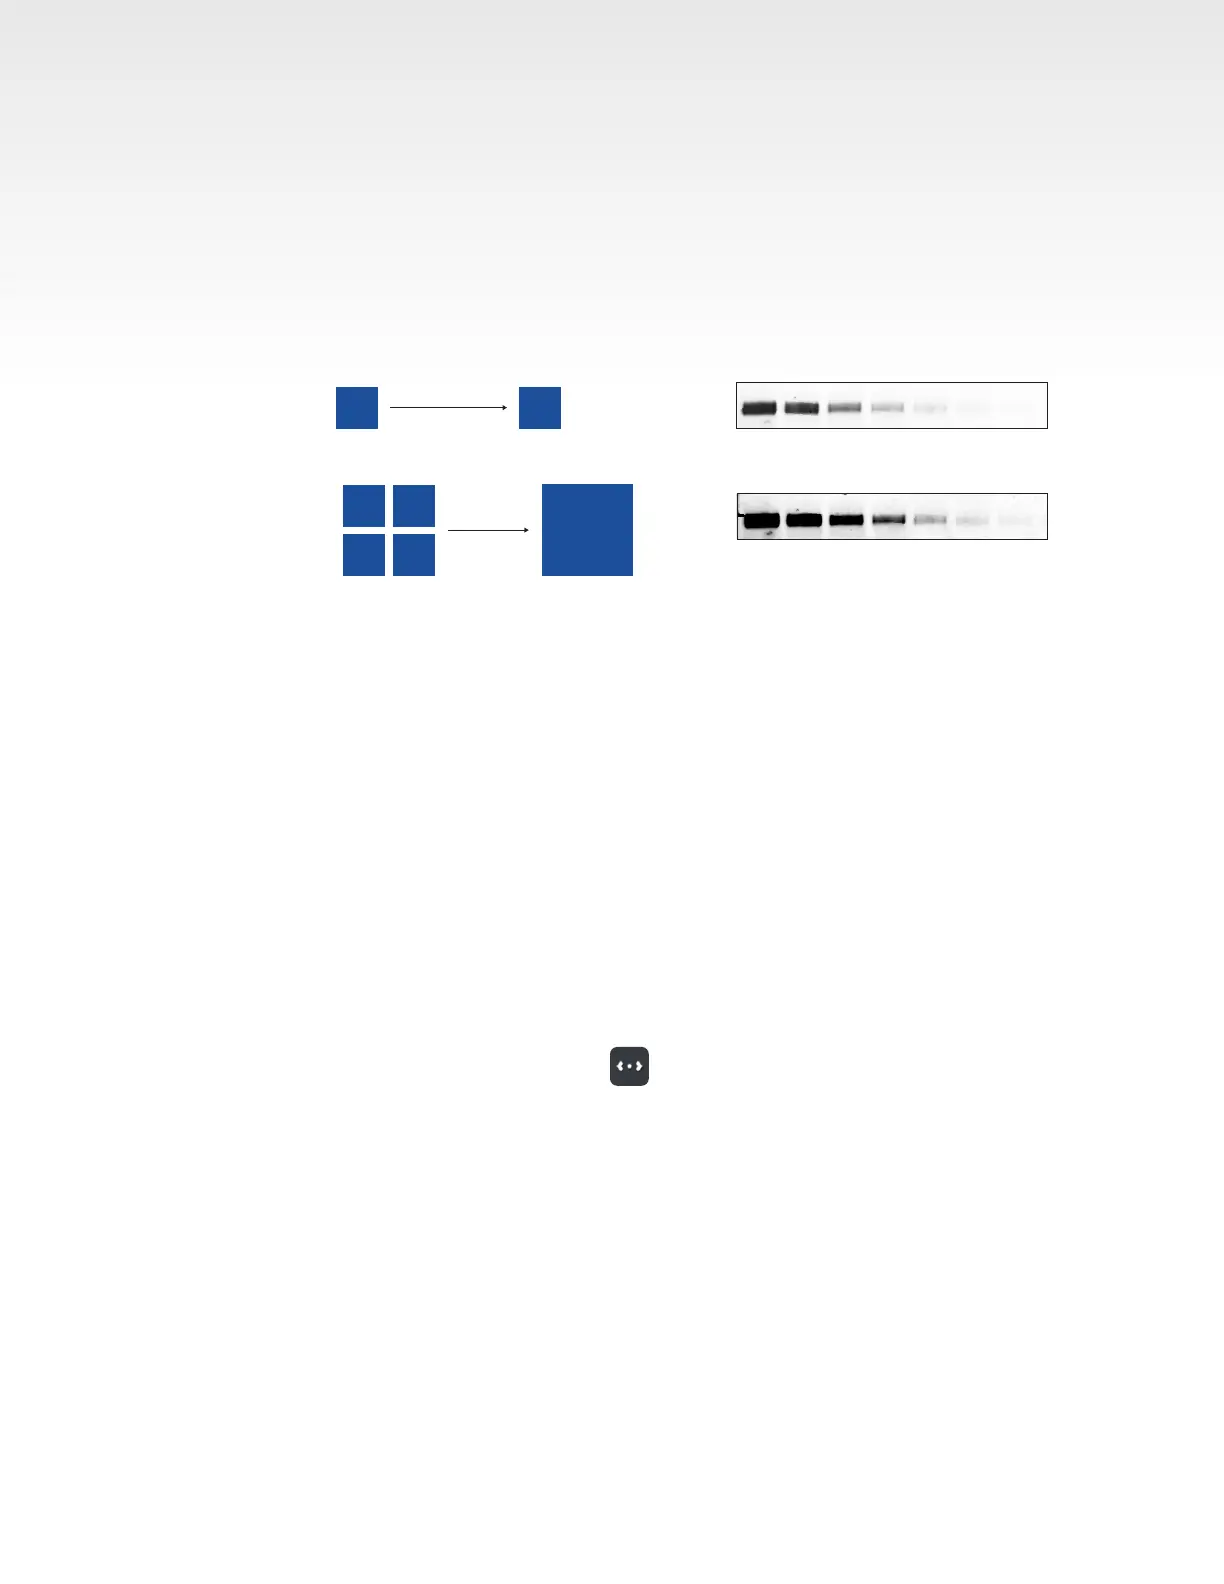
40 seconds, unbinned
40 seconds, 2X2 bin
Pixel binning improves image sensitivity. Pixel binning is a powerful technique for digital imaging that increases
sensitivity by combining pixels to make a larger “super-pixel.” The super-pixel images improve the signal-to-background
ratio (SBR) when compared against unbinned images.
1X1 Binning
2X2 Binning
3.9 µ
3.9 µ
7.8 µ
7.8 µ
3. Exposure – choose the exposure time manually or use autoexposure, which will allow the software
to capture the image for you using the full dynamic range of the camera. There are four options
for Exposure:
• Rapid Capture – software will optimize a short exposure time to the brightest signal on the blot.
• Overexpose – software will calculate an exposure time that saturates the brightest bands in the
blot to potentially capture weaker signals. This is useful for blots where the brightest bands may
not be the bands of interest. This will saturate part of the image.
• Wide Dynamic Range – software will calculate an exposure time that is long enough to capture
the widest range of signal while avoiding saturation. This autoexposure method is well suited to
most blots. Uses the full dynamic range of the camera.
• Manual – select a custom exposure time. The maximum exposure time is 60 minutes for
chemiluminescence detection and 5 minutes for uorescence imaging.
4. Live Mode – in Manually Image menu, tap to enable Live Mode. Click again to close. Live Mode
illuminates the imaging area to allow you to see a live image to verify sample placement.
• Auto-exposure to region – set area that you want the autoexpose to focus on.
• Capture selected region – generate an image of the selected region of interest.