Azure Imaging System User Manual Page 22
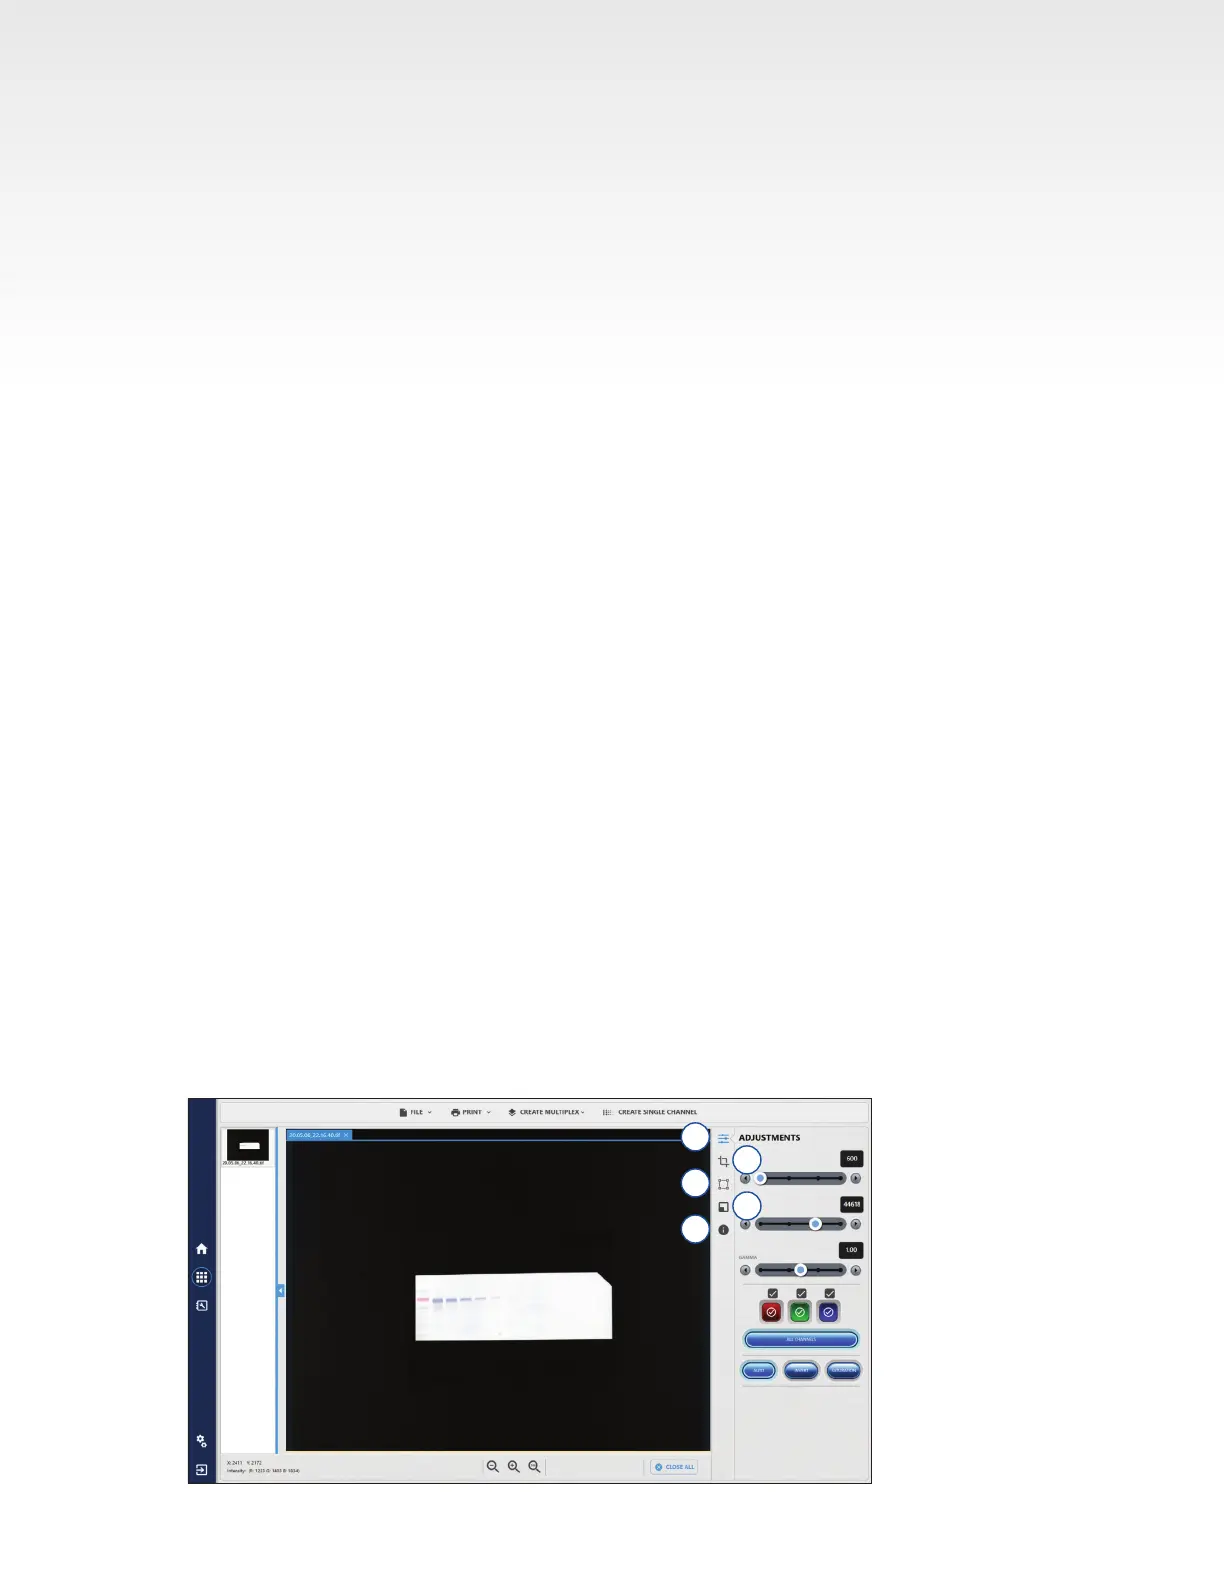
4.2 Image Adjustment Functions
1. Adjustments
• Adjust the black, white and gamma levels of the image.
• For multi-channel images, use the colored box icons to select which channels are active for
viewing and adjusting. Check the box within the color icon to make a channel active for viewing.
Check the box above the color icon to make a channel active for adjustments. Click All Channels
to activate All Channels for viewing and adjusting.
• Clicking Auto will automatically adjust levels of the channels selected for adjustment.
• Click Invert to invert the colors of the signal and background.
• Saturation will highlight in pink which pixels are beyond the detection limit of the camera.
Note: Adjusting these settings will not affect the raw data when saved as a .tiff le (16-Bit image).
Only images saved as a .jpg, BMP, and PUB tiff (8-Bit images) will display with the adjusted
contrast settings. Azure recommends using .tiff formats for images that need to be quantied, and
saving a copy in 8-Bit format with contrast adjustments for publication purposes.
2. ROI – select of region of interest for further actions including crop and copy.
• Select:
• Crop in order to isolate a particular area of the image. A new tab will open with an image of
the selected area.
• Copy a region of interest on a single channel image. After selecting another image of the
same size, use the paste option to overlay the copied image.
• Clear clipboard erases the saved image done with cropping or copying so you can select a
new region.
Note: If a Marker image was taken alongside a chemi image and the Auto Merge function was not
enabled, the Marker and chemi images can be merged using the ROI function. Use ROI to select
the marker area from the Marker image, copy, and paste onto the chemi image to merge.
3. Image Orientation – rotate or ip images using the options provided. The free rotate function is
helpful for images samples that were not imaged straight.
4. Resize – customize width, height, and dots per inch (DPI) for 8-Bit publication images.
5. Info – gives detailed information about the active image. Displays the parameters for image
acquisition including date, protocol type, capture type, protocol, author, binning, exposure time,
exposure type, channel name, light sources, lter, aperture, tray type, focus, calibration, software
version, serial number, and comments.
2
3
4
1
5