Azure Imaging System User Manual Page 16
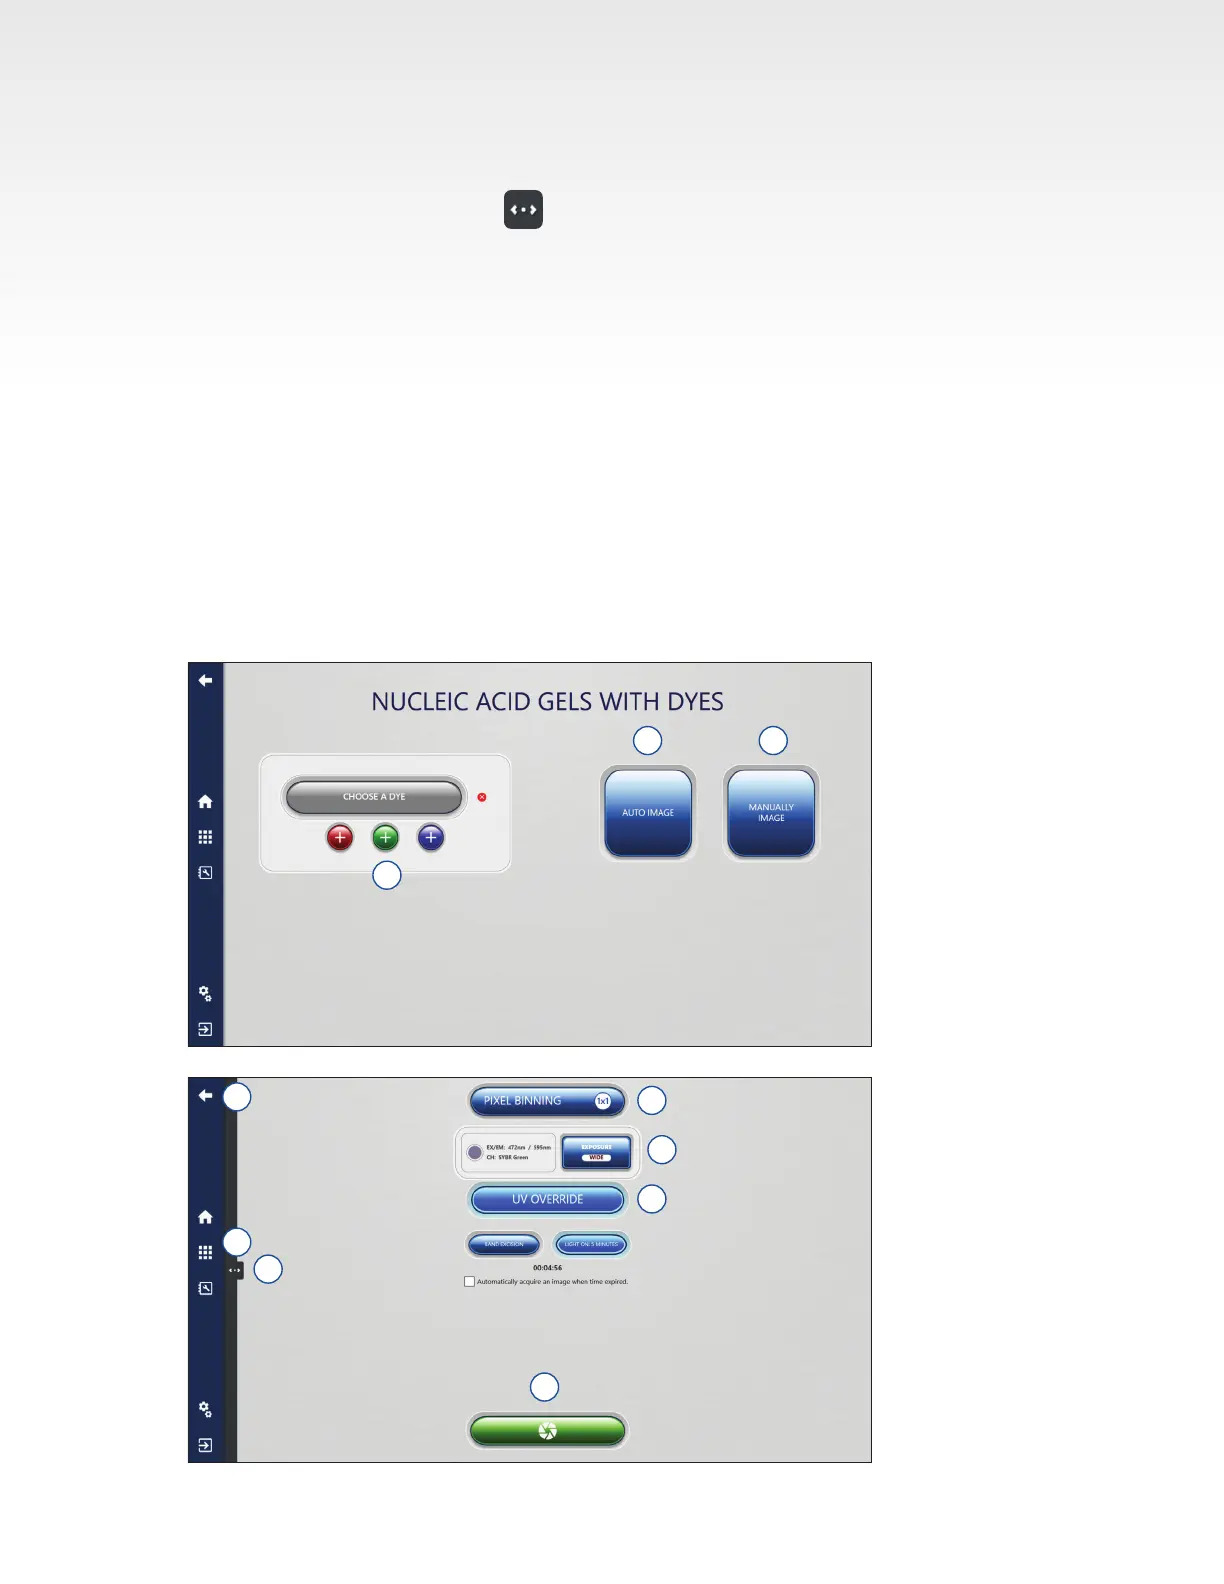
9. Exposure type can be selected for each channel. Select between the different auto exposure modes
or choose Manual Exposure Type to enter the desired exposure time. See Section 3.2 for more details
on the different Auto Exposure options.
10. In Manually Image menu, tap to enable Live Mode. Click again to close. Live Mode illuminates
the imaging area to allow you to see a live image and offers the following additional options
• Auto-exposure to region – set area that you want the autoexpose to use to determine
exposure time.
• Capture selected region – capture an image of the selected region of interest.
11. UV Override is useful for band excision, or pre-warming the UV bulbs. Click the UV Override button
to engage.
• For band excision, click the Band Excision button and use the key located on the door of the Azure
Imager to manually override the UV safety mechanism in the door lock of the imager. Use the
correct protection described in the UV Safety Precautions sections of this manual.
12. Select the Capture button to capture the image according to the set specications.
13. After capture, images will appear in the Gallery automatically. The Gallery can be reached at any
time by pressing the Gallery icon.
14. Go back one screen at any time by pressing the back icon.
6 7
5
8
14
9
10
12
13
11