PAGE 66
SERVICE MANUAL
CAUTION
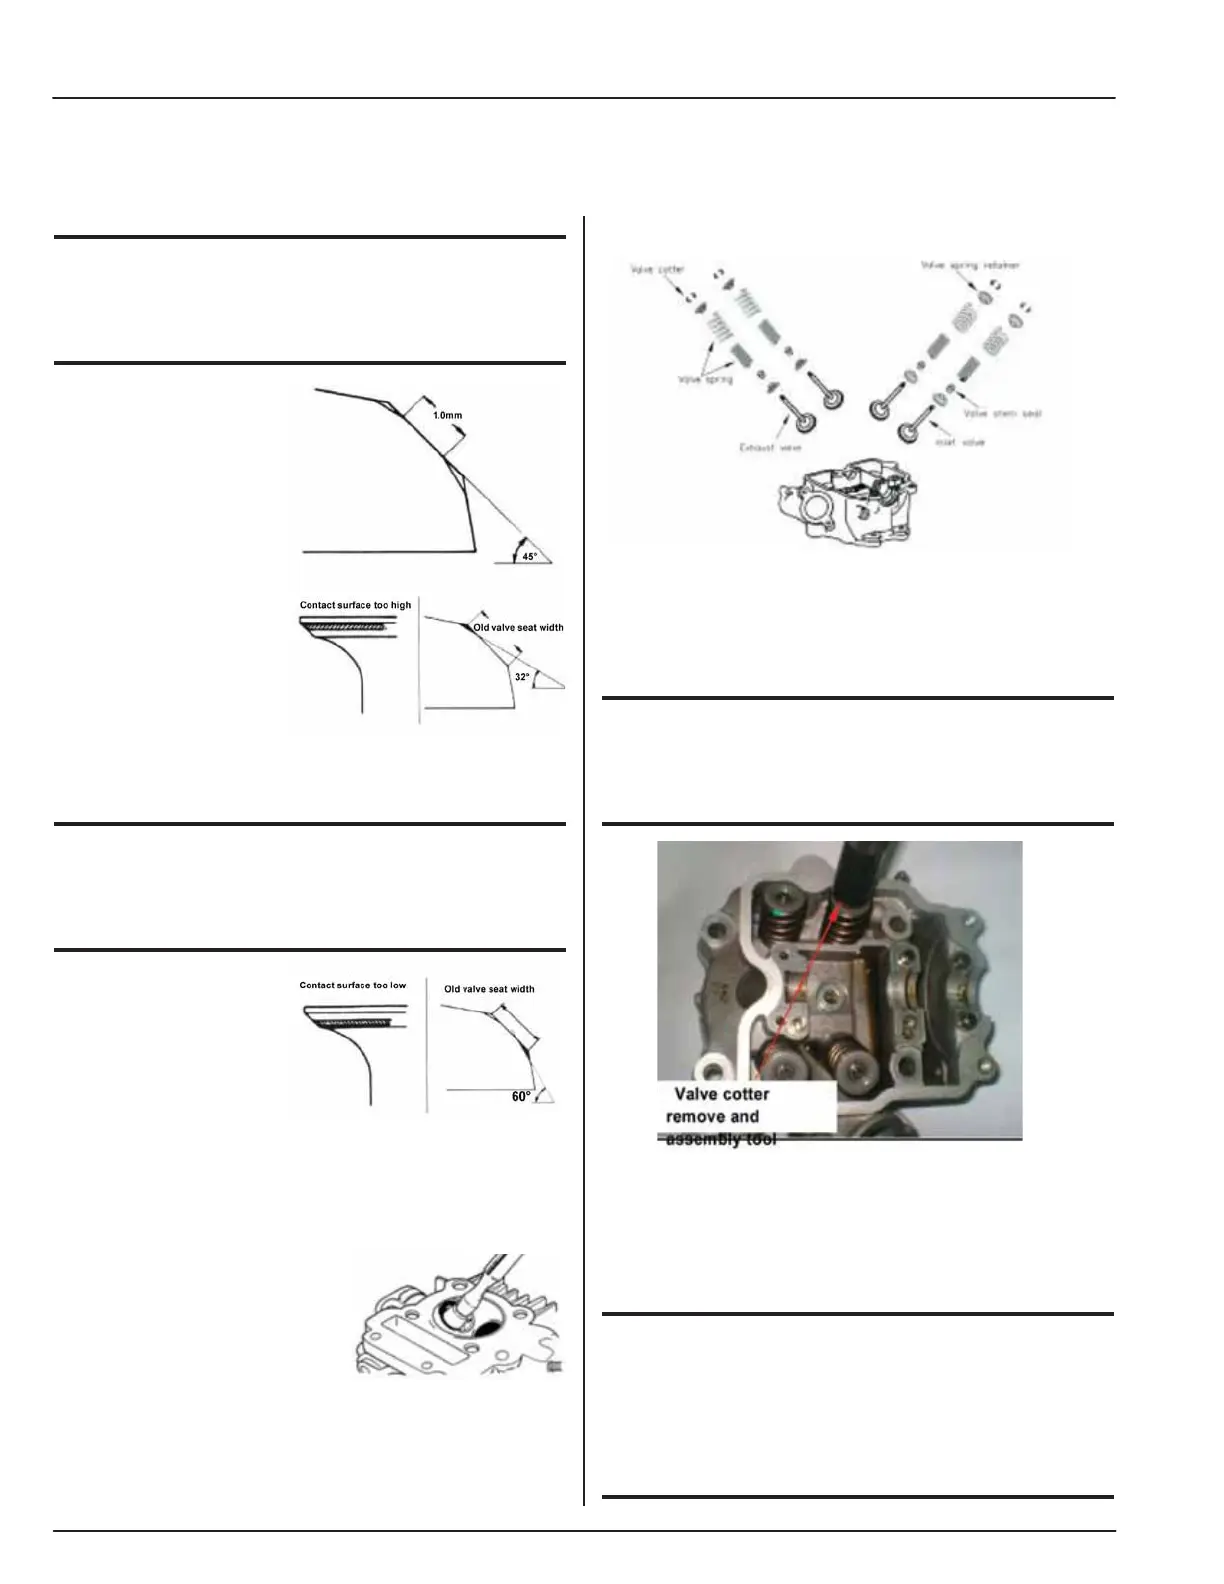
• Make sure that all roughness and uneven faces have
been ground.
• Grind valve seat again
if necessary.
• Coat the valve seat
surface with red
paint.
• Install the valve
through valve guide
until the valve
contacting with valve
seat, slightly press
down the valve but do not rotate it so that a seal
track will be created on contact surface.
CAUTION
• The contact surfaces of valve and valve seat are
very important to the valve sealing completely.
• If the contact surface
is too high, grind
the valve seat contact
surface lower with
32° cutter.
• Then, grind the valve seat to specified width.
• If the contact surface is too low, grind the valve
seat with 60° cutter.
• Then, grind the valve seat to specified width.
Valve Seat Inspection
and Service:
• After the valve seat has
been ground, coat valve seat
surface with emery and then grind surface.
• Clean up all emery coat from cylinder and valve
after grinding.
Cylinder Head Reassembly:
• Lubricate valve stem with engine oil, and then
insert the valve into valve guide.
• Install new valve stem oil seal.
• Install valve springs and retainers.
CAUTION
• The closed coils of valve spring should face down
to combustion chamber.
• Use a valve cotter remove & assembly tool to
press the valve spring, and then reinstall valves.
Special Service Tool:
• Valve cotter remove & assembly tool
CAUTION
• In order to avoid damaging the valve stem and the
cylinder head, in the combustion chamber place a
rag between the valve spring remover/installer when
compressing the valve spring.