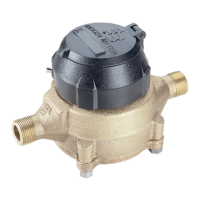
Removing the Measuring Element
OTE:N A cage seal is installed in the 1-1/2" to 6" Recordall
®
Turbo Series so that the entire water volume flows through the
measuring element.
1. Remove the O-ring and cage seal.
2. Check for damage and clean or replace prior to reassembly.
3. To remove the measuring element from the cover, remove the calibration shaft seal plug and the lock screw.
See Figure 3 and Figure 4.
4. Place the cover register-side down on a table or flat surface.
5. Lightly tap or press the calibration shaft from the wet side out of the bore in the cover (1-1/2" to 4" only). Do not strike
or bend the calibration linkage.
6. The measuring element insert can be removed from the cover plate for service or replacement by removing the cage
set screws (quantity of one for 1/-1/2" to 4", quantity of 4 for the 6" size). See Figure 3 and Figure 4.
7. Holding the cover plate in one hand, rotate the thermoplastic element counter-clockwise until the bayonet-like tabs
are aligned with open areas of the cover plate (1-1/2" to 4" only).
8. Remove the element from the cover plate.
Removing the Magnet Carrier
1. To remove the magnet carrier from the measuring element insert, lift it o the stainless steel pin. See Figure 3 and
Figure 4.
2. Check the condition of the magnet and gear on the magnet carrier for damage or wear. If signicant wear or damage is
present, replace the magnet carrier.
3. Remove the hold-down strap. See Figure 3 and Figure 4.
4. Check the condition of the transmission shaft gear for damage or wear. If signicant wear or damage is present, replace
the gear.
5. Lift the gear o the shaft.
Removing the Straightening Vanes/Nose Cone
The straightening vanes are an integral part of the upstream and downstream nose cone assemblies. See Figure 3 and Figure 4.
To gain access to them, remove the measuring element from the cover.
Removing the upstream nose cone provides access to the rotor, calibration ring and the transmission assembly.
Removing the upstream nose cone
1. Unscrew the upstream nose cone setscrew. For 1-1/2" to 4" meters, slide the calibration linkage into the cage insert
stop.
2. Take hold of the nose cone/straightening vanes and turn them clockwise, thereby disengaging the calibration linkage
from the tab on the calibration ring and unlocking the bayonets of the nose cones from the cage (see Figure 5).
3. If the tab of the calibration ring has not disengaged the linkage, rotate the ring carefully by pushing the struts at the
interior of the element (between the straightening vanes and the rotor). Pull the nose cone assembly out from the
measuring element insert. For 6" meters, remove the transmission gear by lifting it o the shaft, noting the alignment
of the D-shaped bore with the at on the shaft (required to align for assembly).
4. Remove the retaining ring that holds down the calibration drive plate, located under magnet carrier magnet. See
Figure 4 and Figure 6. Remove drive plate. Rotate calibration ring until pin clears slot of cage. Take hold of the nose
cone/straightening vanes and turn clockwise. Pull the nose cone assembly out from the measuring element insert.
Remove rotor assembly.
Servicing Parts and Assemblies
RTS-UM-00380-EN-09 Page 13 January 2015

 Loading...