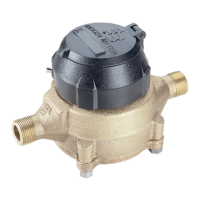
Removing the rear nose cone
To remove the rear nose cone, you must remove the transmission shaft. See Figure 3, Figure 4, Figure 5 and Figure 6.
1. Remove the strap over the gear (1-1/2" to 4" only).
2. Lift the gear o the shaft.
OTE:N The shaft has a flat spot that matches with the D-shaped bore in the gear (required to align for assembly).
3. Remove the nose cone set screw.
4. Remove the protection tube by carefully pressing (with the at surface of a blade screwdriver) on bottom of tube
located inside rear nose cone.
5. Press to release the detent lock, approximately 1/4" vertical travel, then lift the tube out from the top of the cage insert.
6. Lift the transmission shaft assembly up and out of the bottom bearing, then slide the shaft downward and diagonally
out (towards you) to remove it from the nose cone/cage assembly.
7. Hold the cage rmly with one hand, rotate the nose cone clockwise with the other hand, then carefully lift it o the
cage.
To reinstall the nose cone, follow these instructions in reverse.
Removing the Calibration Mechanism
To disassemble the calibration ring assembly (see Figure 3, Figure 4, "Removing the Meter Head" on page 12 and "Removing the
Straightening Vanes/Nose Cone" on page 13):
1. Remove the calibration shaft seal plug and unscrew the calibration shaft lock screw from the cover plate.
2. Remove the calibration shaft thrust washer and calibration shaft. Press the calibration shaft out of the cover plate
from below.
3. If a leak exists at this point in the disassembly of the meter, remove the calibration shaft O-ring. Before reinserting the
O-ring, apply a light coat of silicon grease to it.
4. Clean all parts.
To gain access to the calibration ring, remove the straightening vane/nose cone. Follow the instructions in “Removing the
Straightening Vanes/Nose Cone” on page 13.
To remove the calibration ring from the nose cone assembly:
1. Align the ring slots with the bayonets of the nose cone assembly (located on inner ring of calibration ring).
2. Carefully lift the calibration ring from the nose cone assembly.
To reinstall the calibration mechanism, follow this procedure in reverse.
Servicing Parts and Assemblies
RTS-UM-00380-EN-09Page 14 January 2015

 Loading...