Modbus Slave ID Modbus Register Description
200 * 6071 Battery backup charging algorithm.
0 = Battery is recharged from a solar panel
1 = Battery is recharged from
12 to 30 V dc . (default)
* The Modbus Slave ID for the base board is set at the factory. This may be changed using the base board DIP switch
settings.
3.2.2 Supplying Power from a Solar Panel
To power the
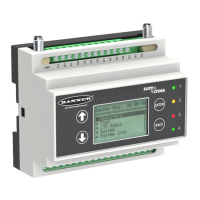
DXM100 Controller from a 12 V dc solar panel, connect the solar panel to power pins 2(+) and 3(-). Connect
a 12 V dc sealed lead acid (SLA) rechargeable battery to pins 4(+) and 5(-).
The factory default setting for the battery charging algorithm assumes you are using 12 to 30 V dc power to recharge the
battery. If the incoming power is from a solar panel, you must change the charging algorithm.
To change the charging algorithm from the menu system:
1. From the LCD menu, select Update > Power.
2. Use the up/down arrows to select "SOLAR" power.
To change the charging algorithm by writing to Modbus register 6071 on the I/O base board (Slave ID 200):
1. Write a 0 to select the solar power charging algorithm.
Modbus Slave ID Modbus Register Description
200 * 6071 Battery backup charging algorithm.
0 = Battery is recharged from a solar panel
1 = Battery is recharged from
12 to 30 V dc . (default)
The following power operating characteristics are stored in Modbus registers.
Battery voltage If no battery is present, the value in this register is less than 5 V. If the value in this register is
greater than the incoming voltage register, the battery is powering the system.
Battery charging
current
The charging algorithm charges the battery when the incoming voltage register value is greater
than the battery voltage register value. This registers shows the charging current in milliamps.
Incoming supply
voltage
The incoming power can be from a solar panel or from a power supply. The battery is charging
when the incoming voltage register value is greater than the battery voltage register value. The
battery is powering the system when the incoming voltage register value is less than the battery
voltage register value.
On-board
thermistor
temperature
This register stores the on-board thermistor reading in tenths of degrees C, this is not a calibrated
input: divide by 10 to calculate the temperature in degrees C. For calibrated temperature inputs,
define one of the universal inputs as a temperature input.
Modbus Slave ID Modbus Register Description
200 * 6081 Battery voltage (mV)
6082 Battery charging current (mA)
6083 Incoming supply voltage (mV) (solar or power supply)
6084 On-board thermistor temperature (⁰C)
* The Slave ID for the base board is set at the factory. This may be changed using the base board DIP switch settings.
3.3 Connecting the Communication Pins
The base board communications connections to the device are RS-485 (primary), RS-485 (secondary) or RS-232.
RS-485. The primary RS-485 bus is a common bus shared with the ISM radio board (Modbus Slave ID 1) or optional
cellular board. The
DXM100 Controller is defined as the Modbus Master on this bus. Other internal Modbus slaves include
the local processor registers (Modbus Slave ID 199), the base I/O controller (Modbus Slave ID 200), and the display board
(Modbus Slave ID 201). When assigning Modbus Slave IDs to externally connected devices, only use IDs 2 through 198.
DXM100 Controller Instruction Manual
www.bannerengineering.com - Tel: 763.544.3164 15

 Loading...