Signal Signal Strength between the cellular modem and the wireless network tower; this value ranges between –51
and –112 dBm. The more positive number is better, –51 is better than –81.
Version Firmware version of the cellular modem; this can only be updated at the factory
5.7 Cellular Activation Quick Start Guide
Sensonix CDMA cellular modems (based on the Telit CE910-DUAL) are ready to be activated when they leave the factory.
Successful activation of every device on the cellular network requires two basic steps:
1.
Attaching a data plan to the particular device
2. Completing Over-the-Air Service Provisioning (OTASP)
To attach a cellular data plan:
1. Select a data plan with a carrier that uses the Verizon network, working with Verizon directly or using an MVNO
such as M2MAir or KORE Telematics.
2. Set up an account with the selected carrier.
3. When working with cellular devices you may be required to log into a web portal provided by the carrier and follow
their instructions for device activation.
4. It is very important to make sure the carrier knows that the data plan is being attached to the device known as
SENSX001.
5. Remove the DXM100 housing cover to see the cellular modem. Use the MEID printed on the Telit CE910-DUAL
cellular modem to uniquely identify the device. The carrier requires this number to attach a monthly data plan.
To complete the Over-the-Air Provisioning (OTASP)
1. Once the contract is attached, the DXM Controller must provision the service using OTASP (Over-the-Air Service
Provisioning).
2. Make sure the cellular module is plugged into the DXM Controller and has its antenna properly connected.
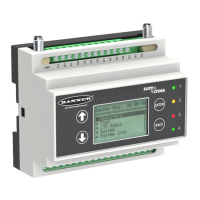
3. On the DXM Controller LCD display select menu: System and then Provision Cell.
4. Click Enter on the Provision Cell menu.
5. The next screen will ask if you want to provision the cellular device, click Enter.
6. It will take approximately 60 seconds and will indicate when it has completed.
7. The cellular modem is ready for use.
5.7 DXM Cellular VPN Setup
A software VPN tunnel can be created between a DXM Controller using a cellular modem to a host PC using a private IP or
static wireless cellular plan. The instructions below outline the DXM Controller set up required to become aware of the VPN
connection. The cellular plan provider will have separate instructions for setting up the VPN on the PC side.
1. Establish VPN tunnel on your computer. Instructions should be provided from your VPN provider.
2. From within the DXM Configuration Tool, go to Settings > Network > Cellular Firewall Settings..
3. Fill in the Firewall IP address and Firewall netmask provided by your VPN provider. For M2Mair this was
included in the Routes.cmd file. It opens the device to traffic from 172.16.1.[0-255].
4. Go to Settings > Cloud Services > Network Interface.
5. Select Cell from the drop-down list and select the Enable VPN checkbox.
6. With your VPN tunnel open, select Device > Connection Settings.
7. Select TCP/IP, enter your VPN IP address, check VPN, and click Connect.
5.8 Binding and Conducting a Site Survey with the ISM Radio
The DXM Controller can have an internal MultiHop master radio or DX80 Gateway radio (star architecture) installed. Before
the ISM radio can communicate with DX80 Nodes, the
DXM Controller must be bound to the other radios in the wireless
network. Use the DXM Controller LCD menu to bind radios to the internal DXM radio.
The LCD display and the processor applications share the external Modbus connection. If the processor is configured to
constantly interact with Modbus, it may cause issues with the LCD display attempting to use the functions of the ISM radio.
To alleviate the contention:
• Load a DXM configuration file that slows down the read/write rules.
• Disable the DXM configuration file from loading into the processor by setting DIP switch 4 to ON (on the processor
board). Reboot the device. When the processor starts back up, it will not load the configuration file and remains
idle. See the DXM100 Controller Instructional Manual (190037) for the processor DIP switch location.
DXM100 Controller Instruction Manual
www.bannerengineering.com - Tel: 763.544.3164 33

 Loading...