2. General
Image 2-1
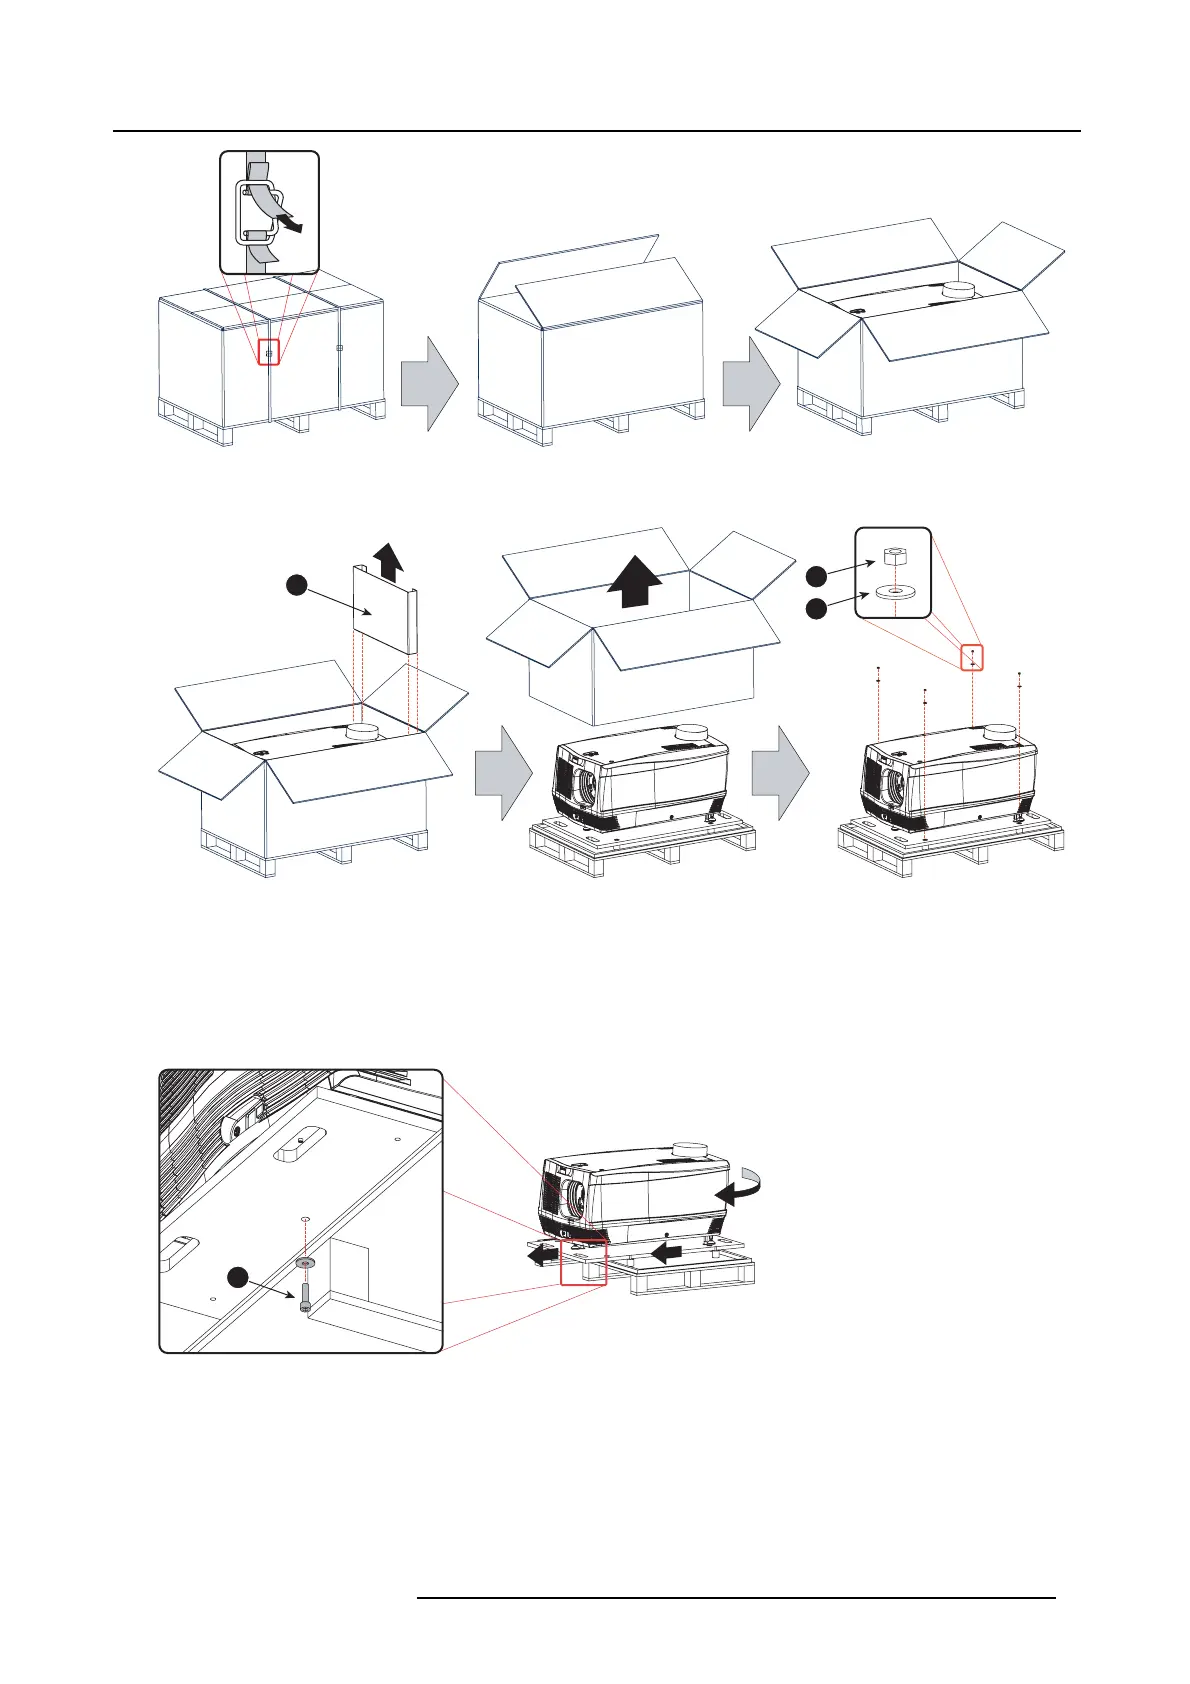
2. Remove the smaller carton bo x (reference 1) as illustrated.
Note: The smaller ca rton box contains the m anual.
1
2
3
Image 2-2
3. Remove the carton box and the foam around the projector. See image 2-2.
Note: The projector is still attached to a wooden plate, which is secured to the below pallet.
4. Loosen the four nuts (reference 2 image 2-2) which secure the pallet as illustrated. Use a 13 m m open end wrench.
5. Rotate the wo oden support plate with projector 90° and slide the front side over the edge of the pallet until the fixation screw
(reference 4) is v isible as illust rated.
6. Remove the hexagon soc ket head cap screw (reference 4). Use an 8 mm A llen wrench.
90°
4
Image 2-3
7. Slide the rear s ide over the edge of the pallet unit th e two fixation sc rews (reference 5) at th e rear a re visible.
8. Remove the two hexagon soc ket head cap screw (reference 5). Use an 8 mm Allen wrench.
R5905050 DP2K C-SERIES 10/07/2012
9
 Loading...


