3. Physical installation
3. PHYSICAL INSTALLATION
About this chapter
This chapter des cribes how the m echanica l se t up of the projector has to be done and how to realize the electrical conn ections.
Overview
• Positioning the DP2K C-series projector at port w indow
• Installation of the exhaust system
• Connecting the projector with the power net
• Power loop through to the projector electronics
• Connecting a UPS with the projector electronics
The light pipe is made out of magnesium. If used in high humidity conditions, there might be some corrosion
visible. However, this does not affect the p erformance of the projector.
3.1 Positioning the DP2K C-series projector at port window
WARNING: T h e installation of the DP2K C-series projector requires at le ast 4 persons.
General guide lines
• Use a s olid pedestal to put the DP2K C-series projector projector on. Ensure that the pedestal can handle the weight of the
projector and that all feet of the projector are captured.
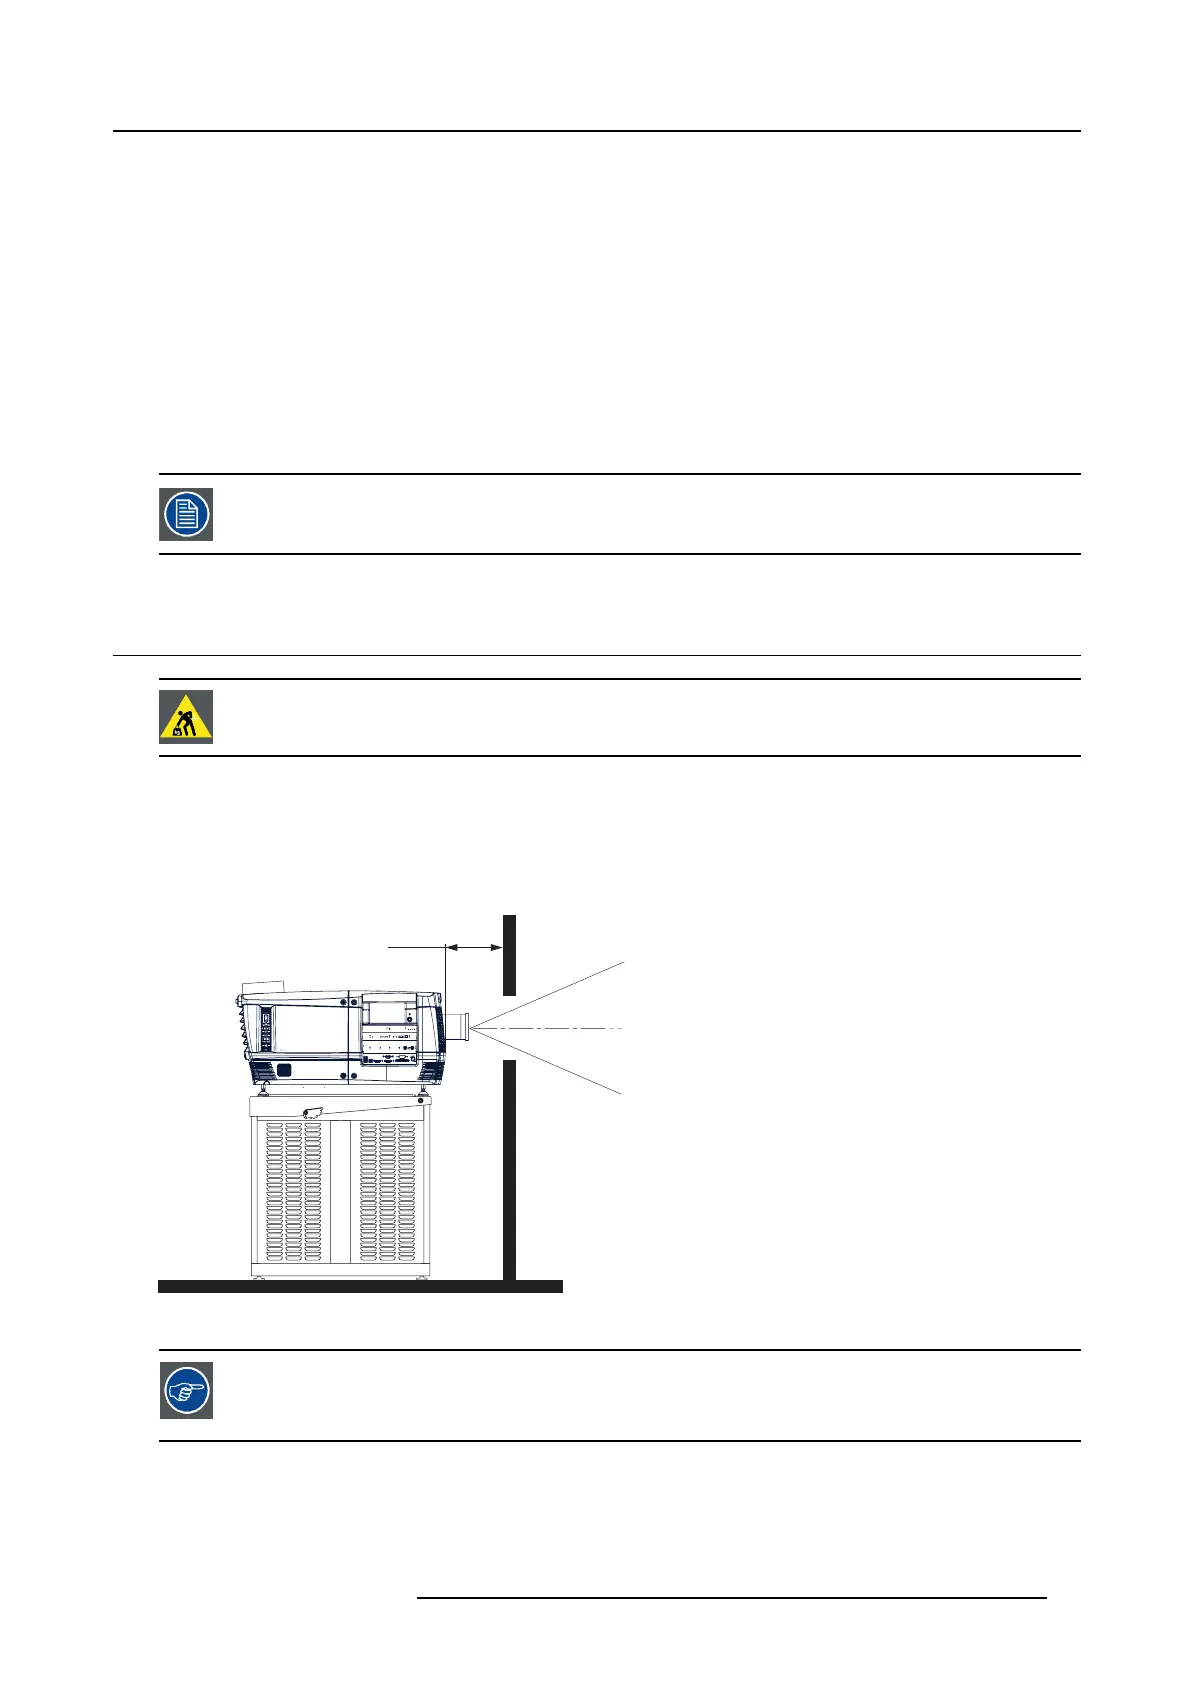
• The pedes tal should be placed in front of the port w indow wall in a manner that the projector front cover is at a minim um distance
of 20 centimeters from the port window.
20 cm
Image 3-1
Positioning at port window
Barco offers a pedestal for the DP2K C-series projector. This universal pedestal allows a so lid and easy setup
of the projector. The universal pedes tal has a separate com partment to install the UPS unit (if available) for
the DP 2K C-series projector. Futhermo re, the universal pedestal contains a standard 19” rack to build in the
projector peripherals like alternative content switchers (e.g. ACS-2048).
Necessary tools
• 14 mm wr ench.
• 17 mm wr ench.
R5905050 DP2K C-SERIES 10/07/2012
13

 Loading...


