3. Physical installation
A
A
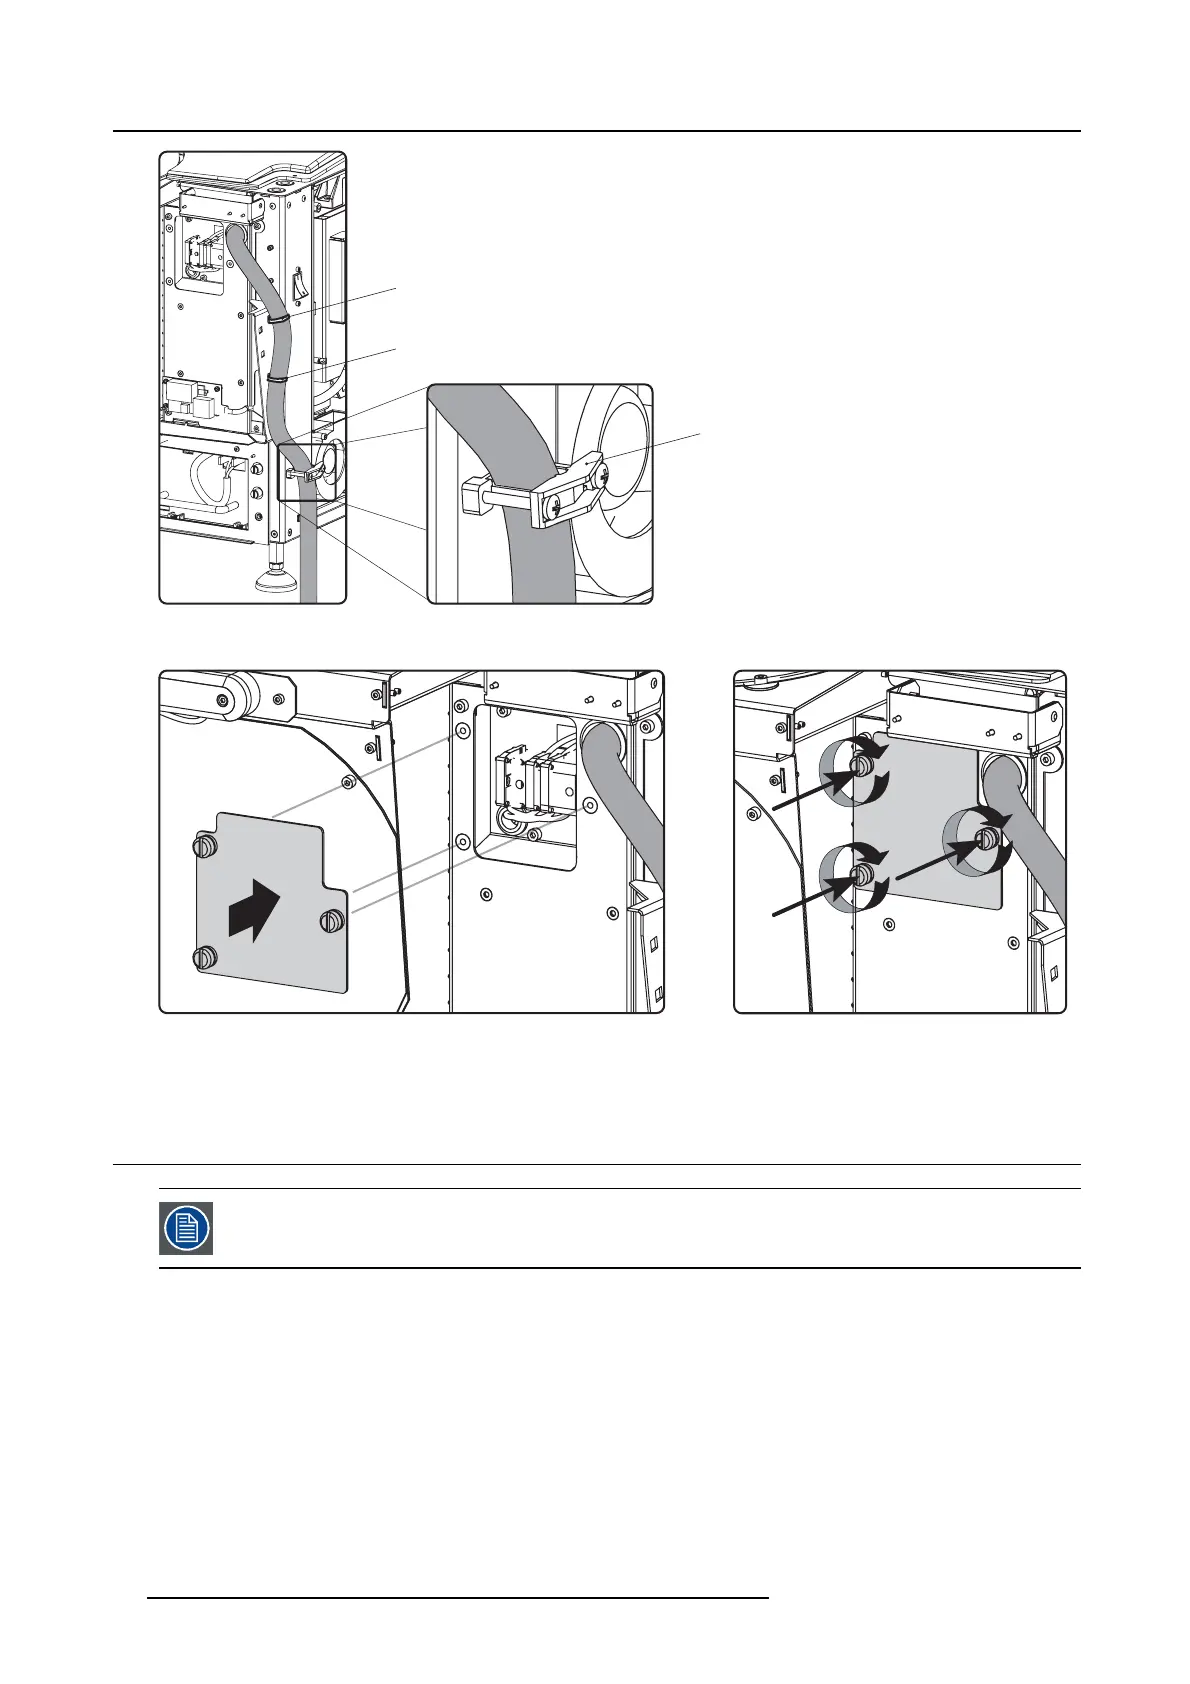
Image 3-8
5. Reinstall the cover of the main AC com partment.
Image 3-9
6. Reinstall the rear cover and lamp cover of the projector.
3.4 Power loop throu gh to the projector electronics
This procedure explains how to provide the projector electronics with power in case n o UPS u nit is used.
Note that the projector is by default configured for use w ithout UPS . So, the short po w er link cab le is already
installed.
INLET/OUTLET fixation accessories
The plugs of the power cable which are inserted in the power INLET or OUTL ET socket of the projector have to b e secured. The
projector is equipped with fixation access ories a s illustrated below.
18
R5905050 DP2K C-SERIES 10/07/2012
 Loading...


