9492600990 18-5
DECS-150 BESTCOMSPlus
®
Software
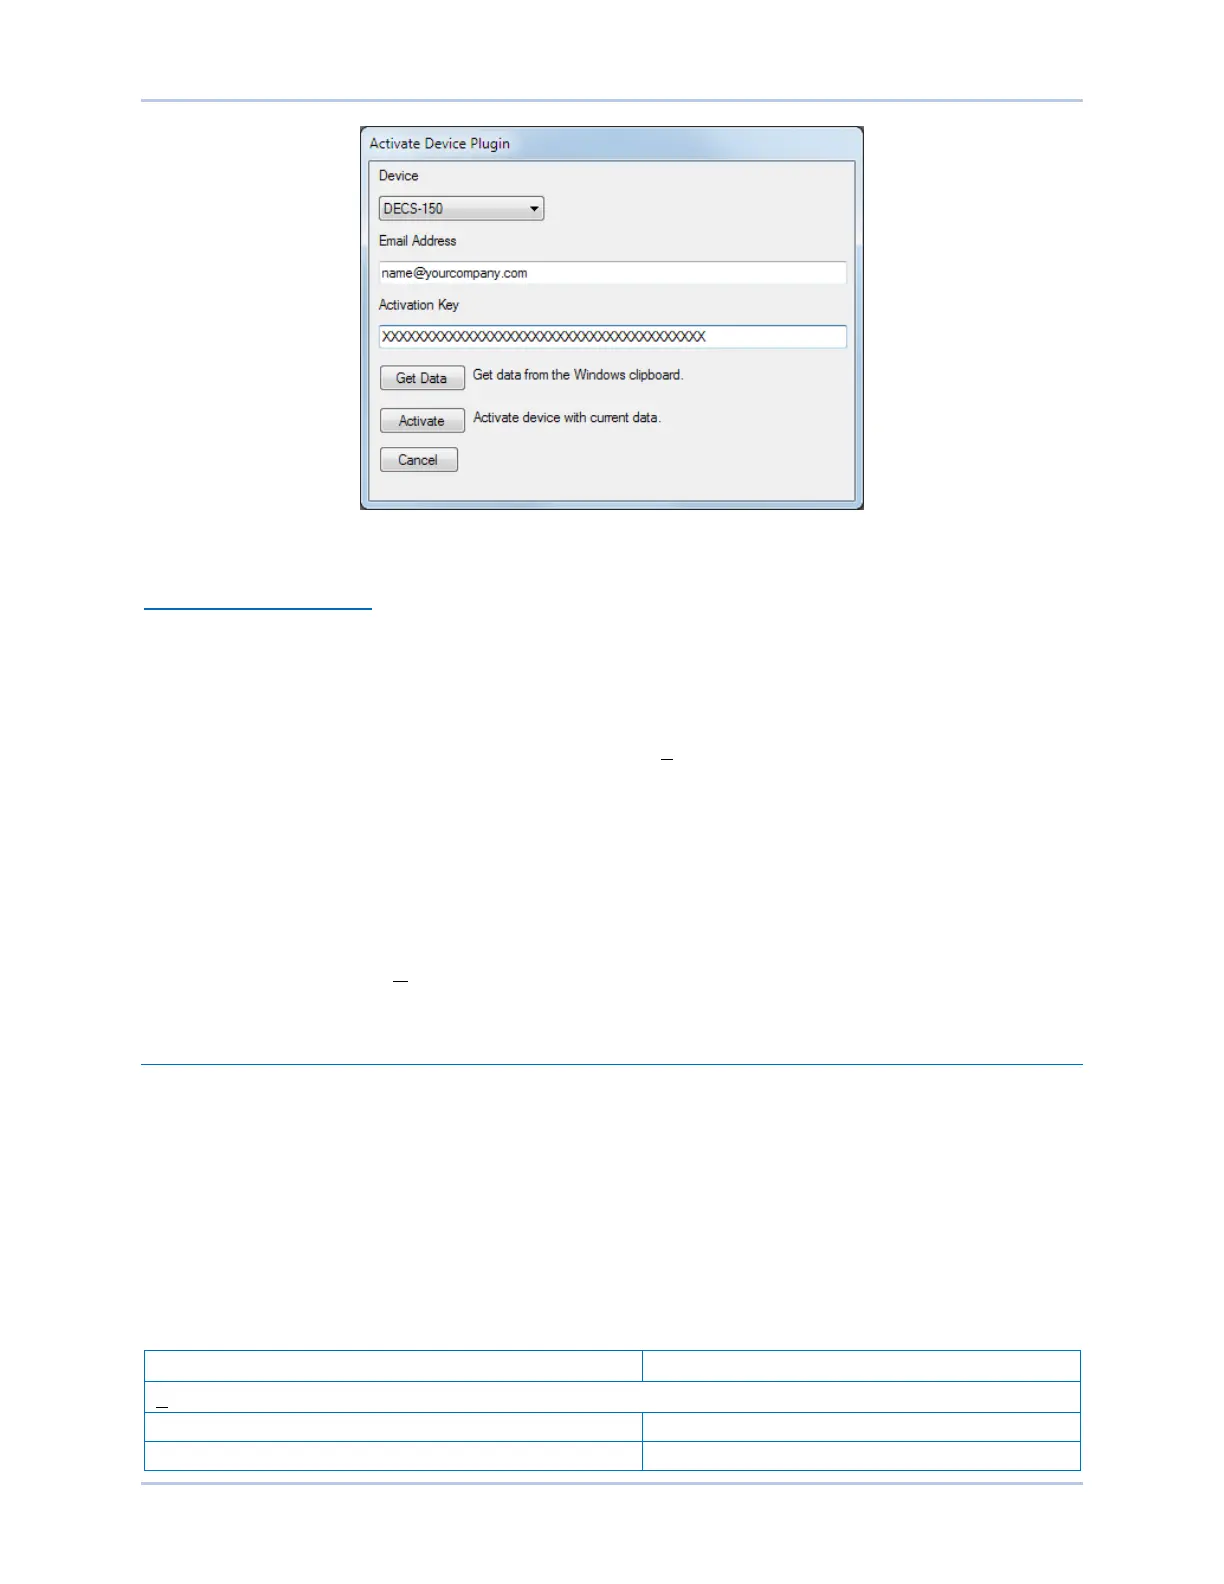
Figure 18-5. Activate Device Plugin Screen
Enter Your Activation Key
Select DECS-150 from the Device pull-down menu. Enter your Email Address and Activation Key
provided by Basler Electric. If you received an email containing the Activation Key, you can select all of
the text in the email and copy it to the Windows clipboard using normal Windows techniques. The Get
Data button extracts the Device, Email Address, and Activation Key from the Windows clipboard and
pastes it into the appropriate fields. Click the Activate button to continue. The Activate Device Plugin
screen is also found by selecting Activate Device from the Tools pull-down menu of the BESTCOMSPlus
main screen.
Establishing Communication
Communication between BESTCOMSPlus and the DECS-150 is established by clicking the Connect
button on the DECS-150 Connection screen (see Figure 18-4) or by clicking the Connect button on the
lower menu bar of the main BESTCOMSPlus screen (Figure 18-1). If you receive an “Unable to Connect
to Device” error message, verify that communications are configured properly. Only one Ethernet
connection is allowed at one time. Download all settings and logic from the relay by selecting Download
Settings and Logic from the Communication pull-down menu. BESTCOMSPlus will read all settings and
logic from the DECS-150 and load them into BESTCOMSPlus memory.
Menu Bars
The menu bars are located near the top of the BESTCOMSPlus screen (see Figure 18-1). The upper
menu bar has five pull-down menus. With the upper menu bar, it is possible to manage settings files,
configure communication settings, upload and download settings and security files, and compare settings
files. The lower menu bar consists of clickable icons. The lower menu bar is used to change
BESTCOMSPlus views, open a settings file, connect/disconnect, preview metering printout, switch to live
mode, and send settings after a change is made when not in live mode.
Upper Menu Bar (BESTCOMSPlus Shell)
Upper menu bar functions are listed and described in Table 18-2.
Table 18-2. Upper Menu Bar (BESTCOMSPlus® Shell)
Create a new settings file
Open an existing settings file