– 15 –
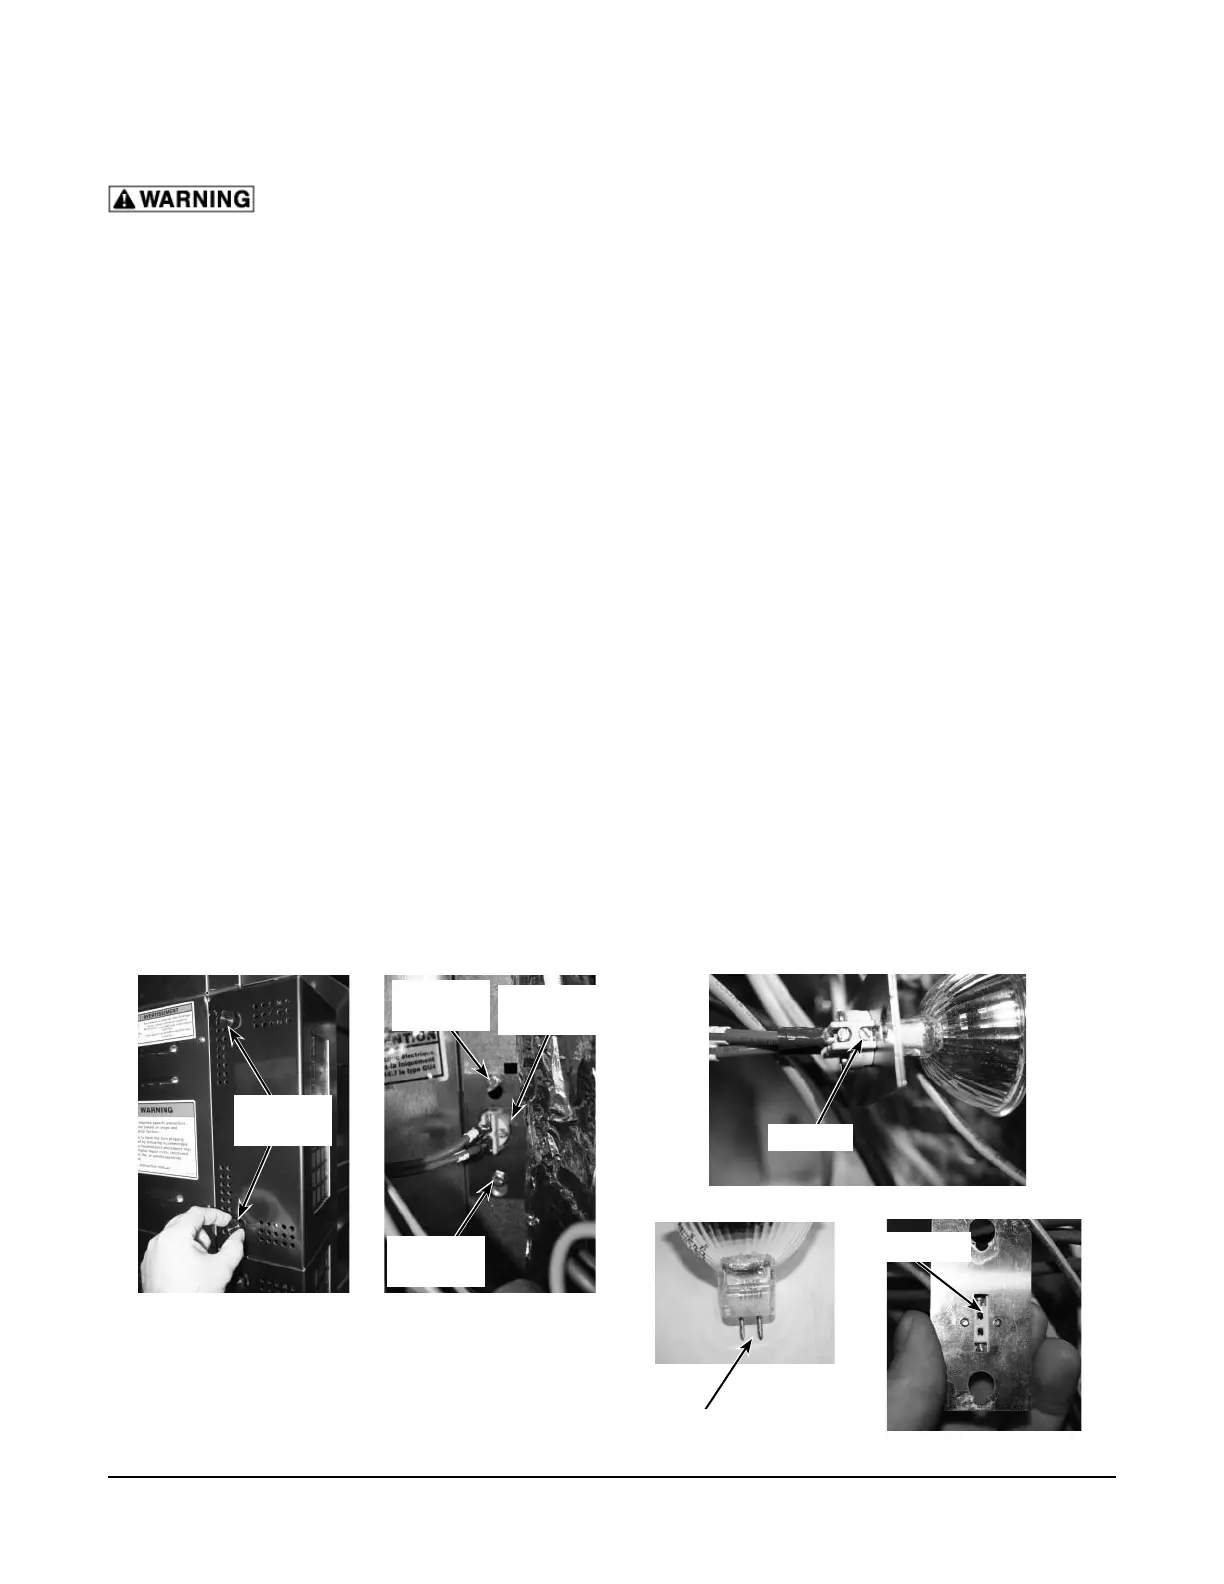
Fig. 7 Fig. 8
Fig. 9
MAINTENANCE
Disconnect the electrical power to the machine and follow lockout / tagout procedures.
LAMP REPLACEMENT
NOTE: Do not touch the replacement bulb with your fi ngers. Touching the replacement bulb will shorten
bulb life. Wear gloves when replacing halogen lamps.
To replace an oven cavity bulb, you will need a small fl at-tip screwdriver, a 7mm nut driver, and a replacement
bulb (Baxter part number 01-1000V7-00049).
Front Lamp (All Models)
1. Remove the thumb screws (Fig. 7) on the left side of the control panel.
2. Swing open control panel.
3. If necessary, loosen (do not remove) the 7mm screws (Fig. 8) on the top and bottom of the lamp
fi xture.
4. Remove lamp fi xture by sliding the fi xture up and over the screws.
5. Loosen (do not remove) the two screws (Fig. 9) that hold the bulb in the socket. They are the screws
next to the metal plate, one on each side.
6. Remove bulb.
7. Install new bulb into fi xture sockets (Fig. 9). The metal prongs (Fig. 9) insert into the sockets of the
fi xture. It does not matter which prong goes in which socket.
8. Tighten the socket screw (Fig. 9).
9. Place lamp fi xture back into opening and slid light fi xture over the 7mm screws (Fig. 8).
NOTE: The 7mm screws do not need to be tightened.
10. Close control panel and reinstall thumb screws (Fig. 7).
THUMB
SCREWS
LIGHT
FIXTURE
7mm
SCREW
7mm
SCREW
SCREW
PRONGS
SOCKETS