Do you have a question about the Beisler 100 and is the answer not in the manual?
Type | Industrial Sewing Machine |
---|---|
Stitch Type | Lockstitch |
Sewing Speed | 5000 stitches per minute |
Needle System | DBx1 |
Stitch Length | Up to 5 mm |
Voltage | 220V |
Machine Weight | 35kg |
Provides classifications for danger, attention, and hint messages used in the manual.
Defines the scope of this operating manual for specific Beisler machine models.
Specifies that only authorized personnel should operate or maintain the machine.
Outlines general safety precautions against operational dangers and unauthorized staff.
Details copyright information for the operating manual and the machine.
Introduces the manual's purpose, scope, and general information about the machine.
Explains that the manual is for operators and directs technical queries to service staff.
Defines the manufacturer's liability regarding product features and usage conditions.
Outlines the terms and conditions of the machine's guarantee.
Specifies the intended purpose of the machine and warns against modifications.
Provides an overview of the machine's capabilities and components.
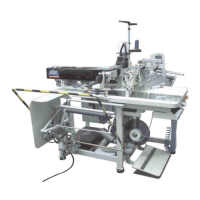
Identifies and illustrates the key components of the Universal-Flap-Pocket-Machine.
Focuses exclusively on security aspects and available safety systems.
Details the security systems integrated into the machine for safe operation.
Explains the function and operation of the program stop button for immediate halt.
Describes the mains and emergency stop switch for power cutoff.
Lists essential general rules for operators to ensure safety.
Covers the procedures and controls necessary for operating the sewing machine.
Details all controls, buttons, pedals, and indicators on the machine.
Explains the functions of the main operating device, including its components.
Describes the use of the memory card slot for software and program backup.
Details the function of the program stop button on the operation device.
Explains the information shown on the machine's display during operation.
Describes the ten-key pad for numerical input and program selection.
Details the functions assigned to the lower level of the function keys.
Details the functions assigned to the upper level of the function keys.
Explains the use of arrow and enter keys for navigation and input confirmation.
Describes the station where parts are inserted for processing.
Reiterates the function of the main power and emergency stop button.
Explains the use of the foot pedal to trigger machine sequence steps.
Details the function of the foot pedal for enabling vacuum.
Explains the foot pedal used to operate the part stacker.
Provides instructions on how to swing out the folder for access.
Describes the procedure for changing the folder attachment.
Explains the steps to change the interface roll.
Details how to empty the stacker when it is full.
Covers the operational procedures, including machine sequences and programs.
Breaks down the production sequence into distinct steps.
Explains how to operate the machine using stored sewing programs.
Guides the user on how to select a sewing program via the operation device.
Describes how to enable or disable specific seams within a program.
Explains how to adjust parameters like seam length and knife position.
Details procedures for managing seams within sewing programs.
Step-by-step guide for removing seams from sewing programs.
Step-by-step guide for adding seams to sewing programs.
Provides recommendations for maintaining the machine's cleanliness.
Covers procedures for receiving, moving, and storing the machine.
Instructions for checking machine completeness and condition upon delivery.
Guidelines for safely moving the machine to its new location.
Specifies conditions for storing the machine to prevent damage.
Details the steps required for installing the machine.
Lists key technical specifications such as dimensions, weight, and power requirements.
Covers the physical setup and positioning of the machine.
Instructions for removing packaging and setting up the machine on a level surface.
Details how to connect the machine to the compressed air system.
Provides guidance on the electrical connections for the machine.
Step-by-step instructions for the initial startup and checks.
Guides users on creating and managing sewing programs.
Outlines the process of creating new sewing programs from scratch.
Explains how to select and assign memory locations for new programs.
Describes how to add existing or new seams to a program.
Details the process of copying seams to create new program variations.
Explains how to modify parameters of copied seams.
Guides on assigning names to seams for better identification.
Provides instructions on how to delete existing seams.
Explains how to enable or disable specific machine functions for seams.
Details various parameters that can be set for different seam types.
Explains the flap clamp modes and their behavior with different clamp configurations.
Describes seam parameter settings for automatic clamp push-back.
Details settings for the main clamp to stop at an intermediate position.
Explains how the main clamp picks up parts automatically.
Illustrates different seam types and stitch formations.
Diagram showing the stitch formation for sewing with a catch.
Diagram illustrating sewing with stitch condensation.
Diagram showing the stitch formation for sewing with stowing.
Covers general machine settings that affect all programmed seams.
Explains the purpose of the technical manual for qualified personnel.
Describes the layout of the technical manual, including its two-column format.
Provides critical safety warnings for performing adjustments and maintenance.
Details necessary preparatory steps before performing adjustments or maintenance.
Instructions on how to safely disconnect the machine's power supply.
Procedure for safely releasing compressed air from the machine.
Covers various adjustments related to the machine's clamp system.
Instructions for adjusting the tension of the clamp drive belt.
Details how to adjust clamp arms to eliminate axial free play.
Explains the factory setting for clamp arm parallelism to the sewing head.
Guides on adjusting the lateral position for double piping.
Details the lateral adjustment for single piping flaps.
Instructions for setting the correct height of the main clamp.
Explains how to adjust the main clamp pressure using the gauge.
Covers ensuring even pressure distribution across the main clamp area.
Describes quick adjustment for double/single piping folders.
Details quick adjustment for jacket/trouser folders.
Explains lateral clamp adjustment without using quick adjustment features.
Describes clamp adjustment for double piping flaps without quick adjustments.
Instructions for adjusting the path of the folding slide.
Details how to ensure the folding slide is parallel to the main clamp.
Explains how to adjust the folding slide for proper material handling.
Guides on setting the correct parallel position of flap clamps.
Describes how to adjust the opening path of the flap clamps.
Instructions for cleaning or replacing the photo cell foil.
Guidance on inspecting and replacing clamp rubber strips.
Covers adjustments for the clamp's movement path and stops.
Details adjusting the front stop for the clamp carriage.
Explains how to measure and verify the clamp's movement path.
Instructions for adjusting the back stop rubber for the clamp carriage.
Covers adjustments for components located at the part insertion station.
Details how to adjust the folder height based on sewing material.
Explains adjustment of the initiator for correct folding slide timing.
Instructions for eliminating free play in the folder's folding position.
Guides on ensuring the folder is parallel to the main clamp.
Details how to adjust the piping width using clamp block settings.
Instructions for adjusting the center knife protection for proper clearance.
Explains how to minimize lateral distance for the guiding plate to the needle.
Details adjusting the height stop of the guiding plate.
Guides on adjusting the spring pressure of the guiding plate.
Covers adjustments for the marking lamps' alignment and distance.
Instructions for aligning the marking lamps' light crosses.
Details adjusting the distances for marking lamp lines.
Explains how to adjust the size of the marking lamp's light cross.
Guides on focusing the marking lamp's light cross sharply.
Instructions for removing and reinstalling marking lamps.
Details how to change light masks for different projection shapes.
Covers adjustments for the dart stretcher mechanism.
Instructions for fixing the dart stretcher in its guiding plate.
Explains adjustment of the magnet switch for the dart stretcher cylinder.
Covers various adjustments for the sewing head assembly.
Details how to level the sewing head's ground plate.
Explains how to align the stitch plate with the sliding plate gap.
Guides on adjusting the tension of the sewing motor's driving belt.
Describes the function and adjustment of the top thread cutter.
Details adjusting the height of the top thread catcher.
Covers various adjustments for the center knife.
Explains how the center knife is activated during the sewing process.
Details how the center knife is deactivated at the seam end.
Describes the safety initiator for the center knife pole.
Instructions for adjusting the depth of the safety initiator.
Details adjusting the height of the center knife relative to the stitch plate.
Explains how to adjust the shear angle of the center knife.
Guides on adjusting the lateral position of the center knife.
Details the adjustment of the needle protection component.
Covers adjustments for the bobbin thread catcher.
Instructions for adjusting the bobbin thread catcher's knife.
Explains how to program the timing for bobbin thread cutting.
Details programming the duration for bobbin thread cutting.
Guides on adjusting the sensitivity of the optional bobbin detector.
Instructions for cleaning the bobbin detector's tactual head.
Covers adjustments for the piping detection system.
Details lateral adjustment of the piping detection photocell.
Explains how to adjust the intensity of the piping detection photocell.
Instructions for swinging up the sewing head for maintenance.
Covers the monitoring of upper threads and its settings.
Details setting the switch-on time for the upper thread monitor.
Explains how to set the filter for detecting thread breakages.
Covers various adjustments for the mitre knife system.
Details the basic adjustment for the locked mitre knife at seam end.
Explains the basic adjustment for the movable mitre knife at seam start.
Guides on adjusting the height of the mitre knife pinoles.
Details adjusting the breadth of the mitre knives.
Explains the function of the pre-stabber for protection during cutting.
Guides on performing lateral adjustments for precise mitre knife cutting.
Details how to perform fine adjustments in length via the machine control.
Instructions for adjusting the tension of the mitre knife drive cog-belt.
Covers adjustments for various optional machine features.
Details adjustments for the automatic push-back blocking system.
Instructions for checking and adjusting the height of the take-off roller.
Covers adjustments for the slant position of the mitre knives.
Details adjusting the distance between the basic bodies of the mitre knives.
Explains height adjustment for mitre knives, referencing section 4.3.
Guides on performing lateral adjustment for the center mitre knife.
Details adjusting the mitre knife stops for both knives.
Explains the correct order for inserting mitre knives.
Shows the correct arrangement of the mitre knife during flap pocket production.
Covers adjustments related to the split needle.
Details adjusting the distance between the split needle and threat catcher.
Explains the center adjustment for the split needle's setting ring.
Covers various adjustments for the vylene feeding system.
Details how to correctly adjust the vylene strip position.
Instructions for removing the vylene plate.
Explains how to adjust the cutting pressure for the vylene.
Guides on adjusting the vylene supply mechanism.
Details ensuring the vylene roll runs smoothly.
Explains how to adjust the vylene supply speed.